

Flow Controls
Flow controls determine how your automation behaves — when to act, who to include, and how long to wait between steps.If / Else
The If/Else element checks a condition and splits your automation path based on whether it’s true or false.Specify your conditions using the drop-down menus and select Add. Once all relevant conditions are set, select Apply Filters.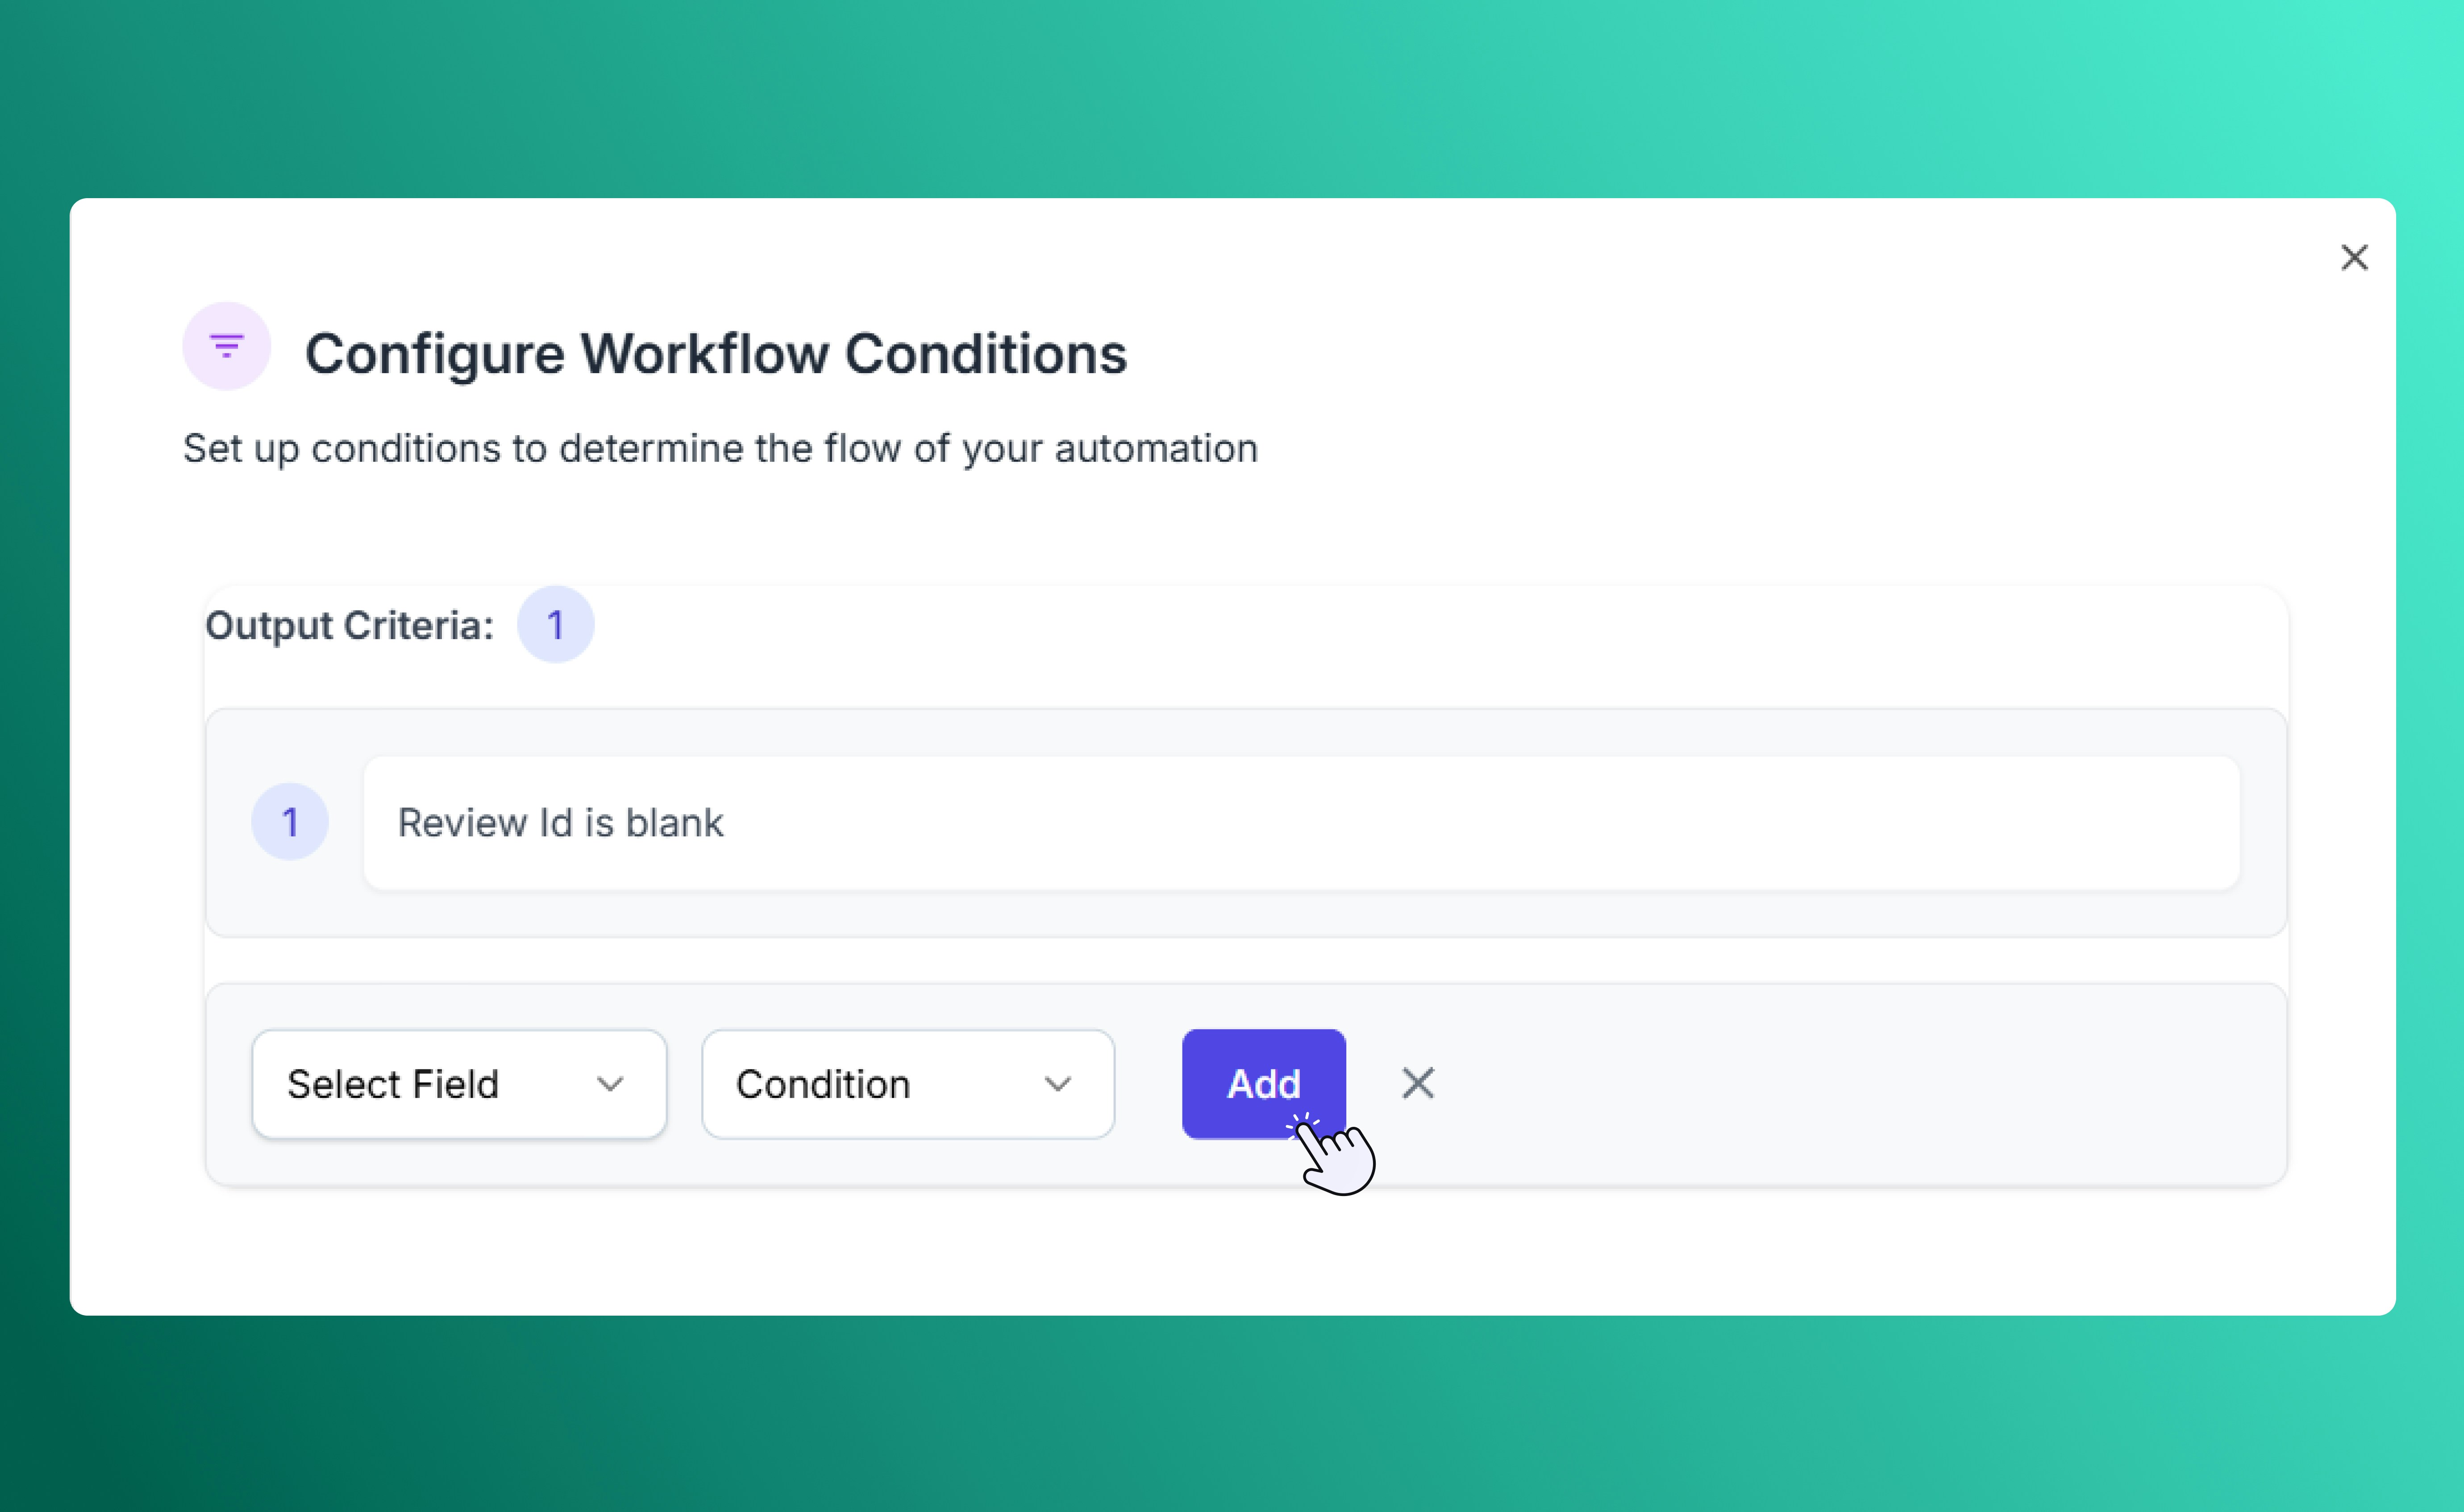
If/Else Workflow Conditions
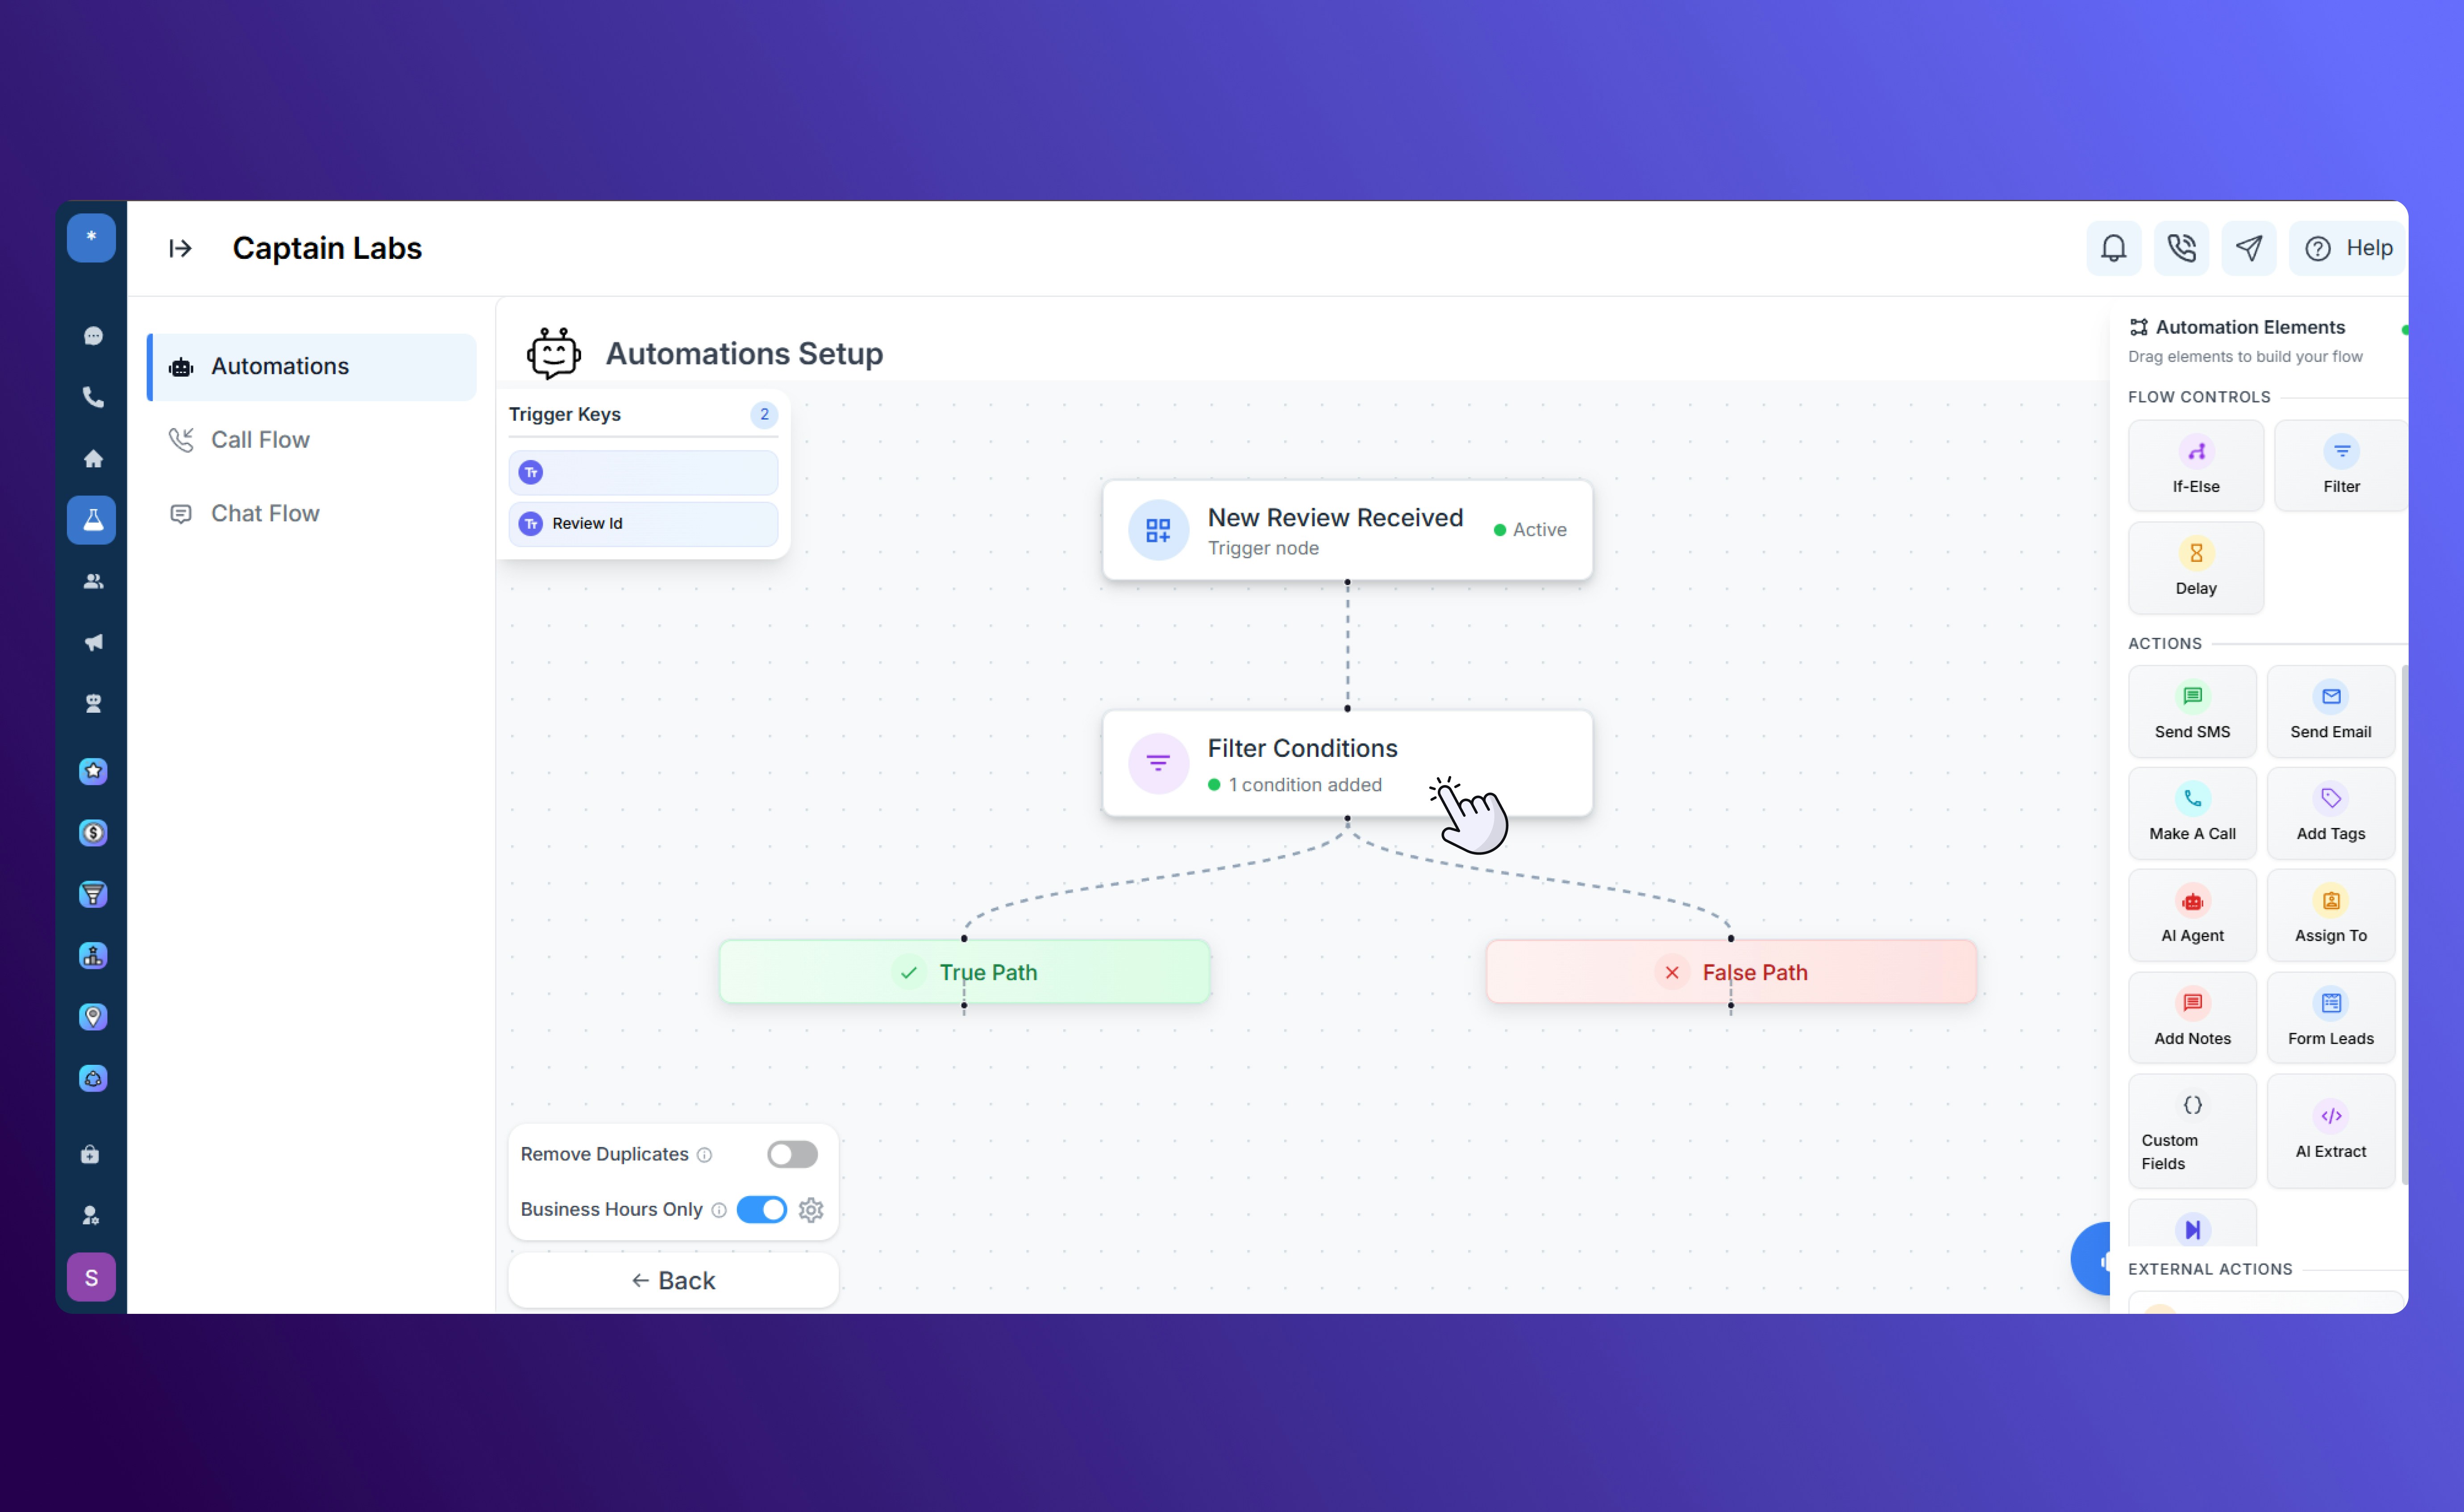
Canvas view with If/Else element
Filter
The Filter element narrows your audience using tags, contact attributes, or custom fields. You can use it to include only specific groups of contacts, such as new leads, customers in a certain region, or those inactive for a set period.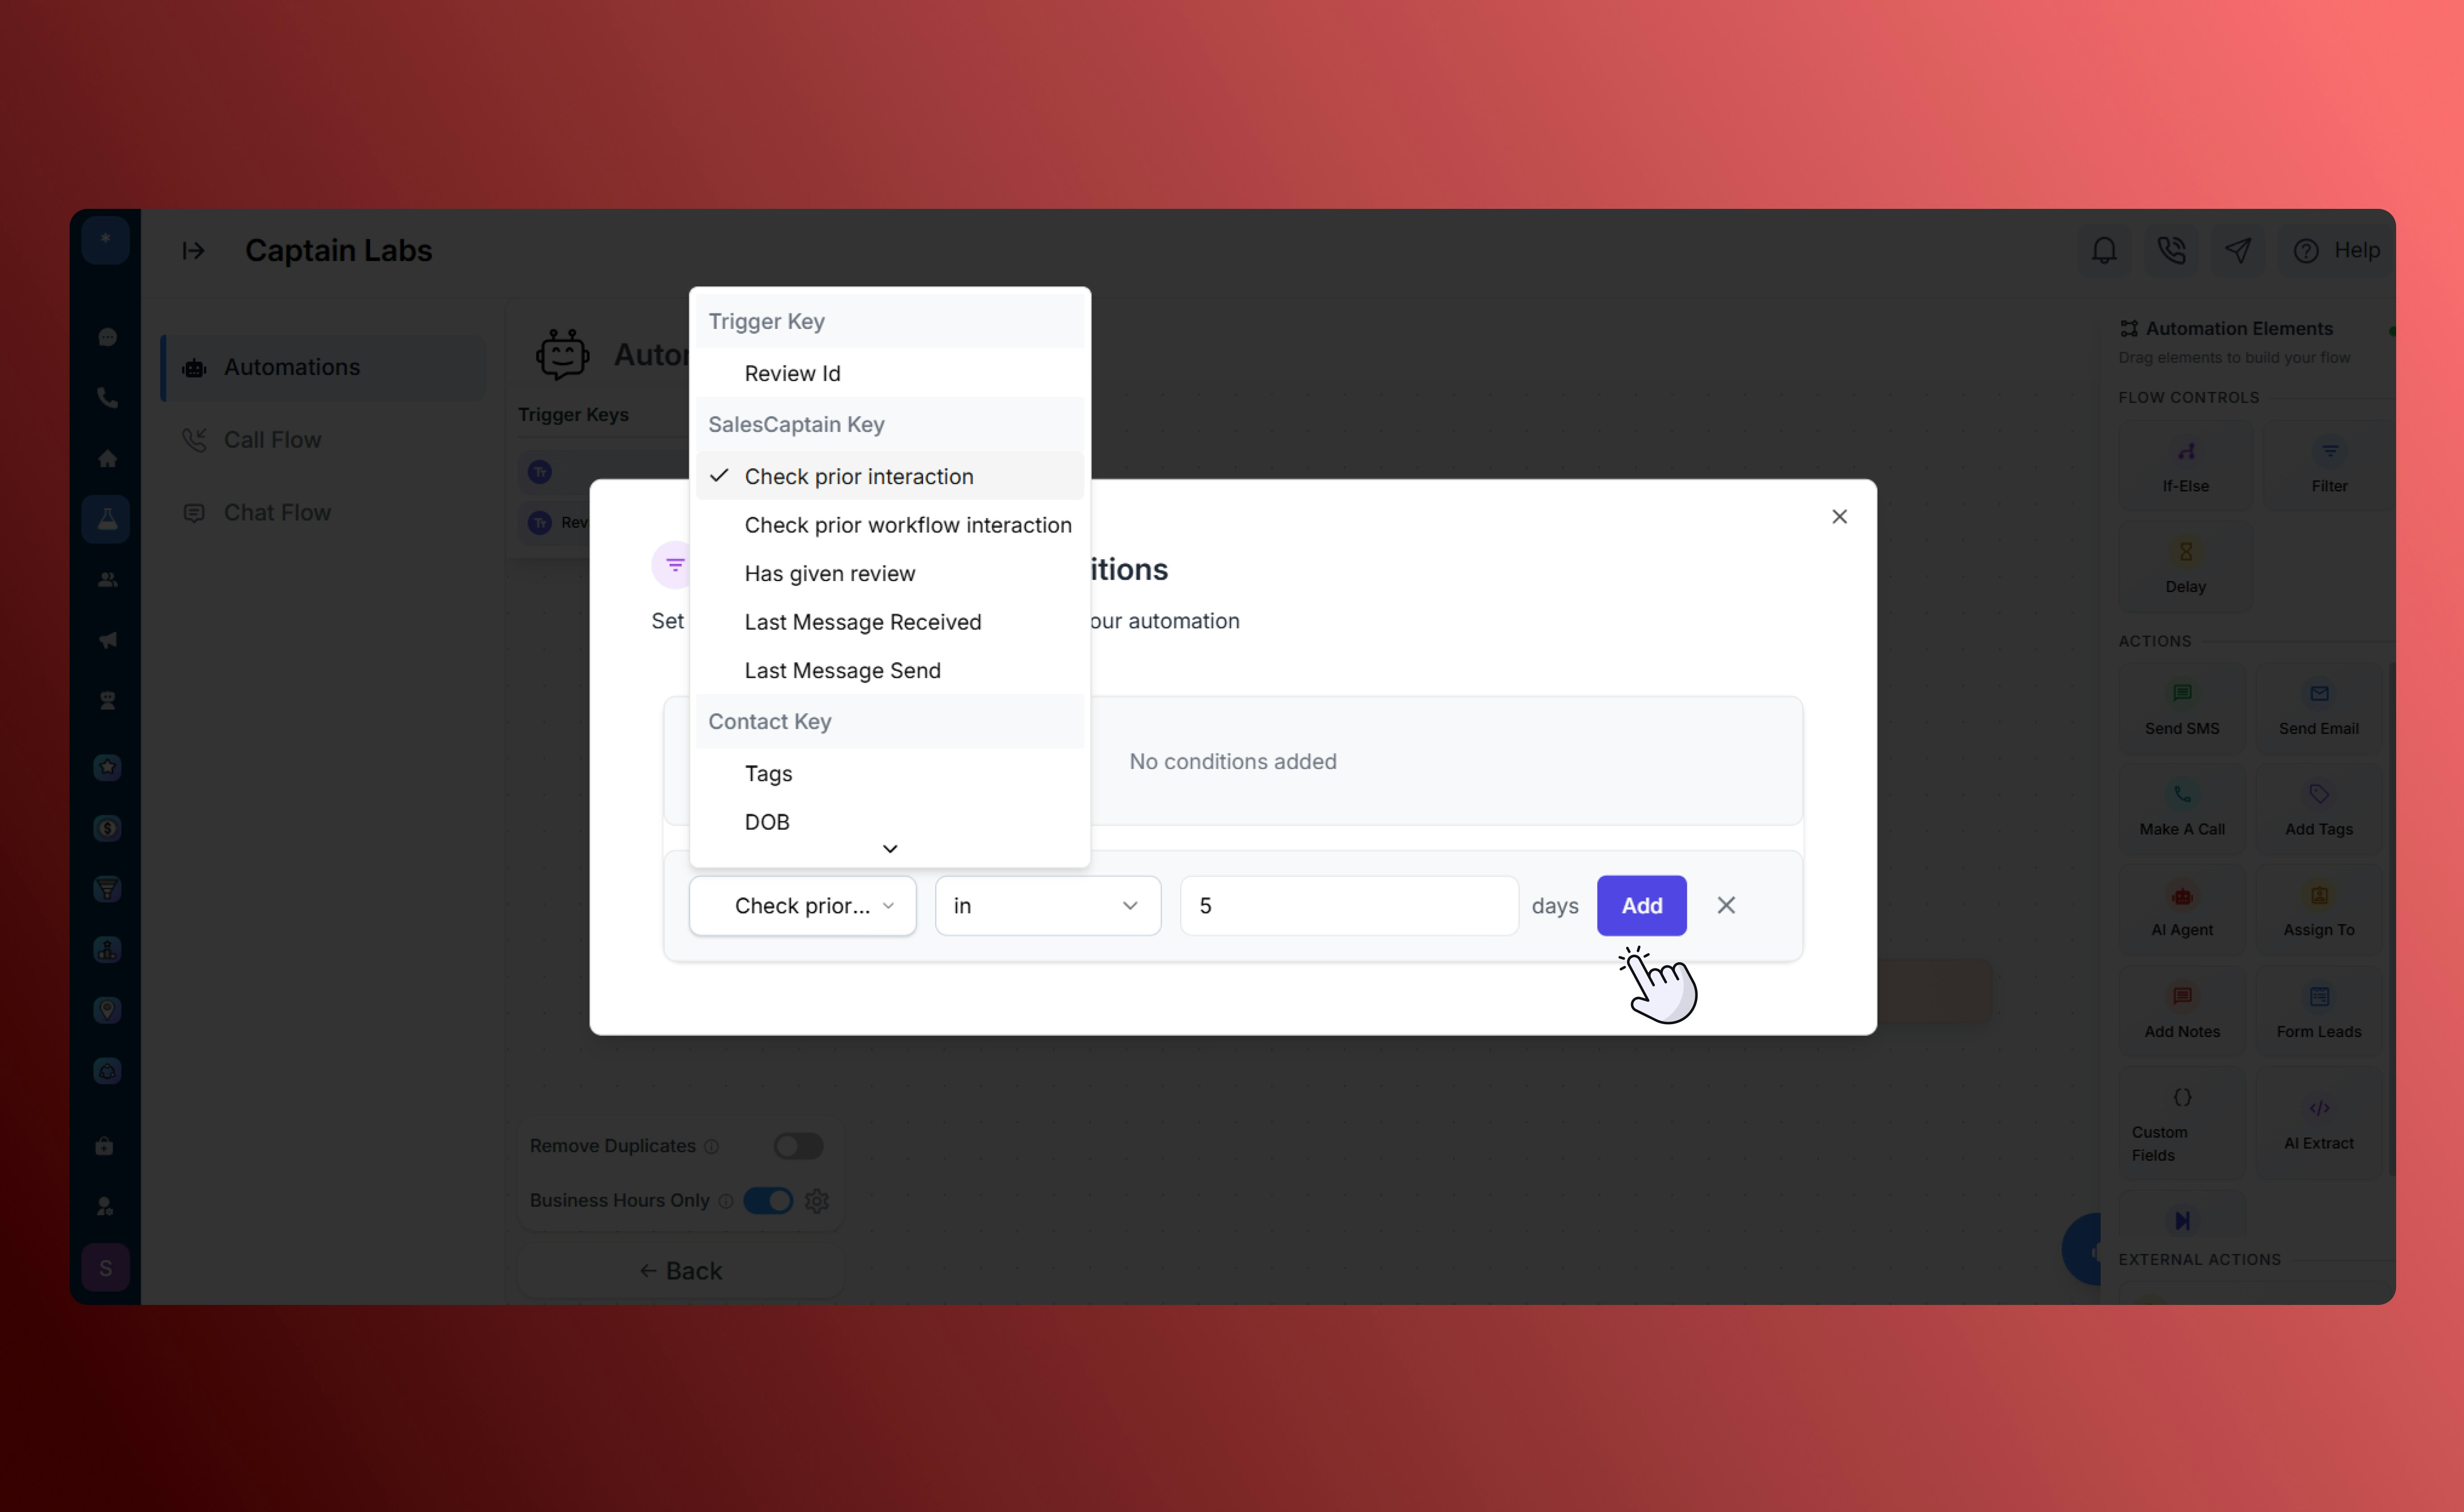
Filter element configuration
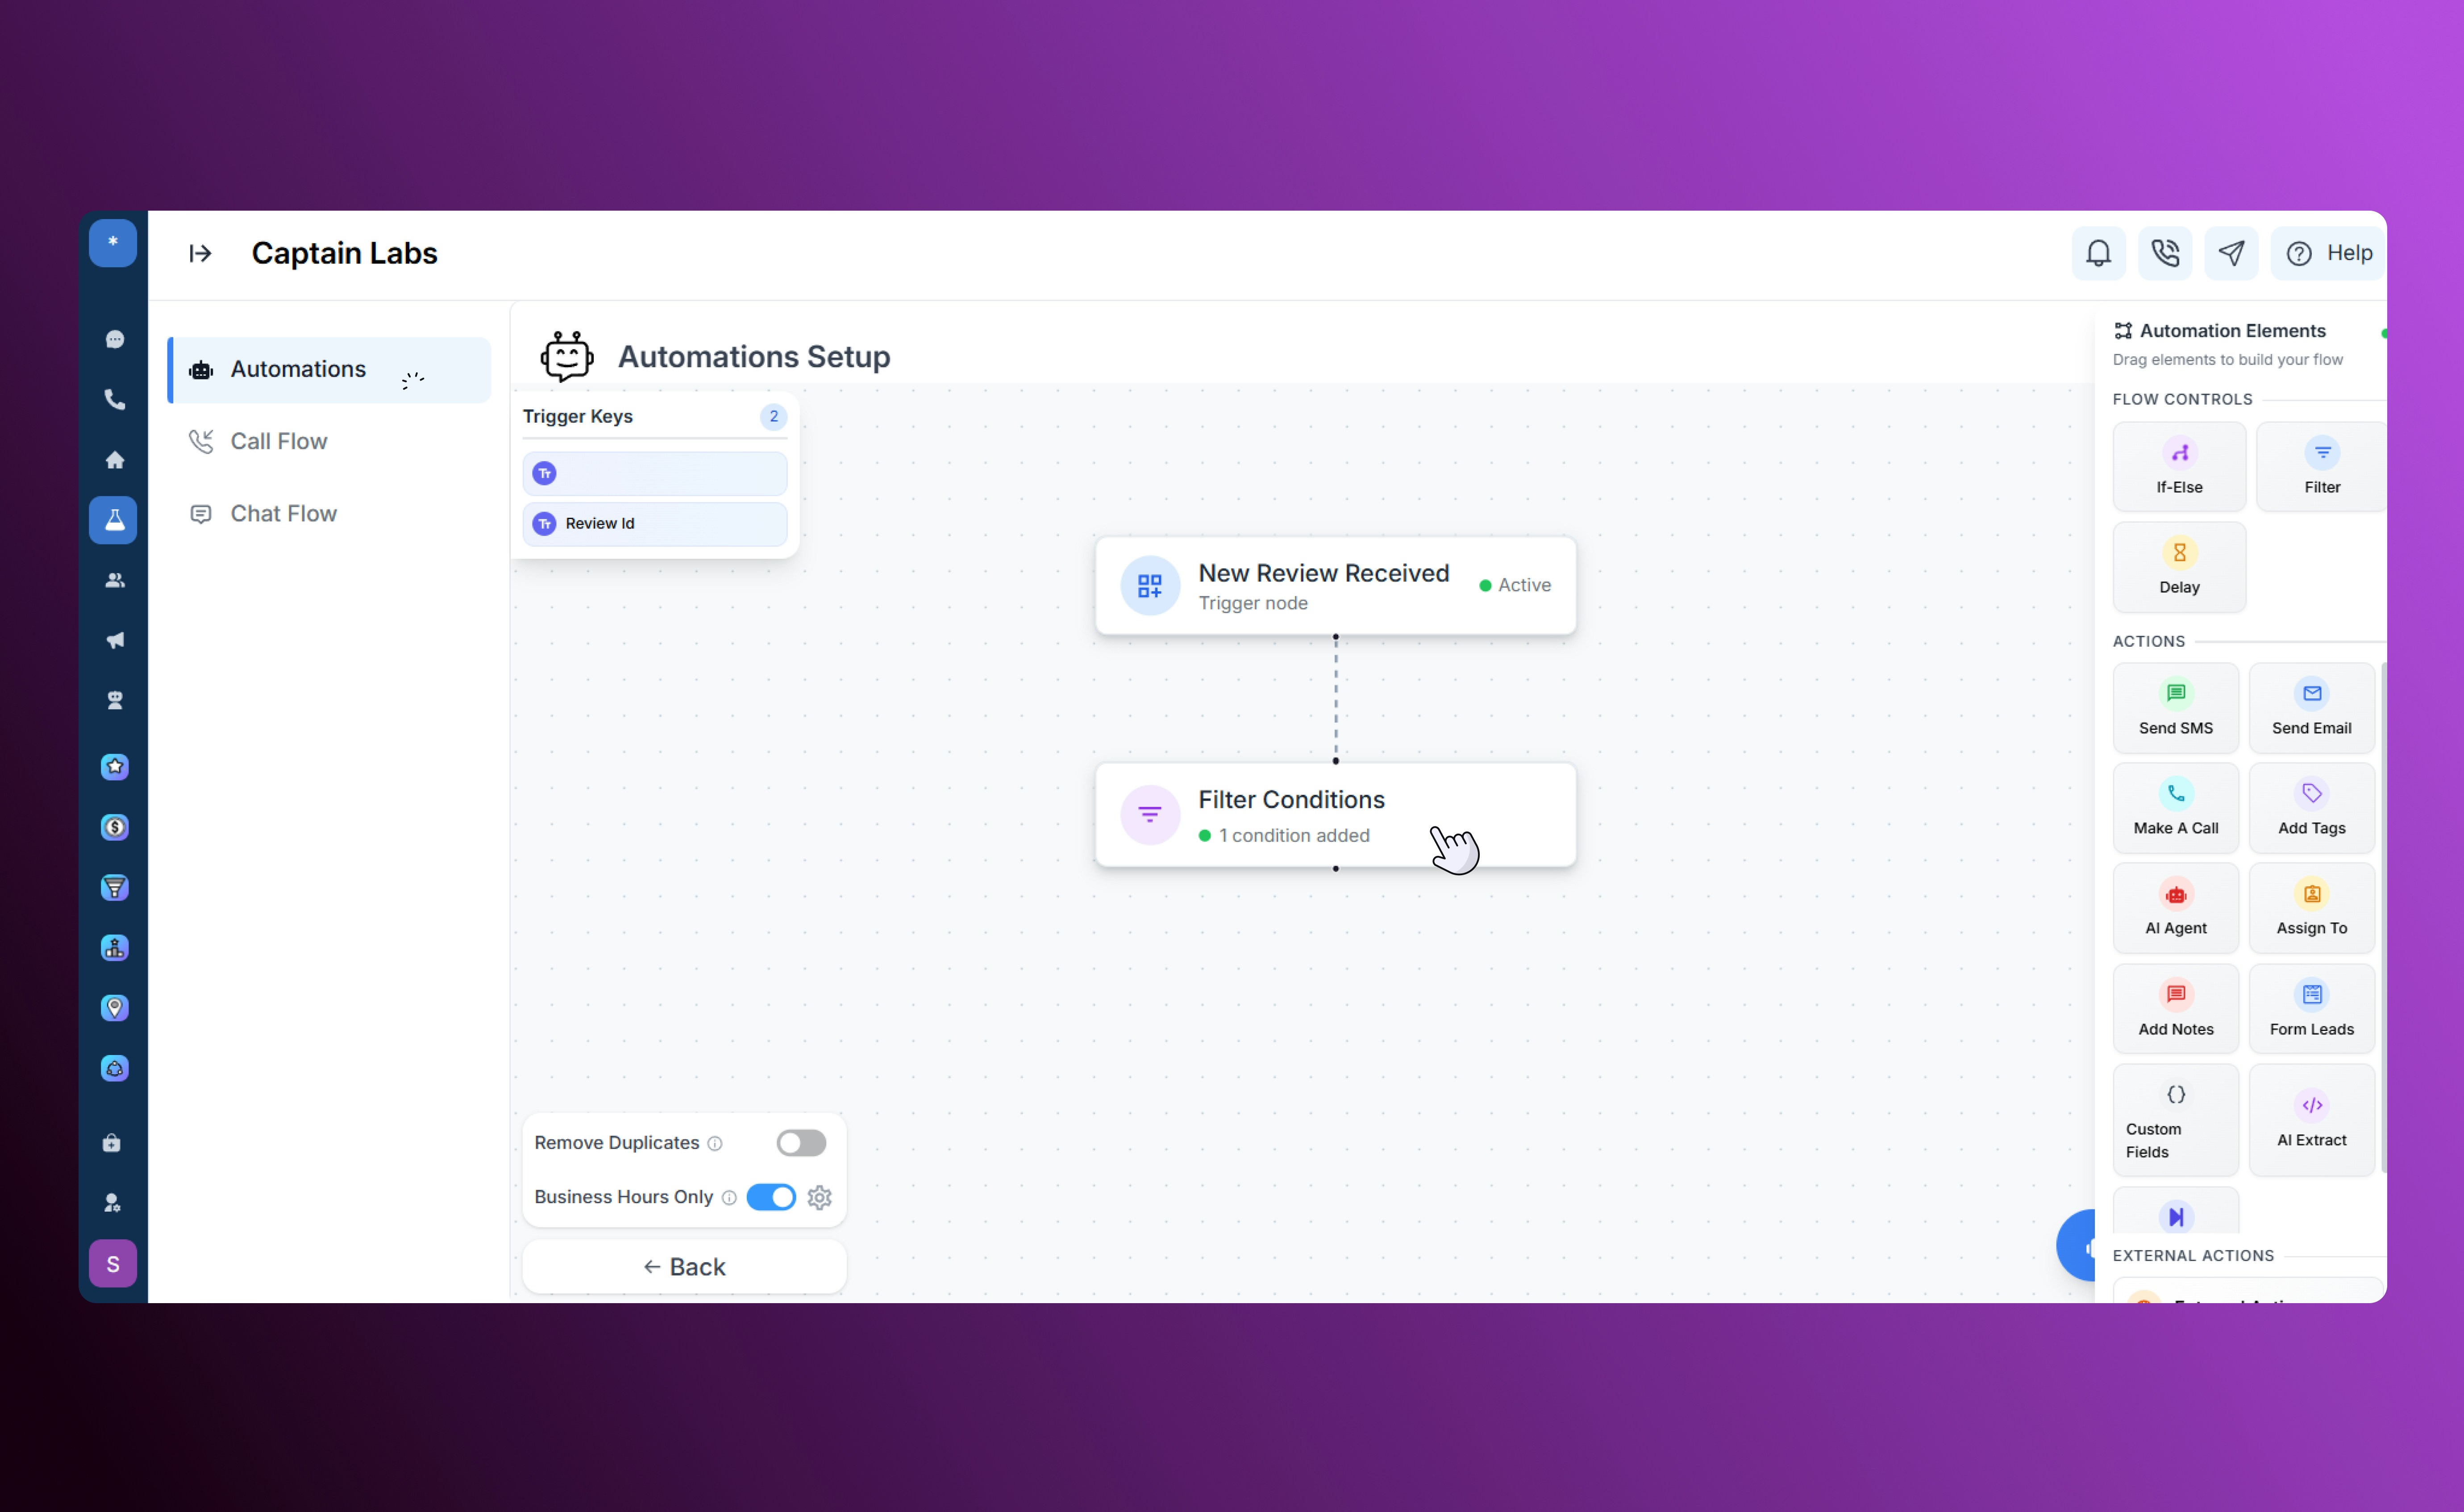
Canvas view with Filter element
Delay
The Delay element adds a waiting period between steps in your automation. You can delay by minutes, hours, or days, or schedule an exact time for the next action. Delays help space out communication naturally and maintain consistent timing between messages.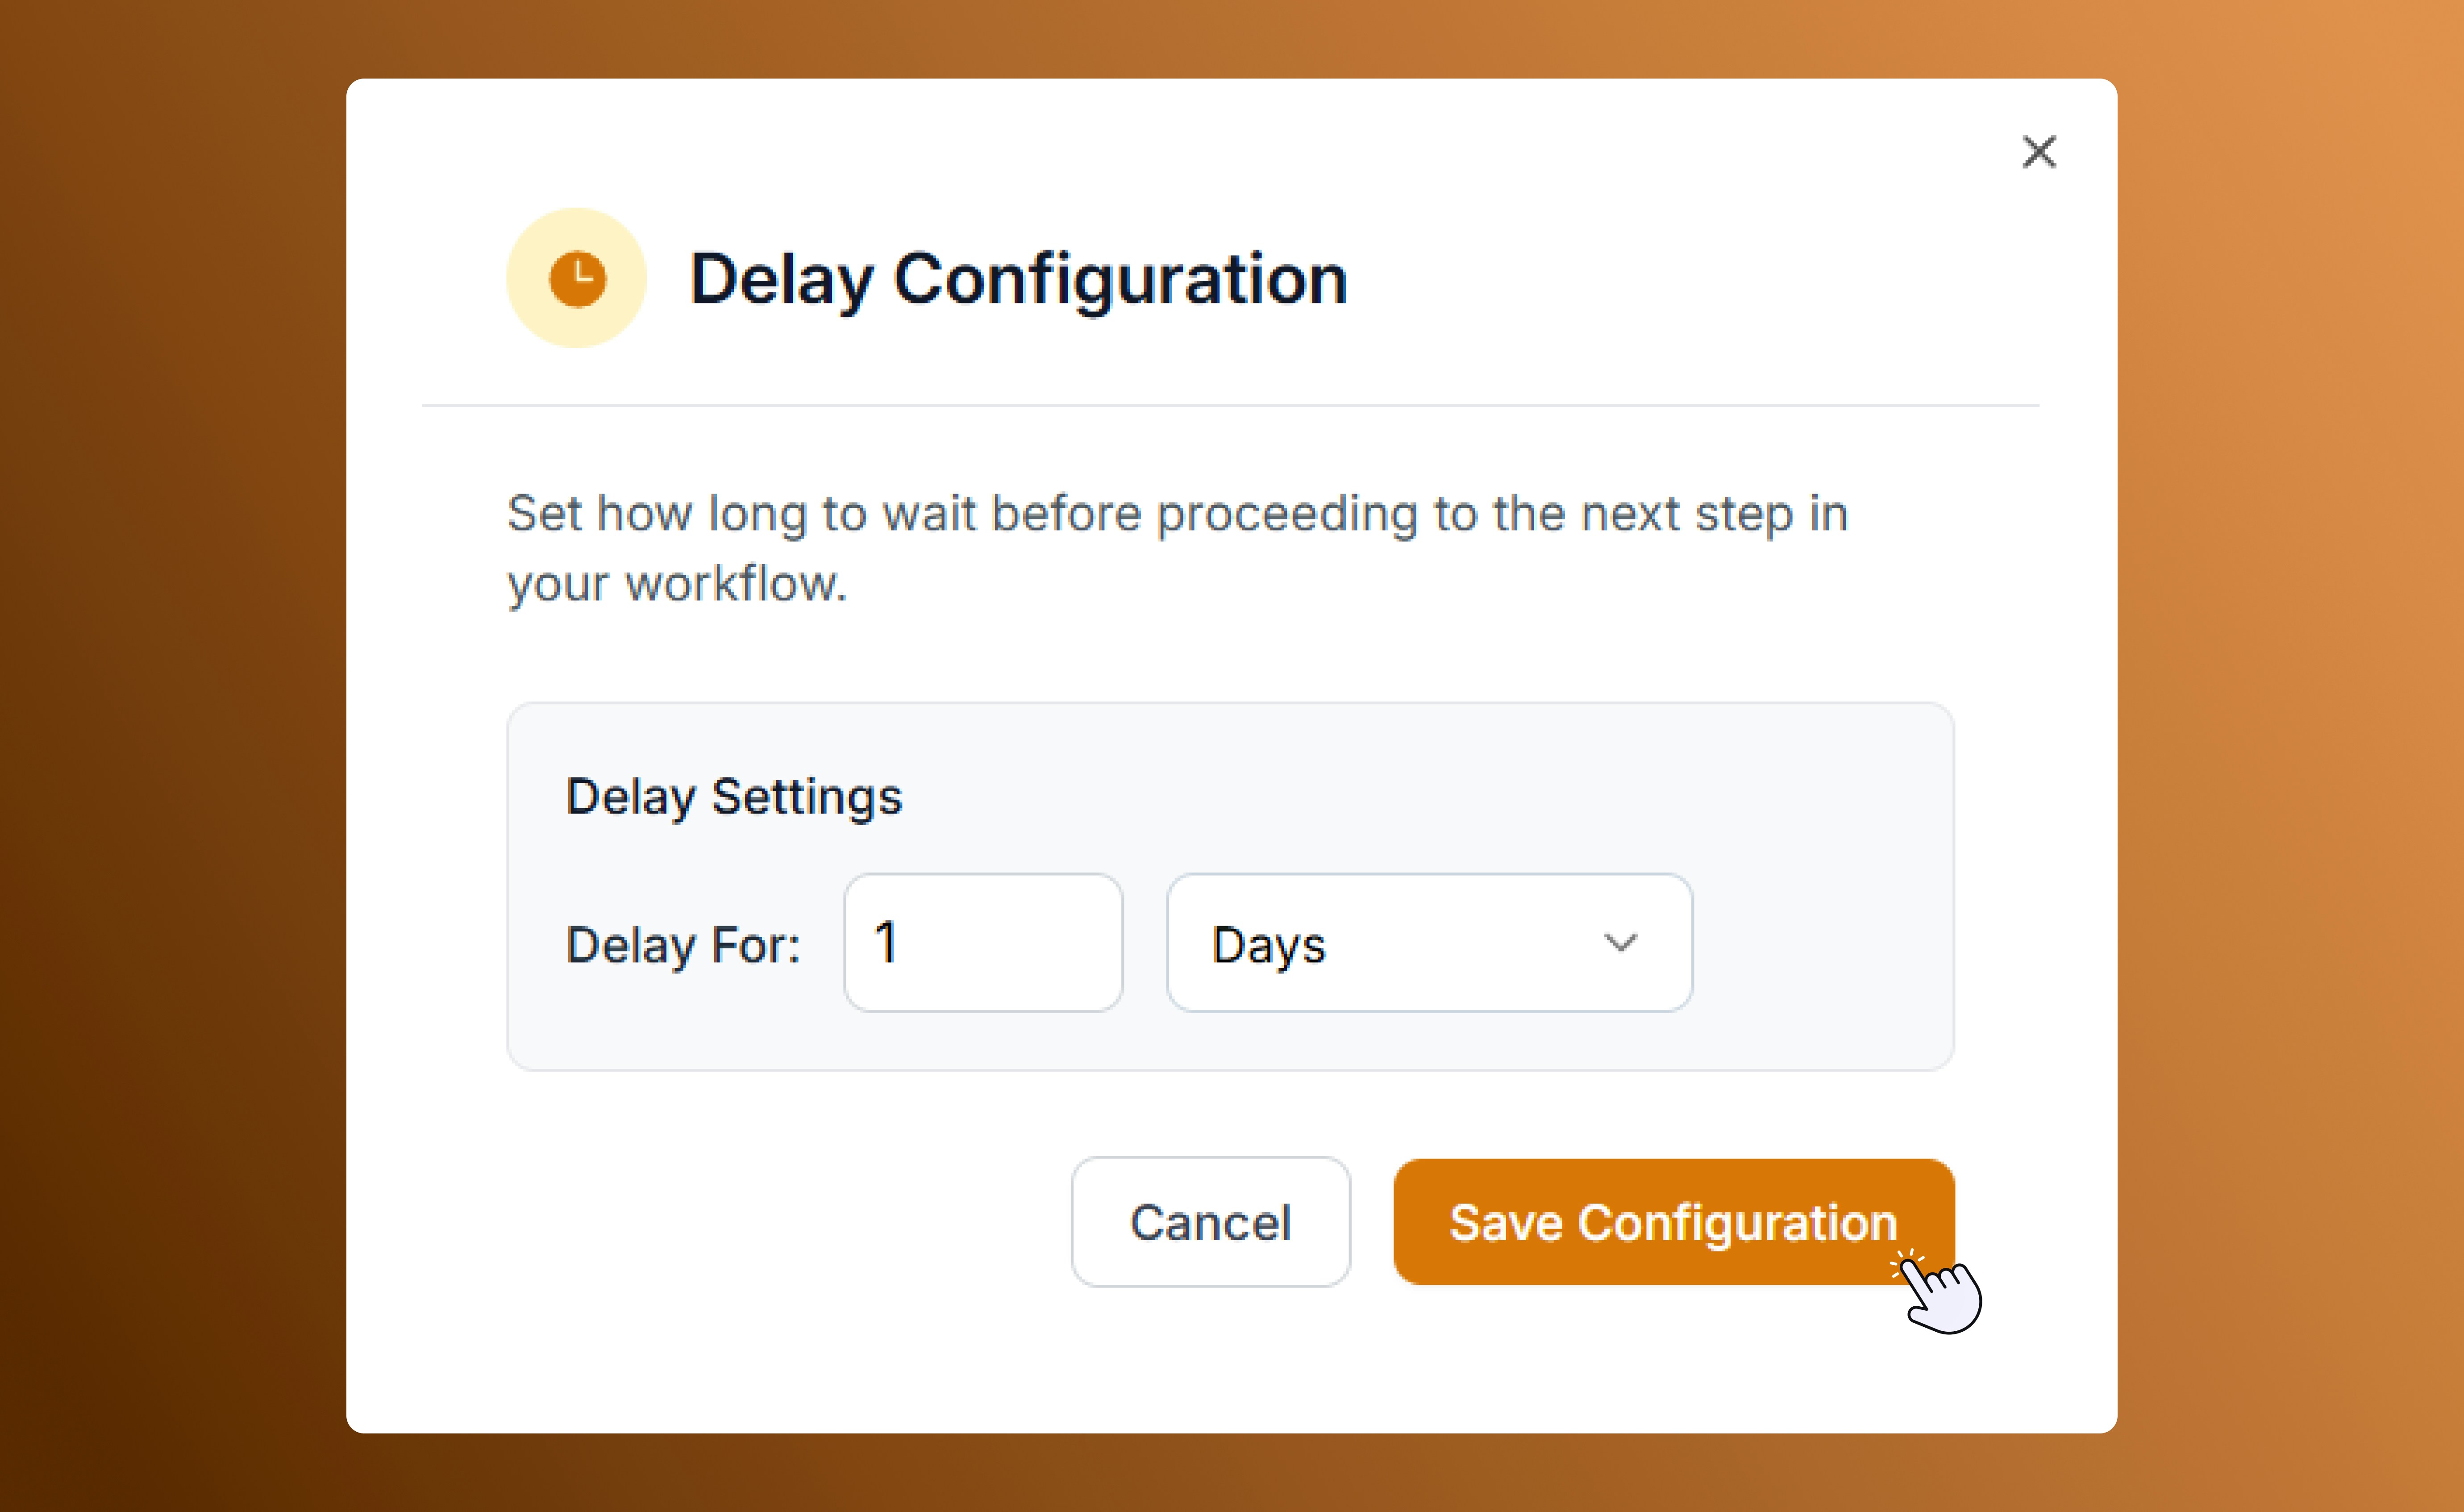
Automation delay configuration
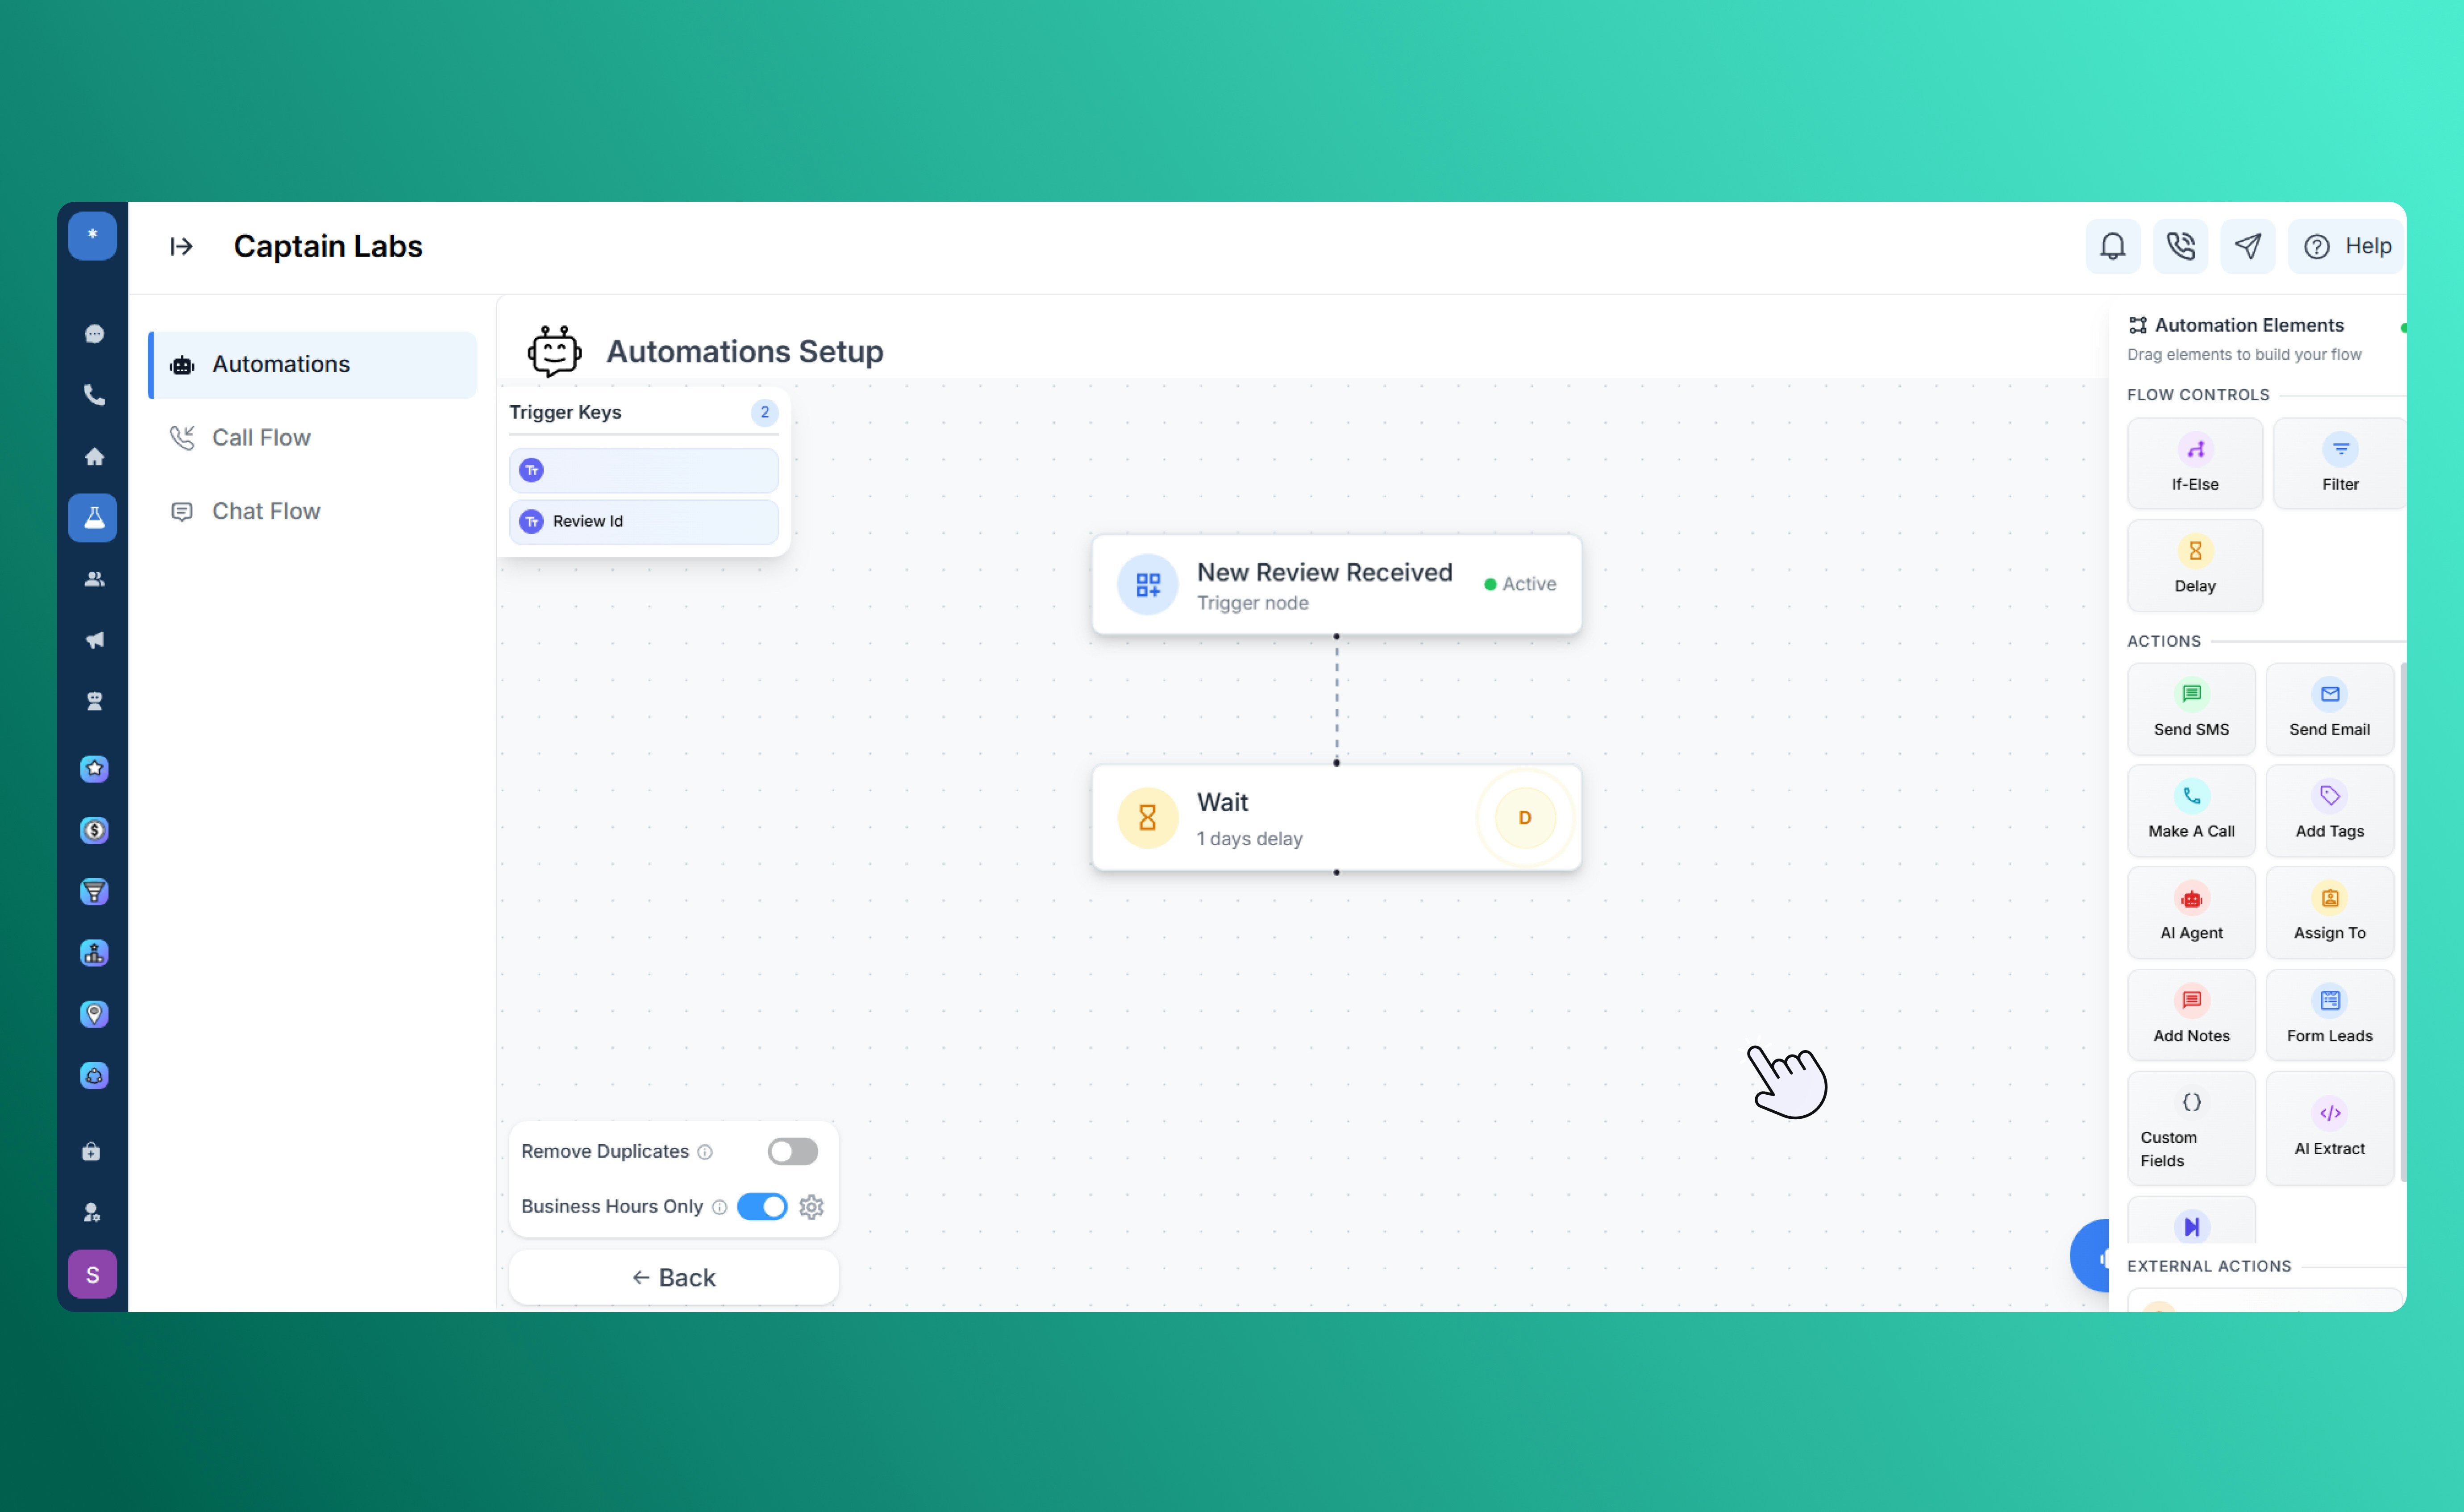
Canvas view with Delay element
Actions
Actions are the tasks your automation performs after a condition is met. You can add one or multiple actions to create your desired workflow.Send SMS
Automatically send a personalized text message to a contact when the trigger occurs. Use this for instant confirmations, reminders, or promotional follow-ups without leaving the platform.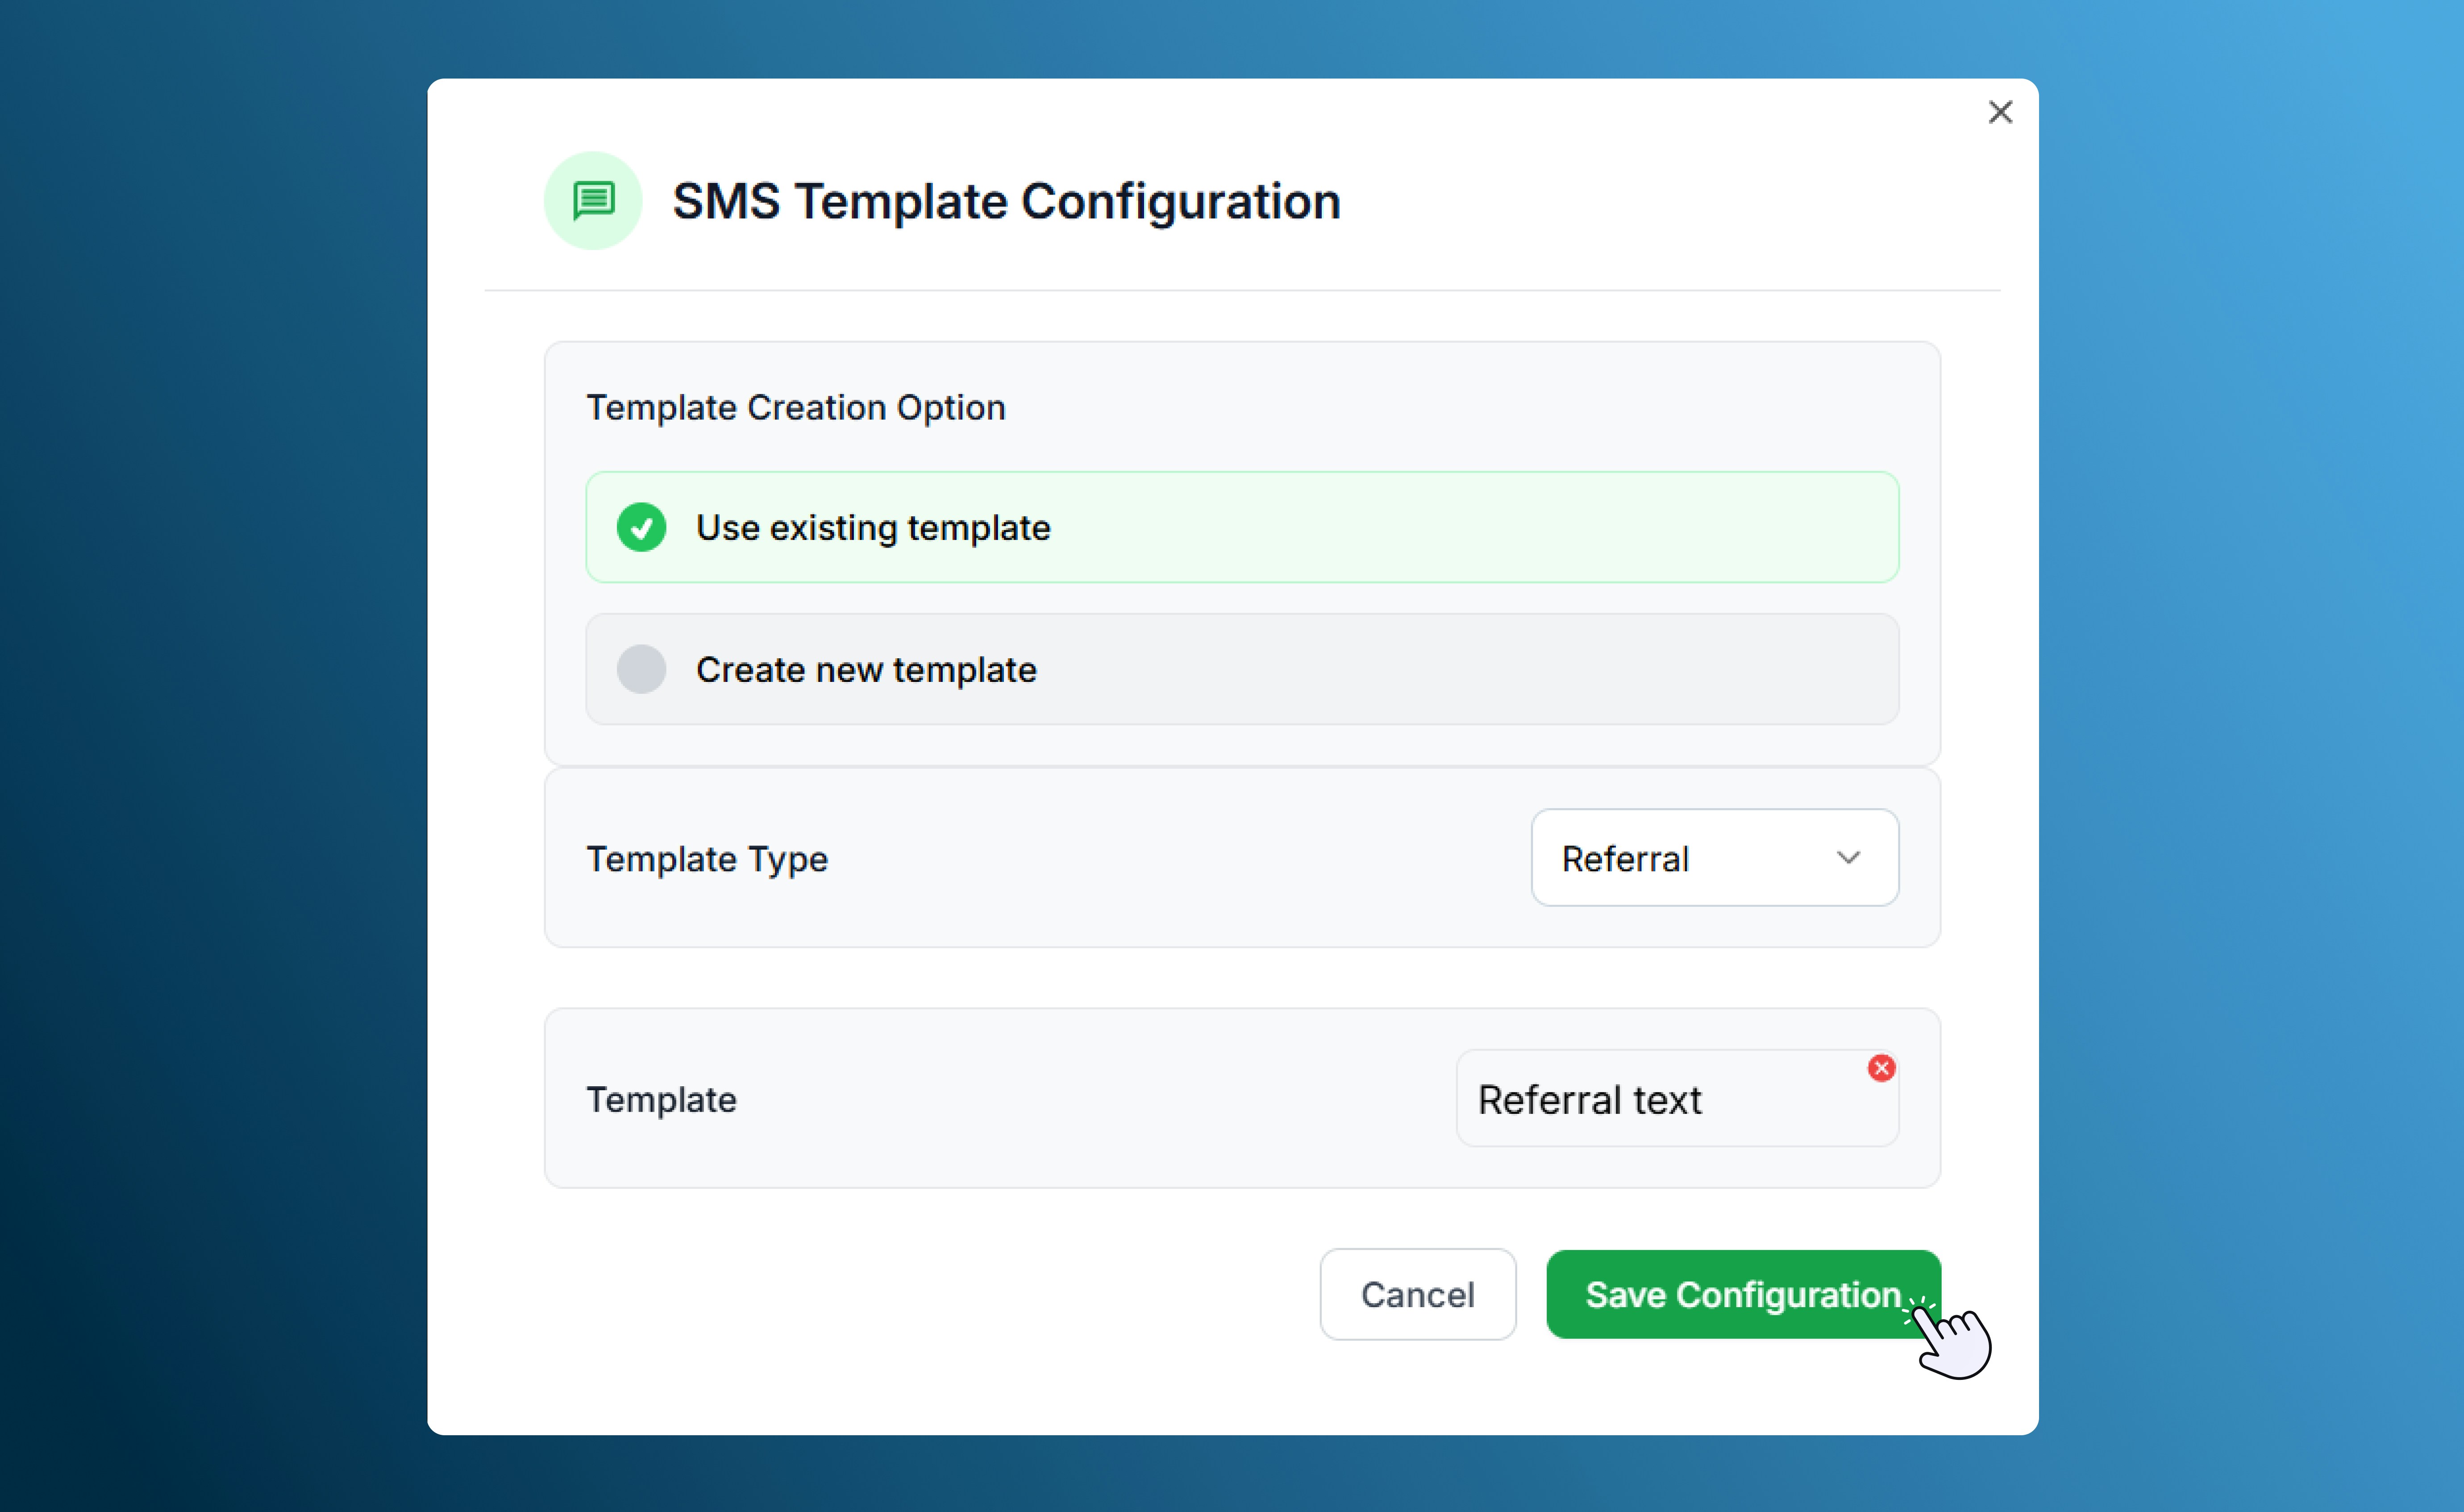
SMS template configuration
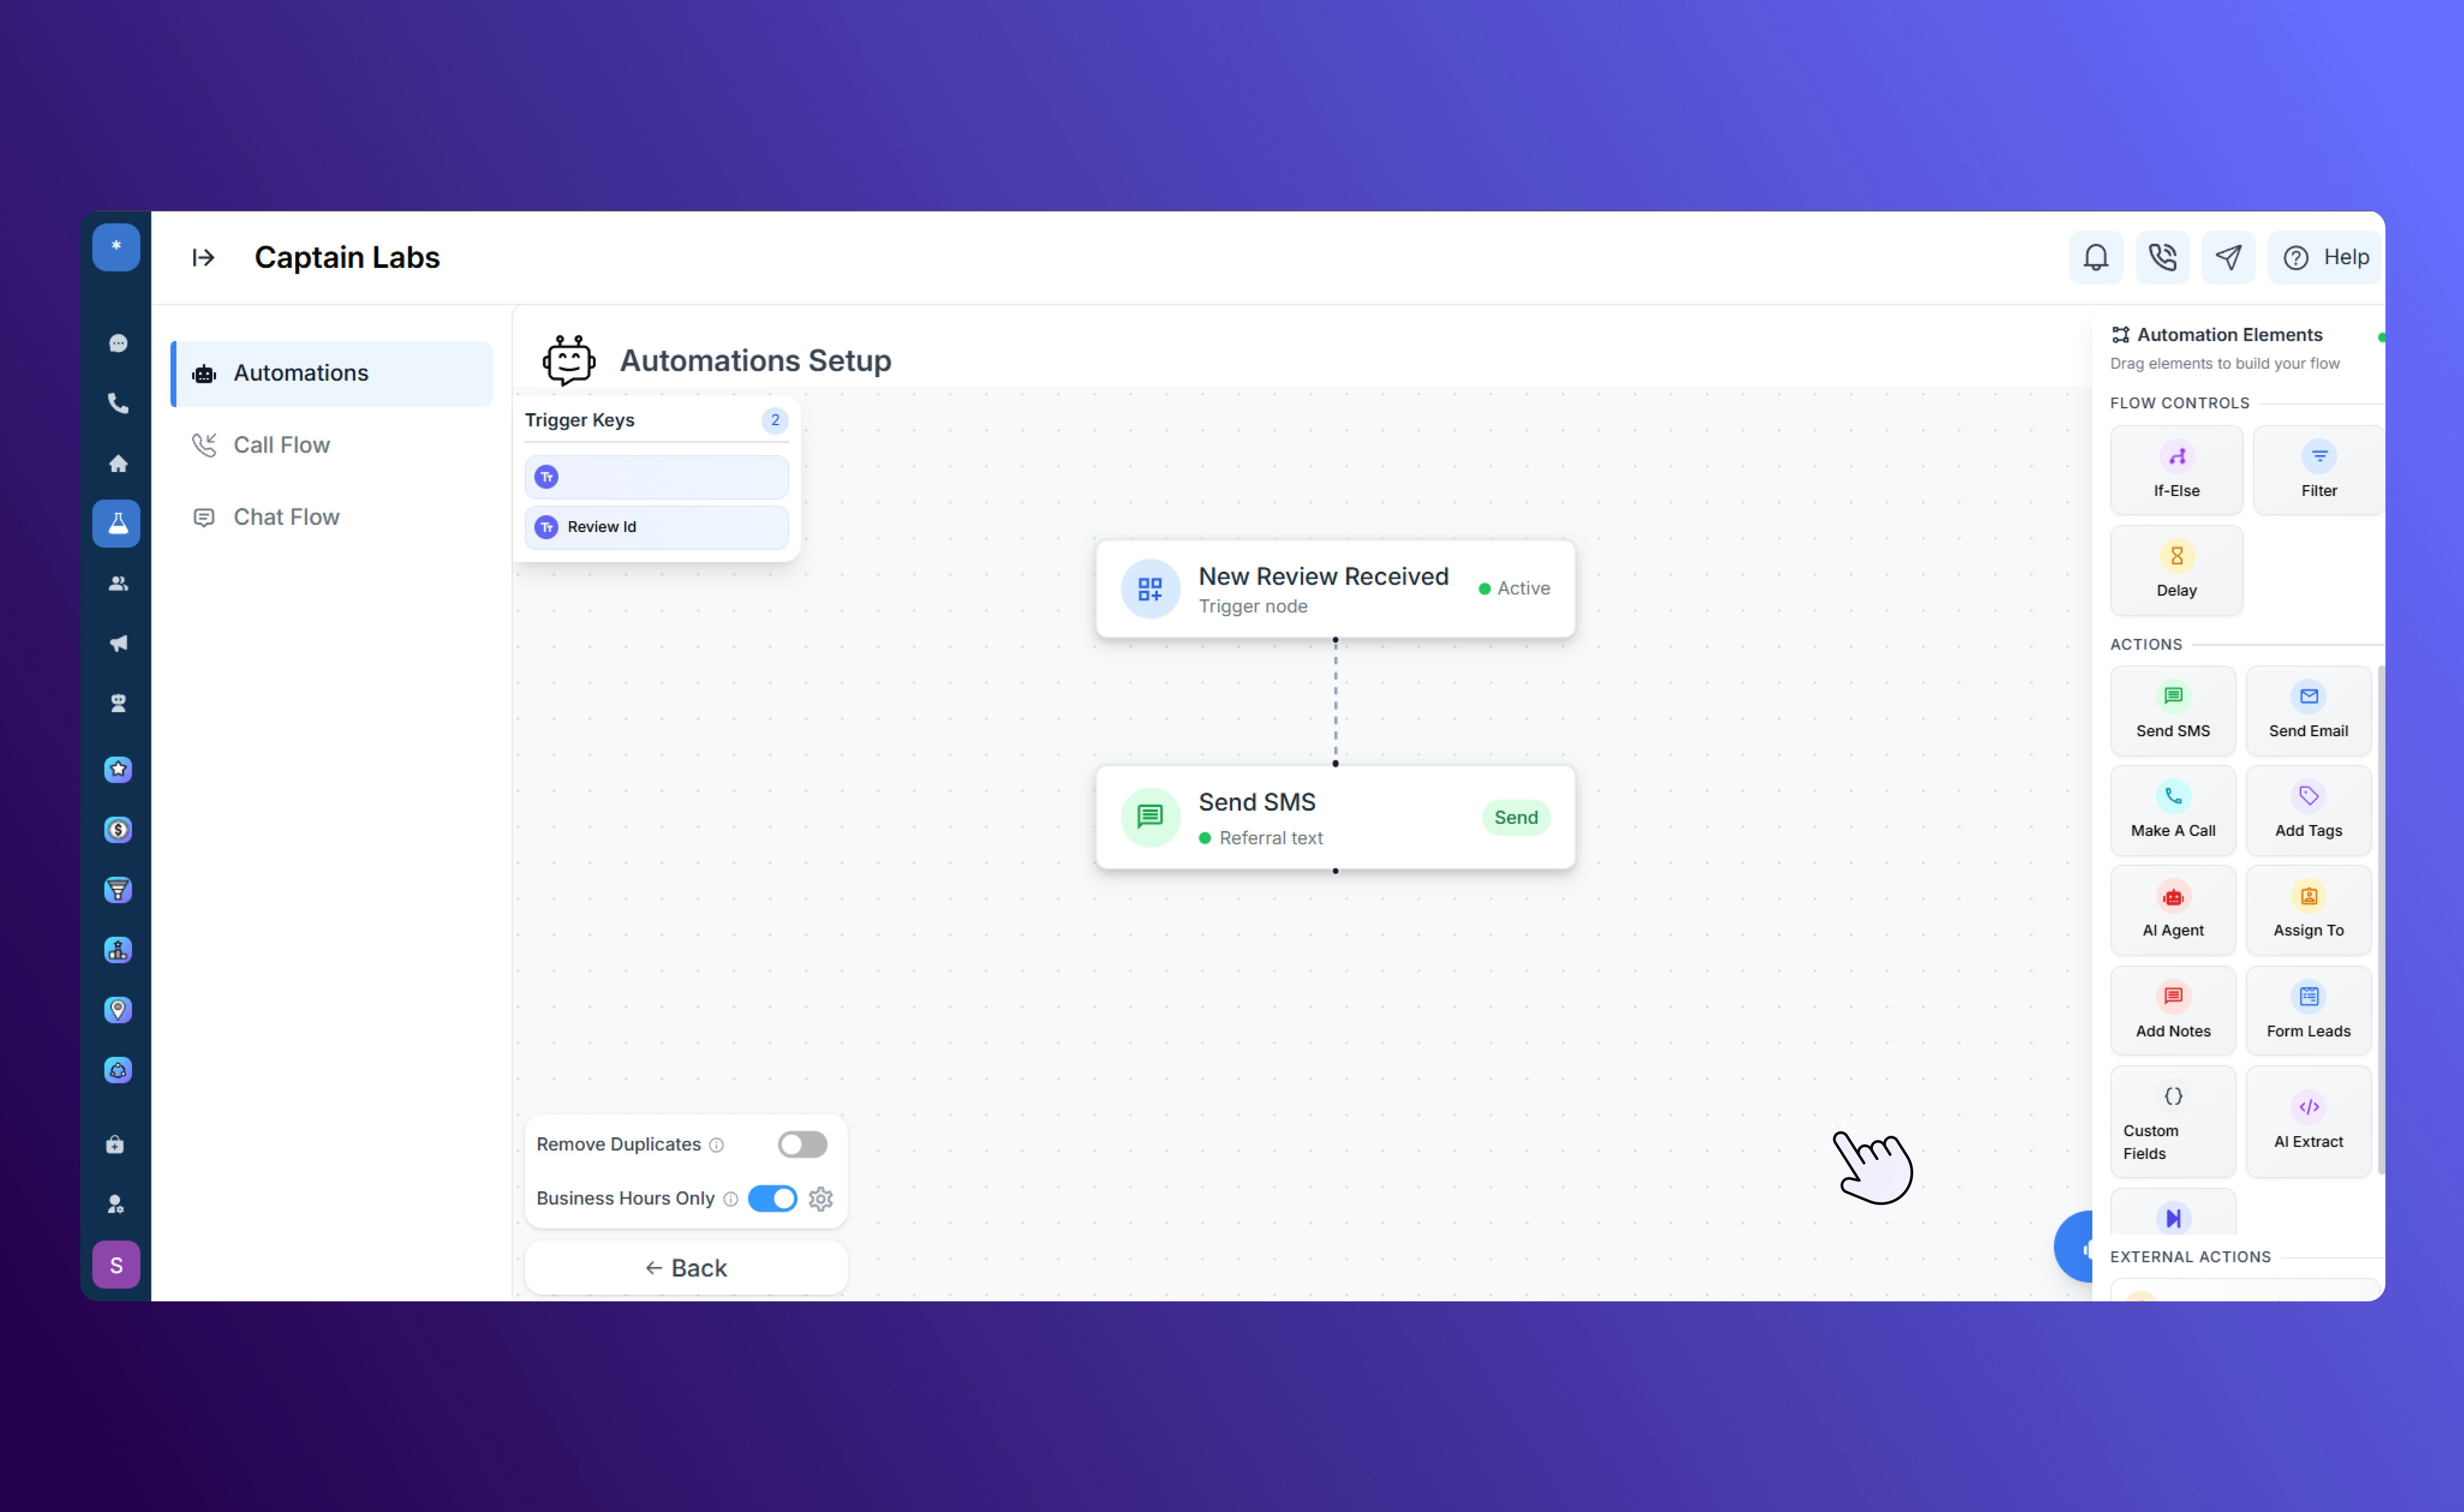
Cavnas view with Send SMS element
Send Email
Send a pre-written or templated email directly to a contact or team member. This action is ideal for sending appointment confirmations, thank-you messages, or regular follow-ups.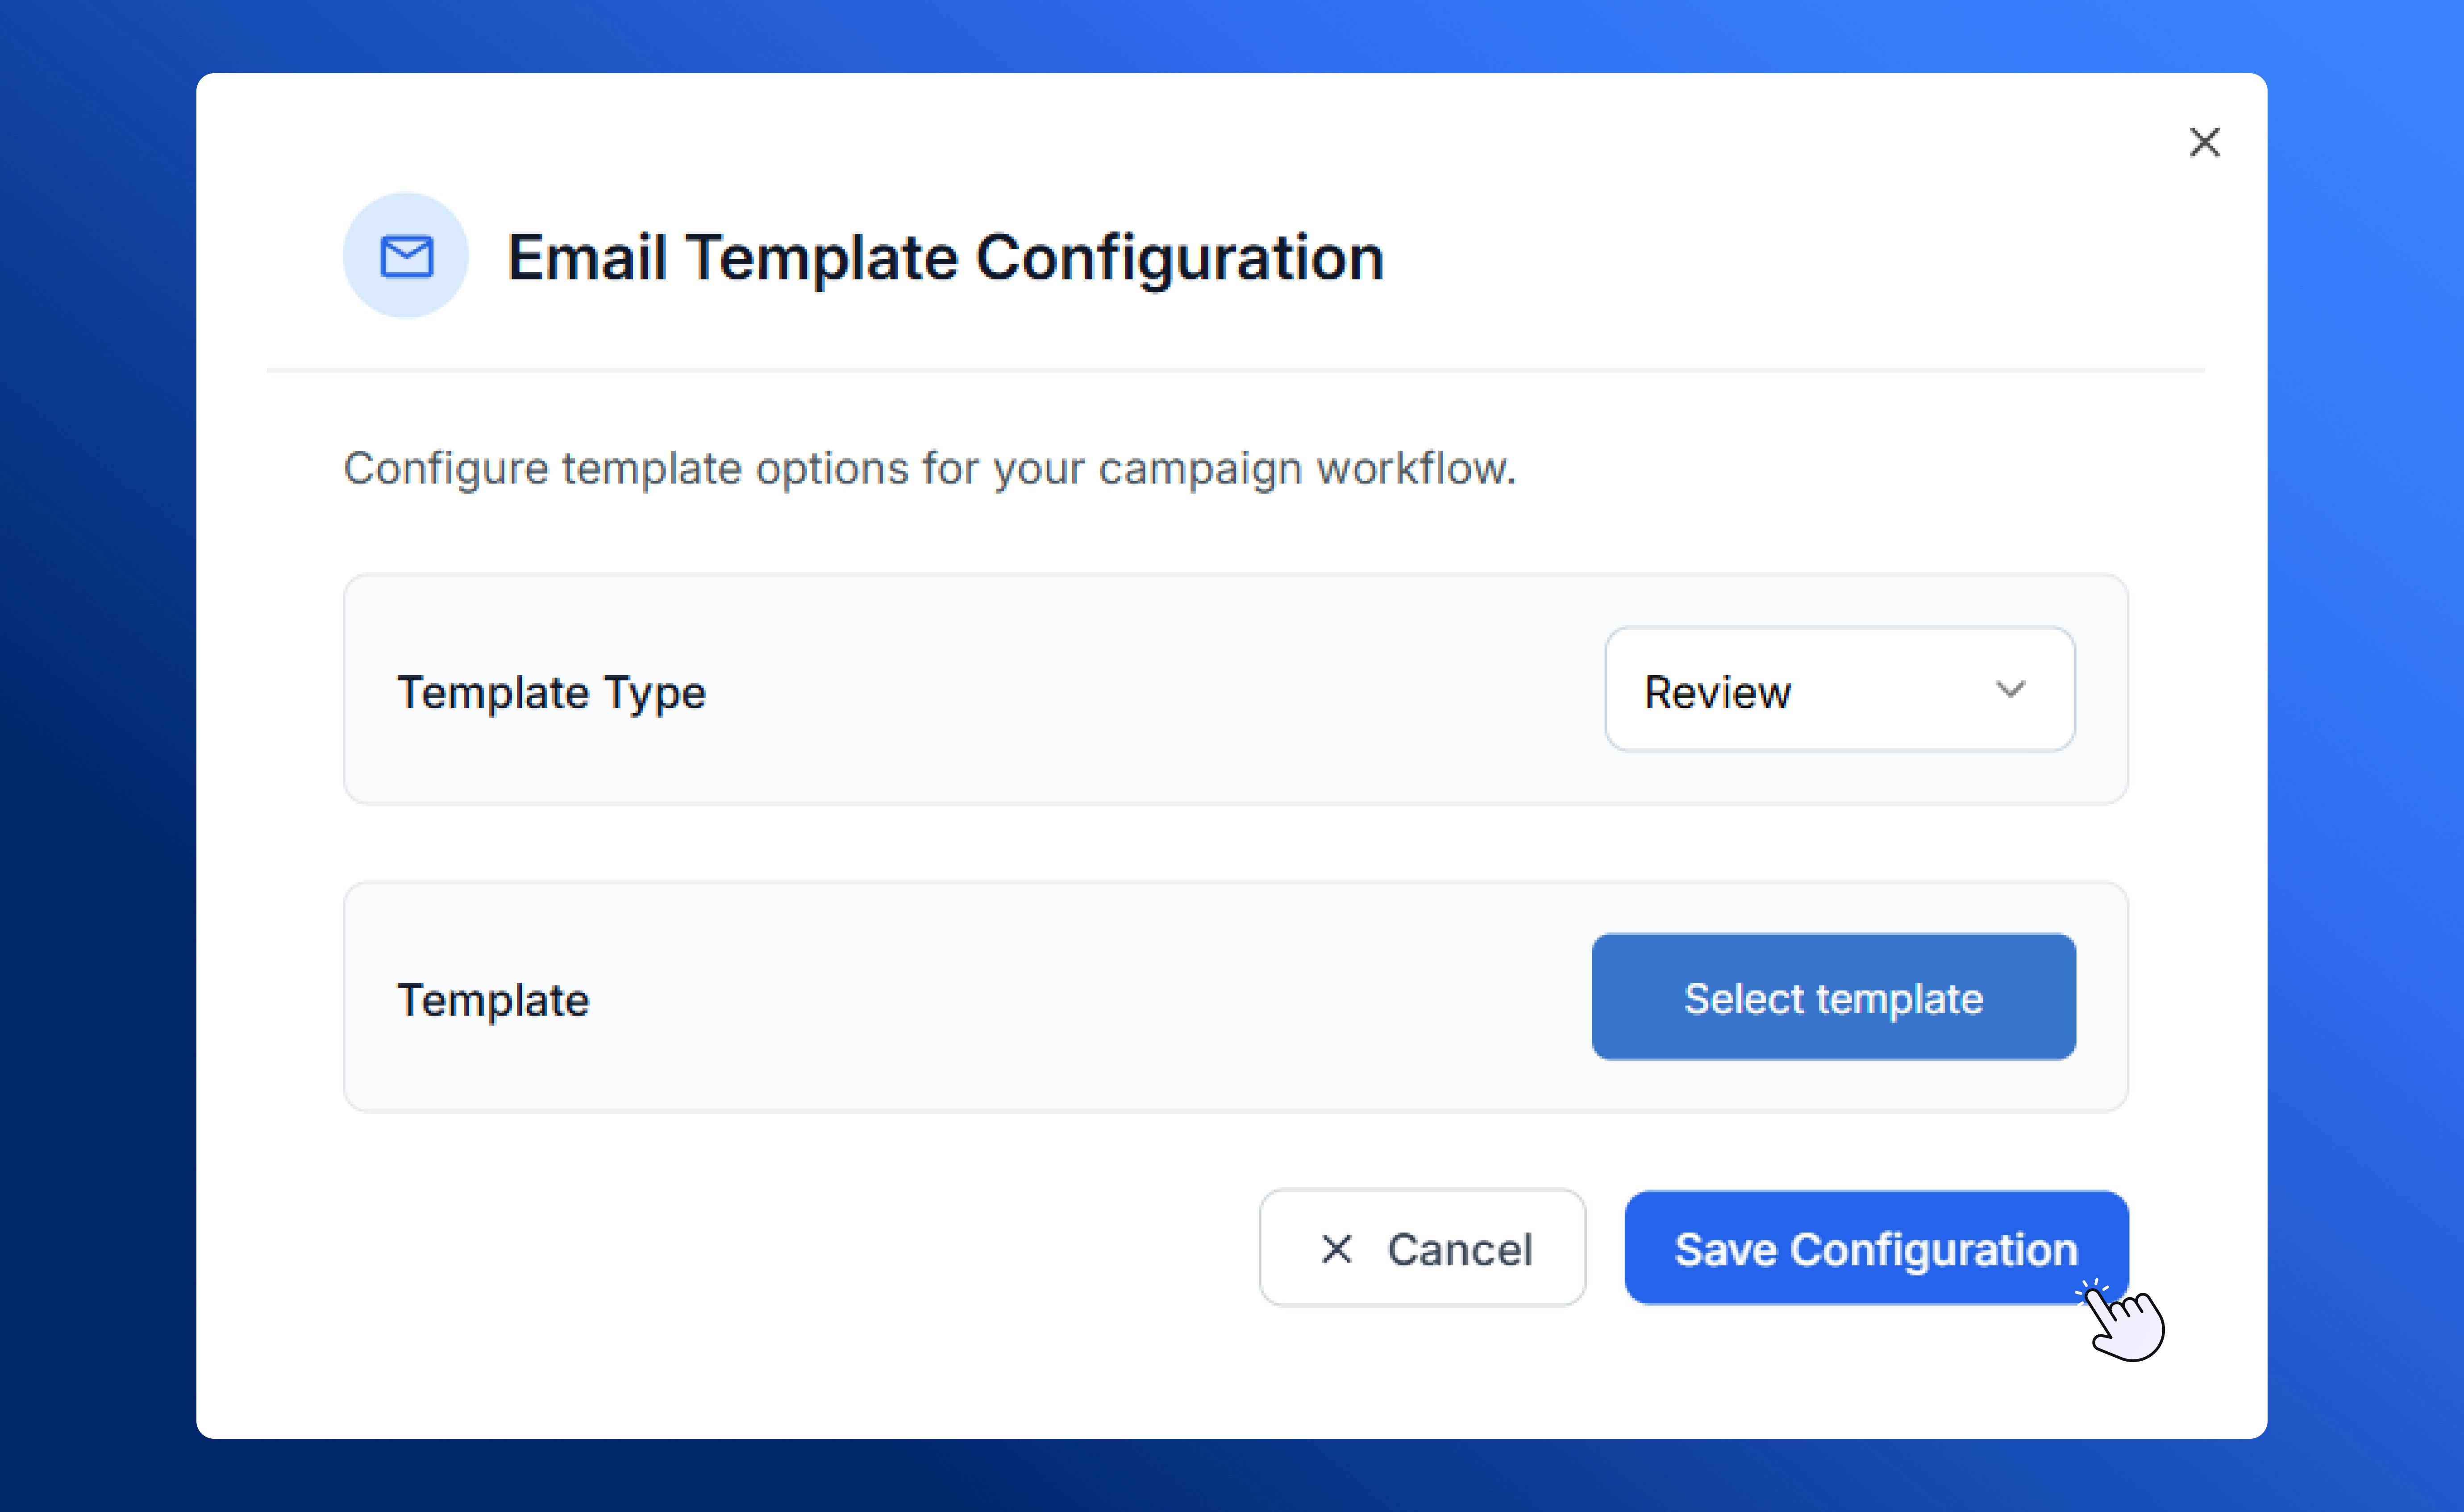
Email Template Configuration
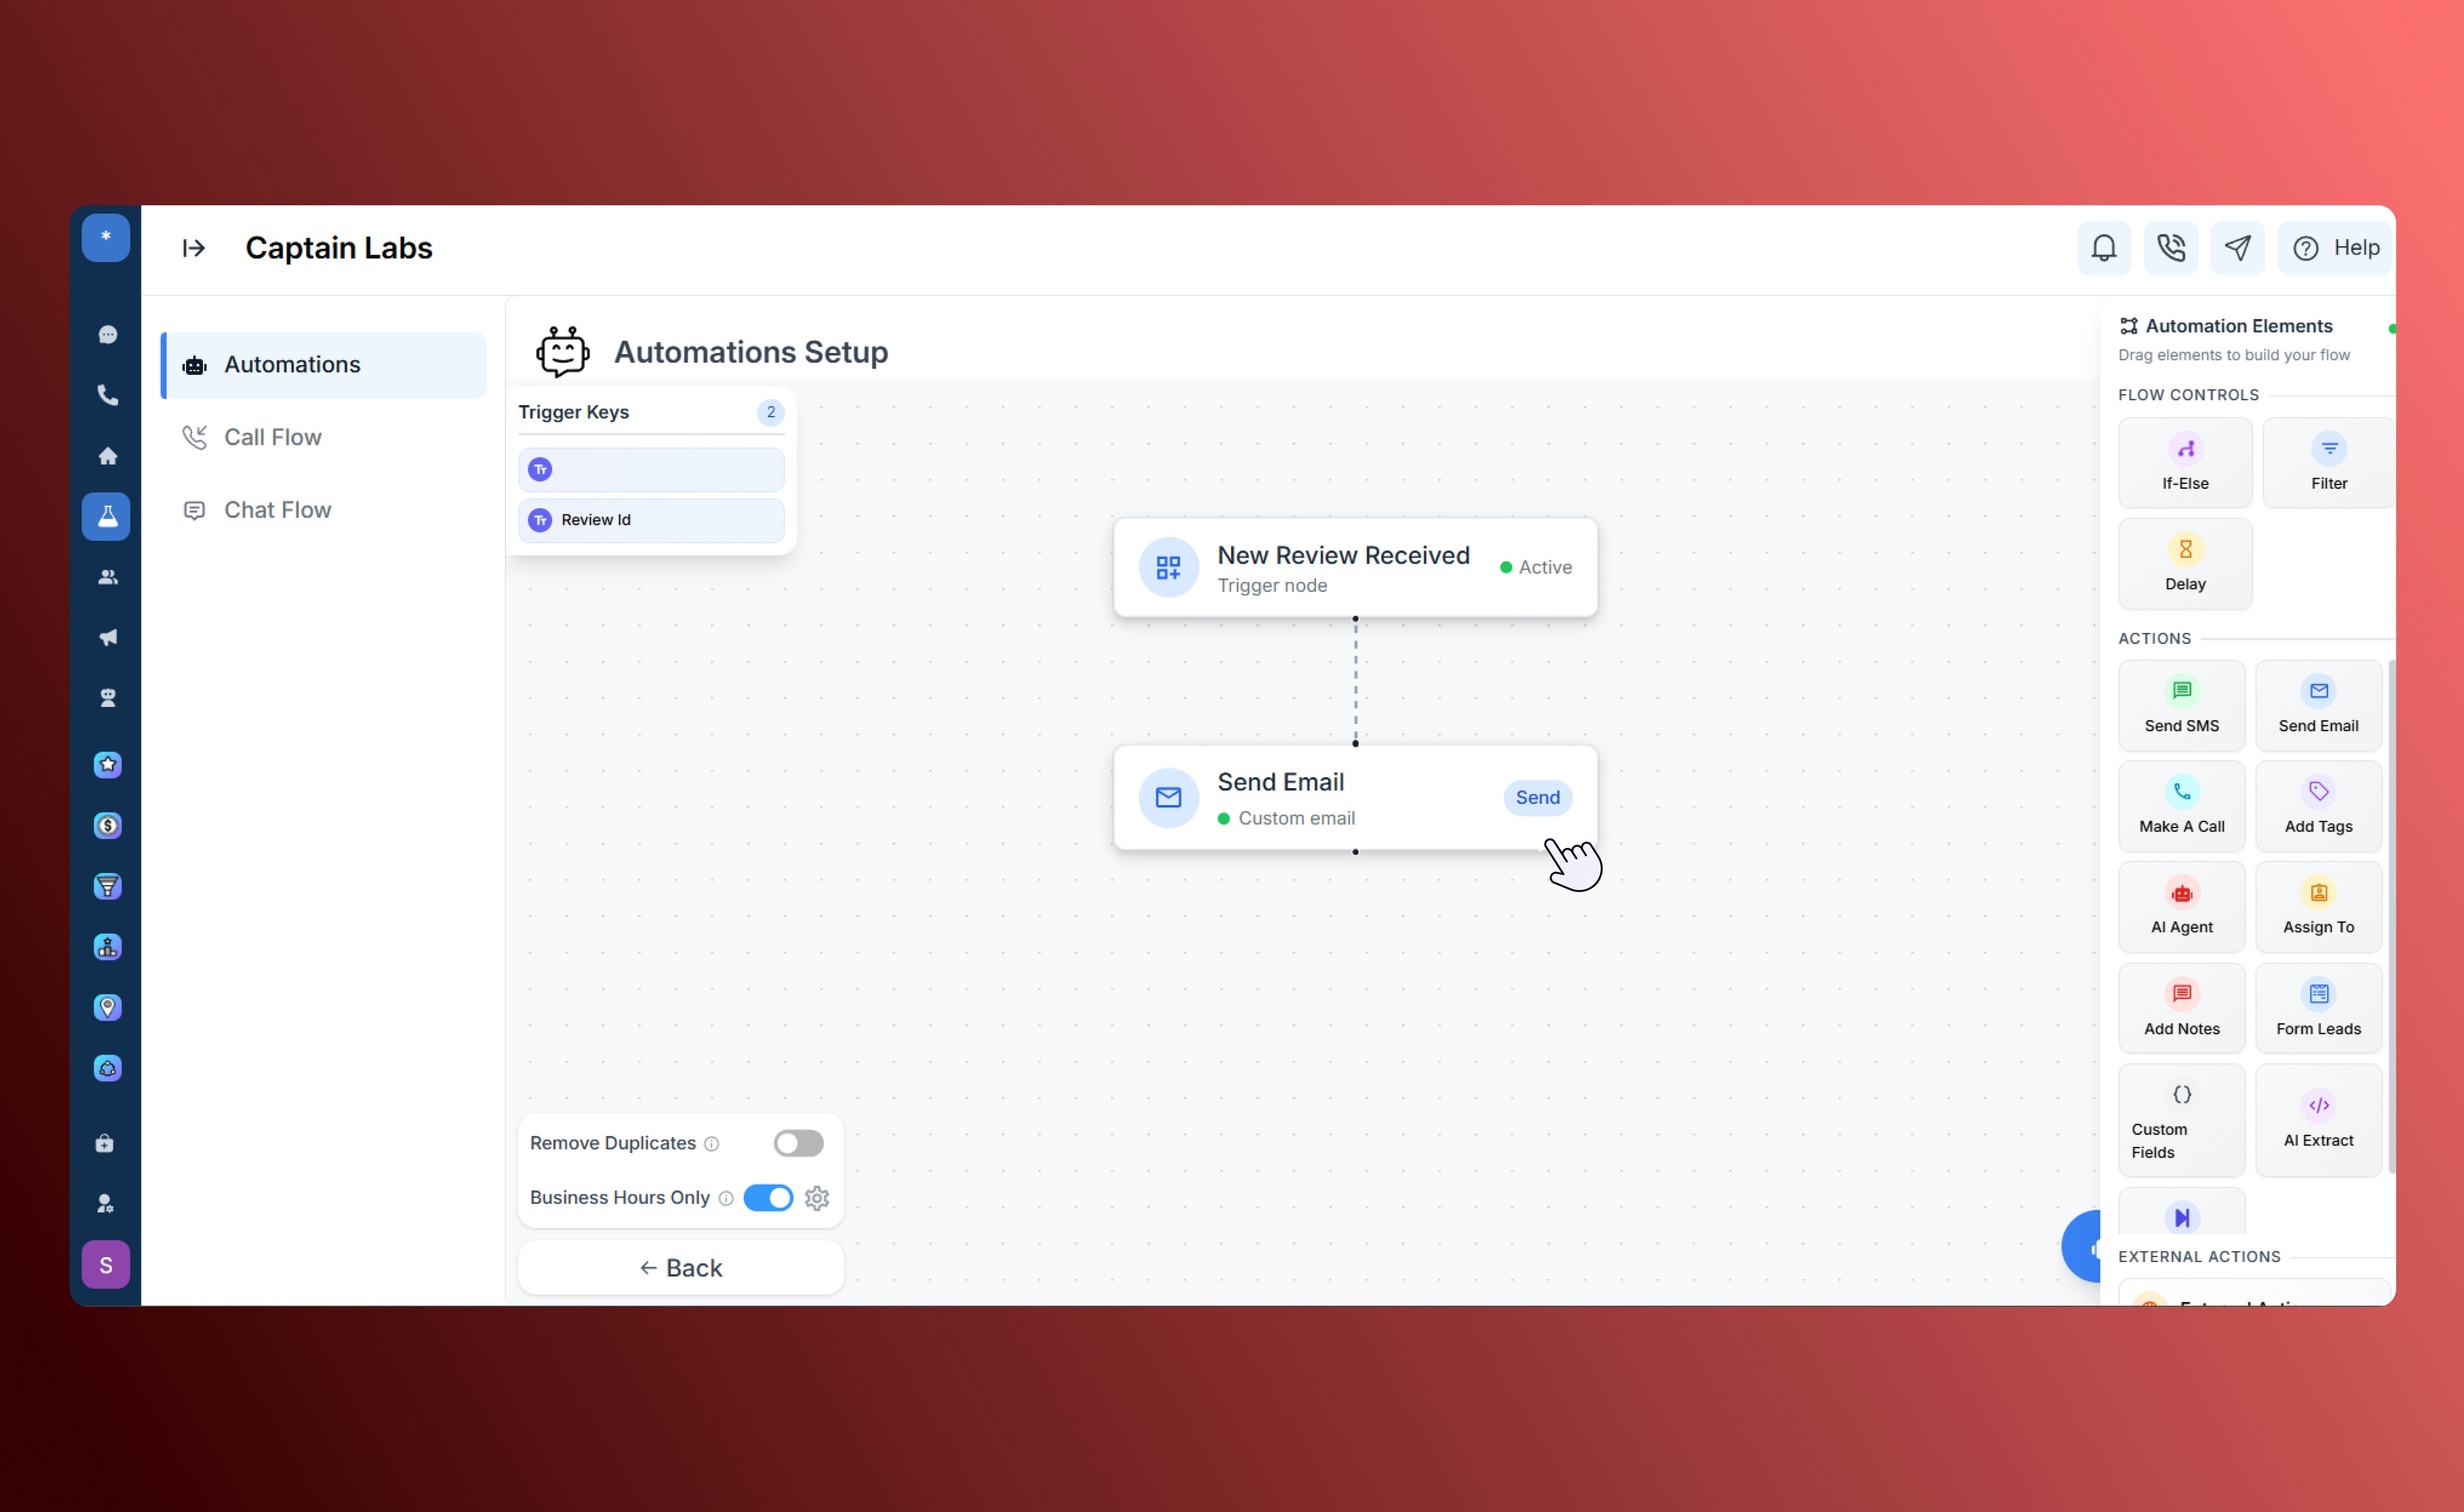
Canvas view with Send Email element
Make a Call
Automatically initiate a phone call through your connected SalesCaptain phone system. Use it to trigger reminders, connect sales calls, or re-engage with customers after a specific event.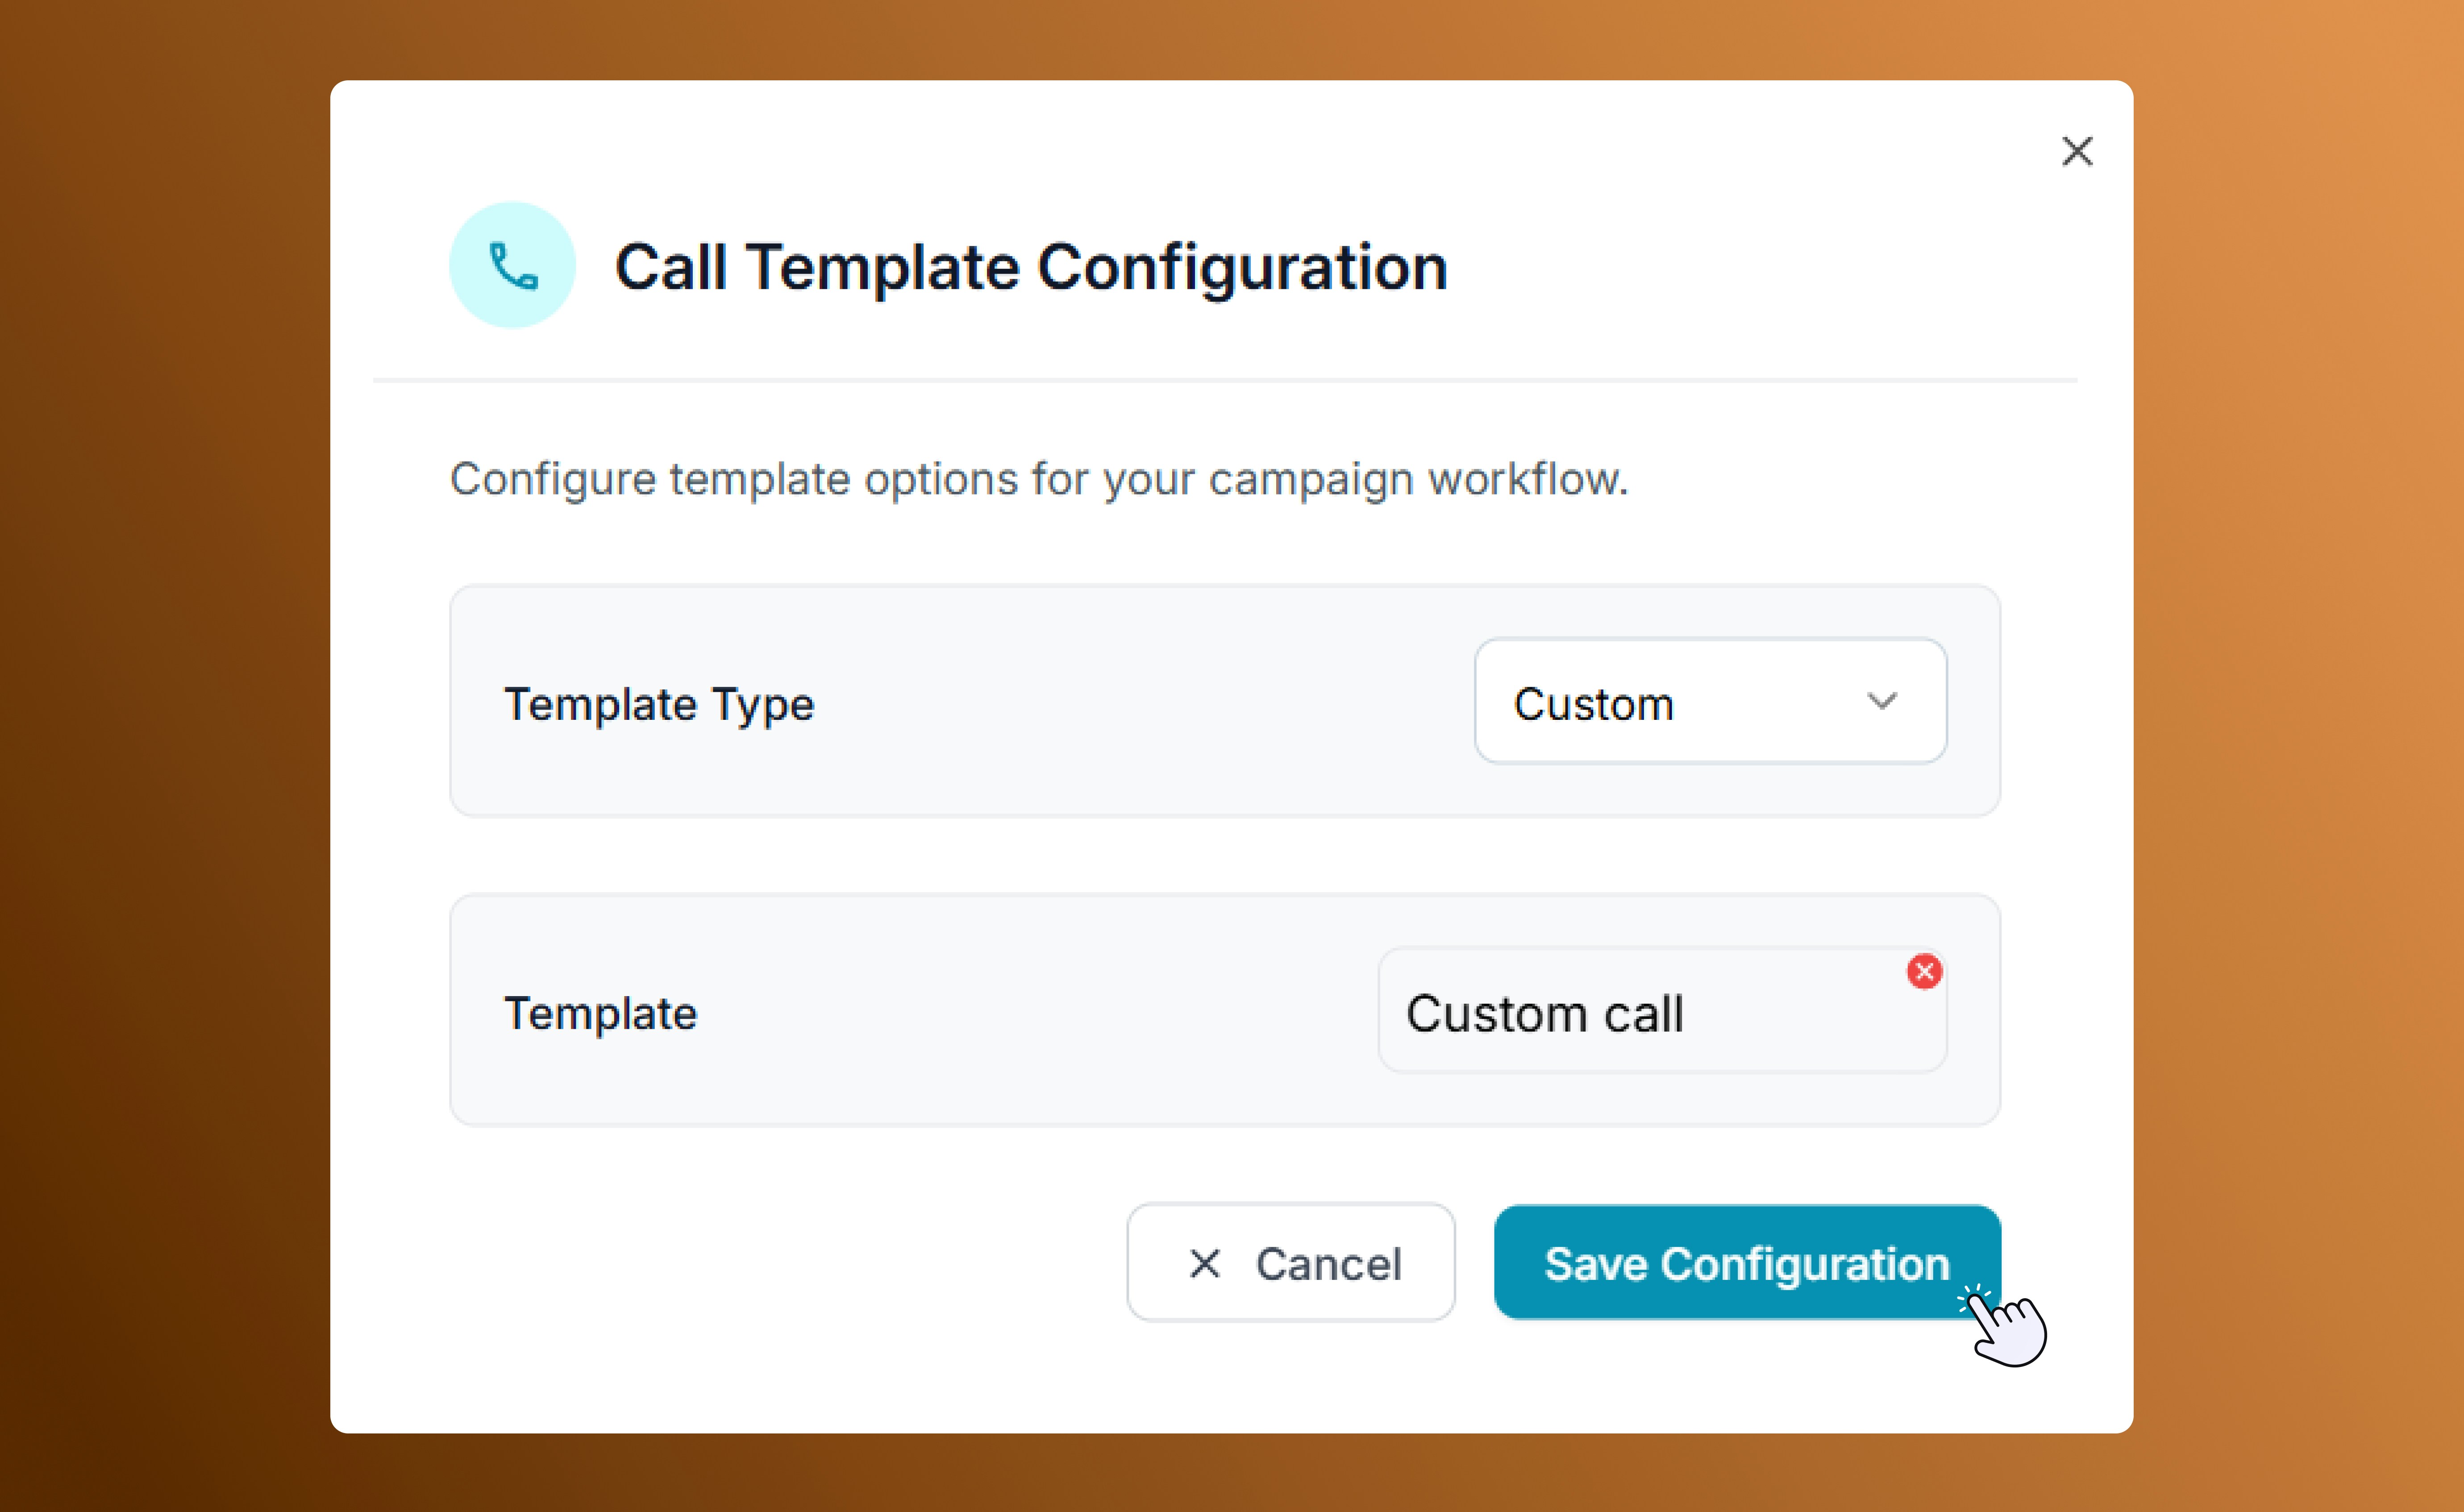
Call template configuration
Add Tags
Apply tags to contacts for easy tracking and segmentation in future workflows. Tags help categorize leads by behavior, interest, or source for better automation control.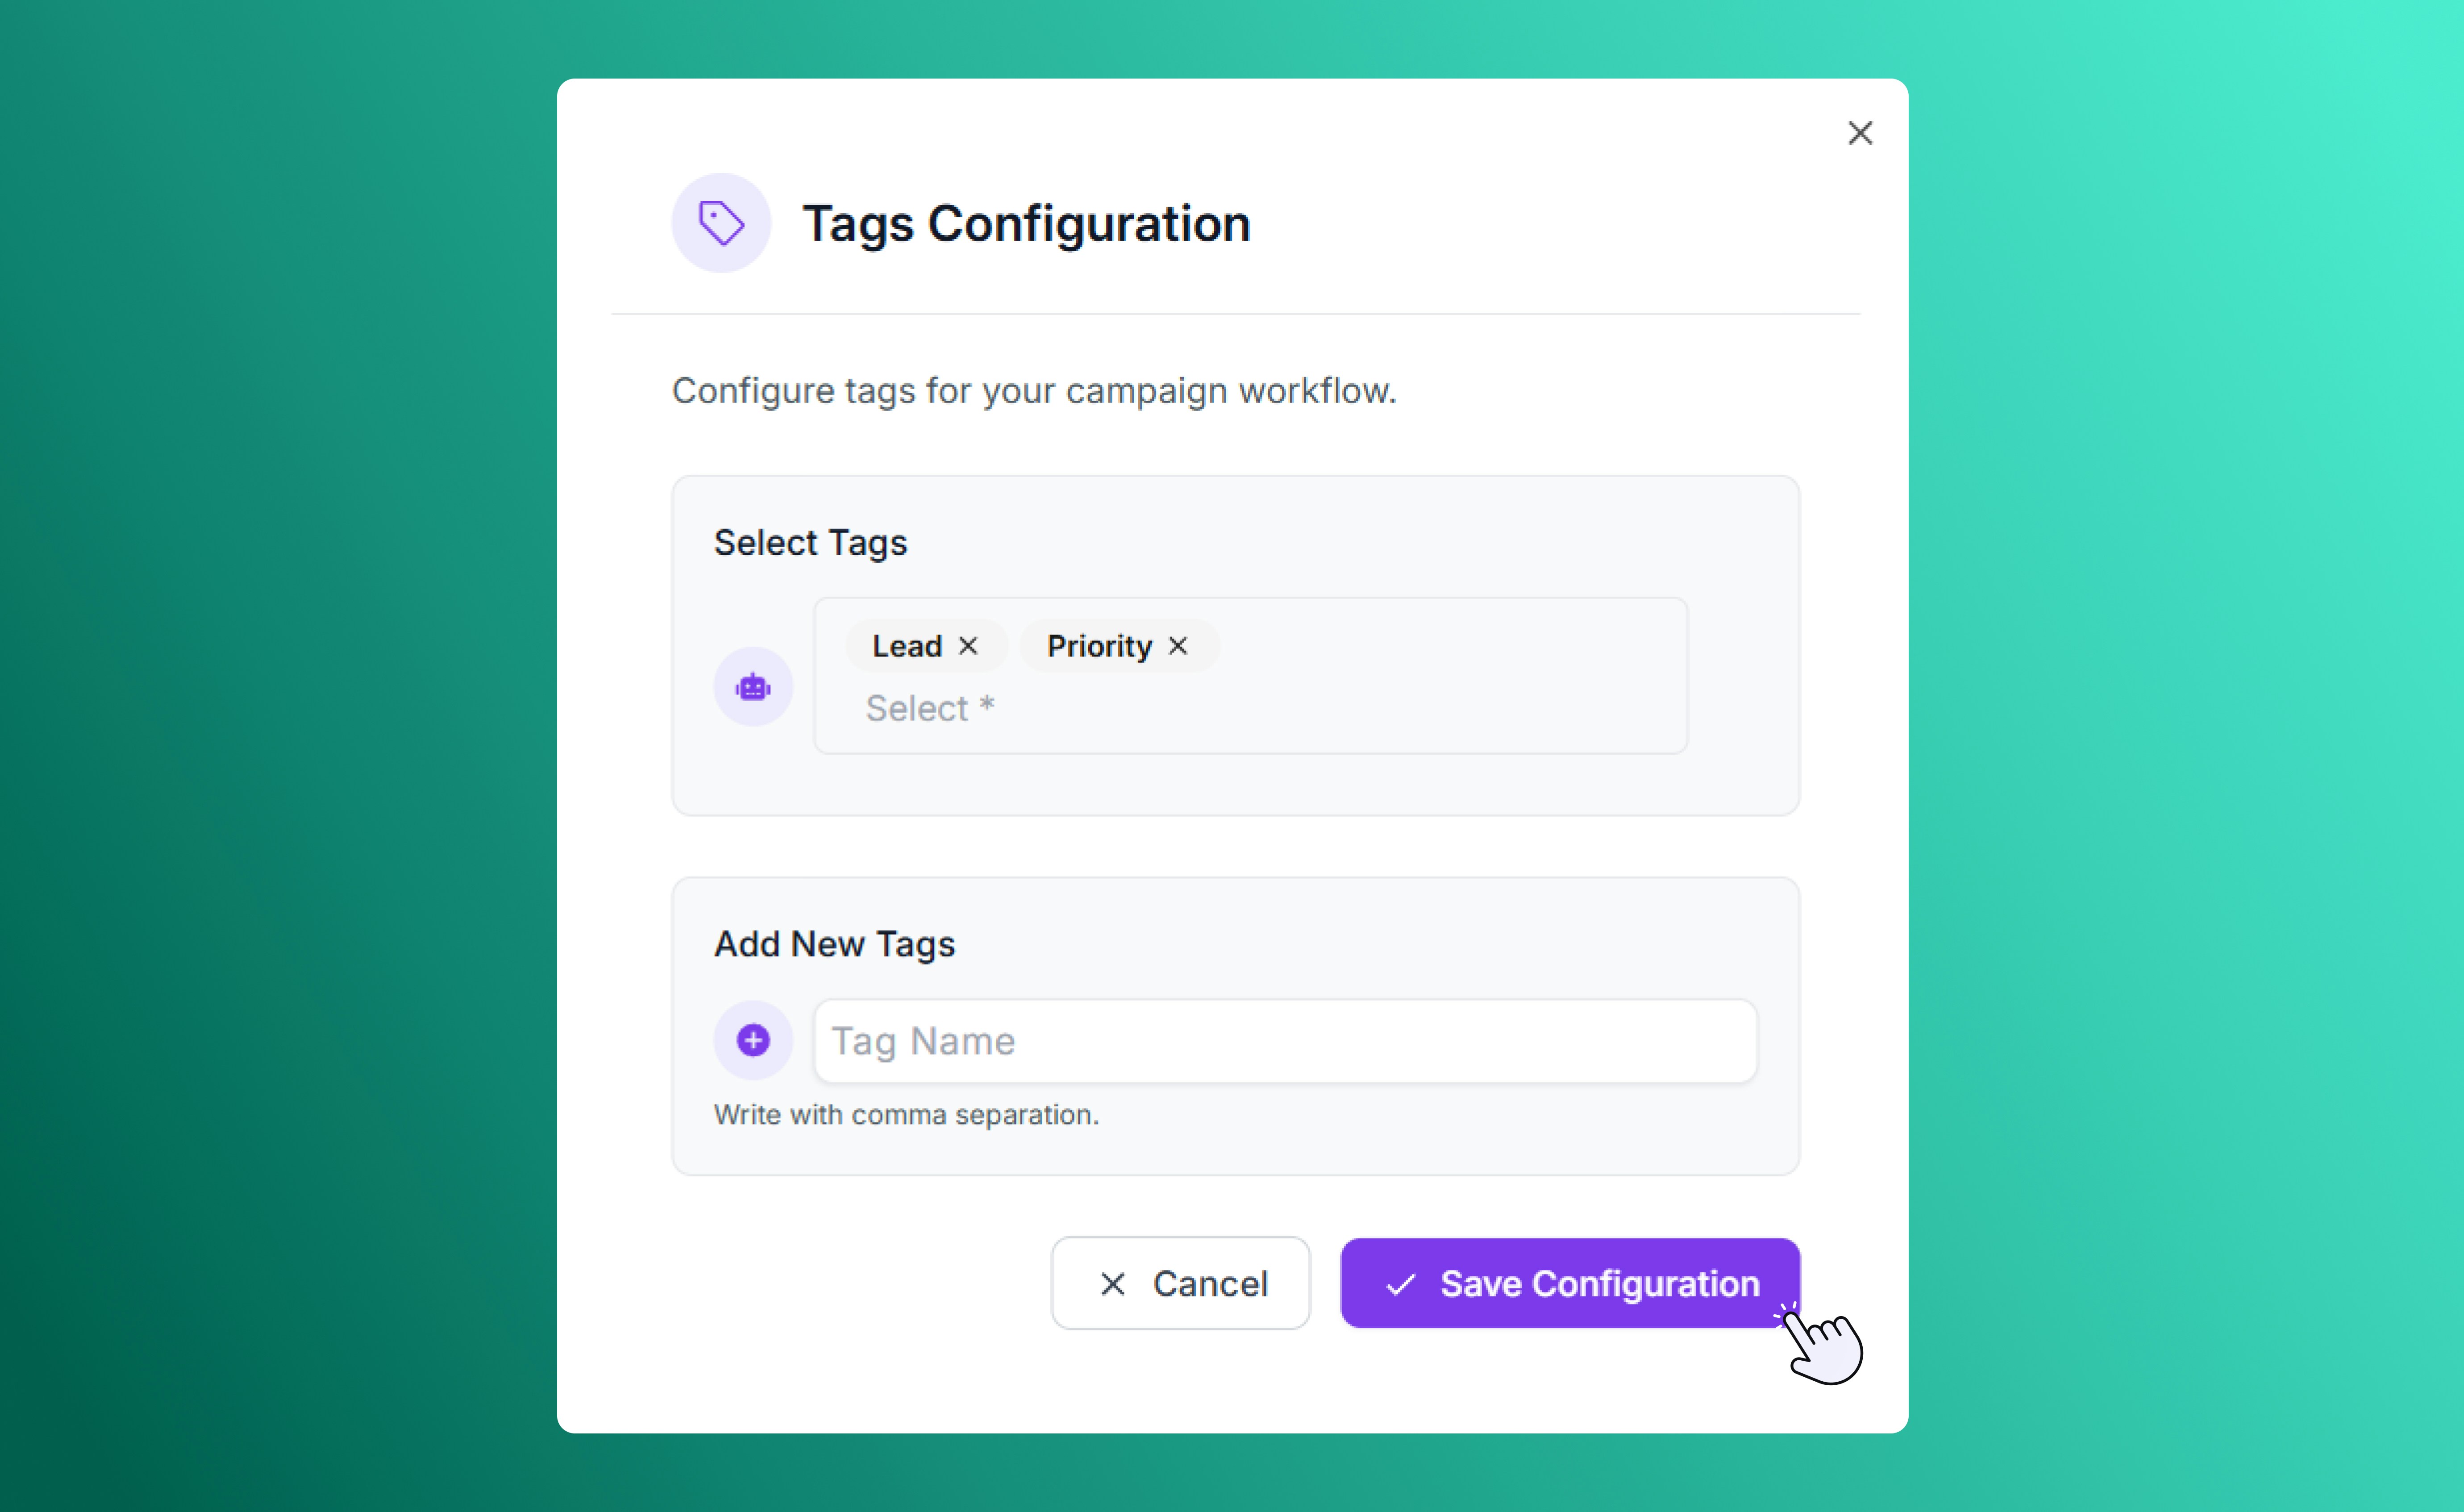
Configuring Tabs
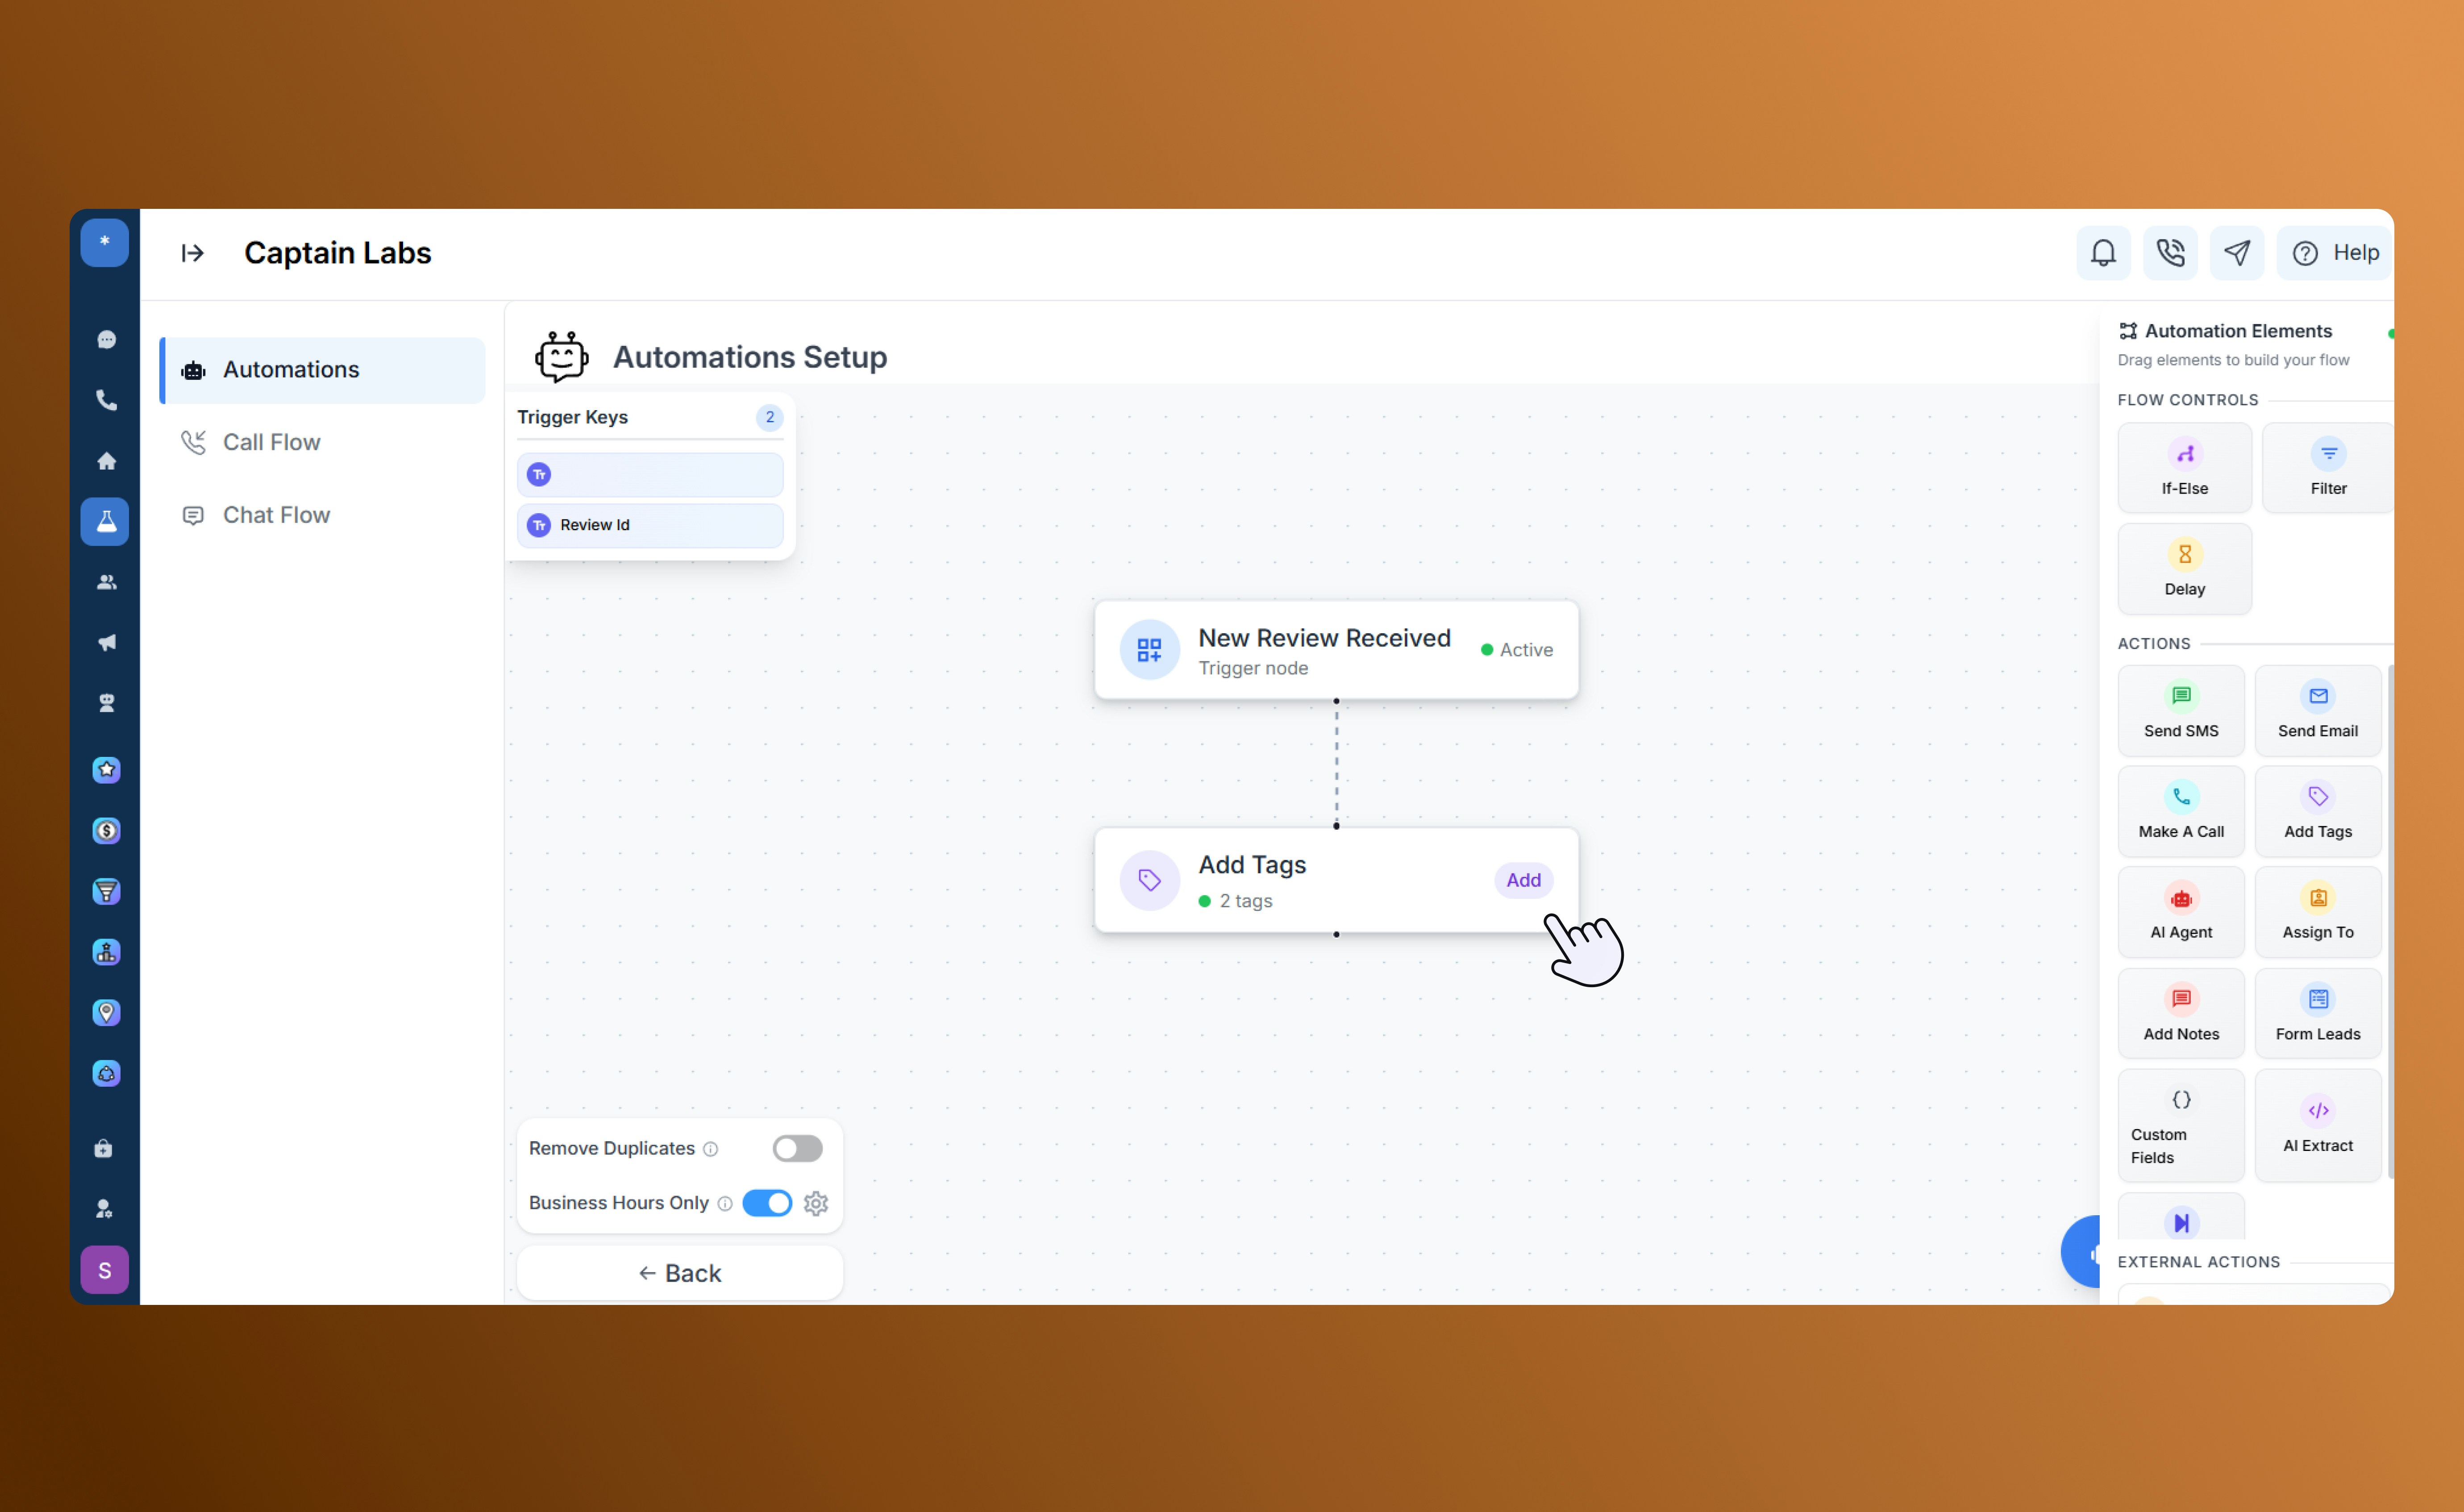
Canvas view with Add Tags element
AI Agent
Activate your AI assistant using voice or test to send automated replies, qualify leads, or continue conversations.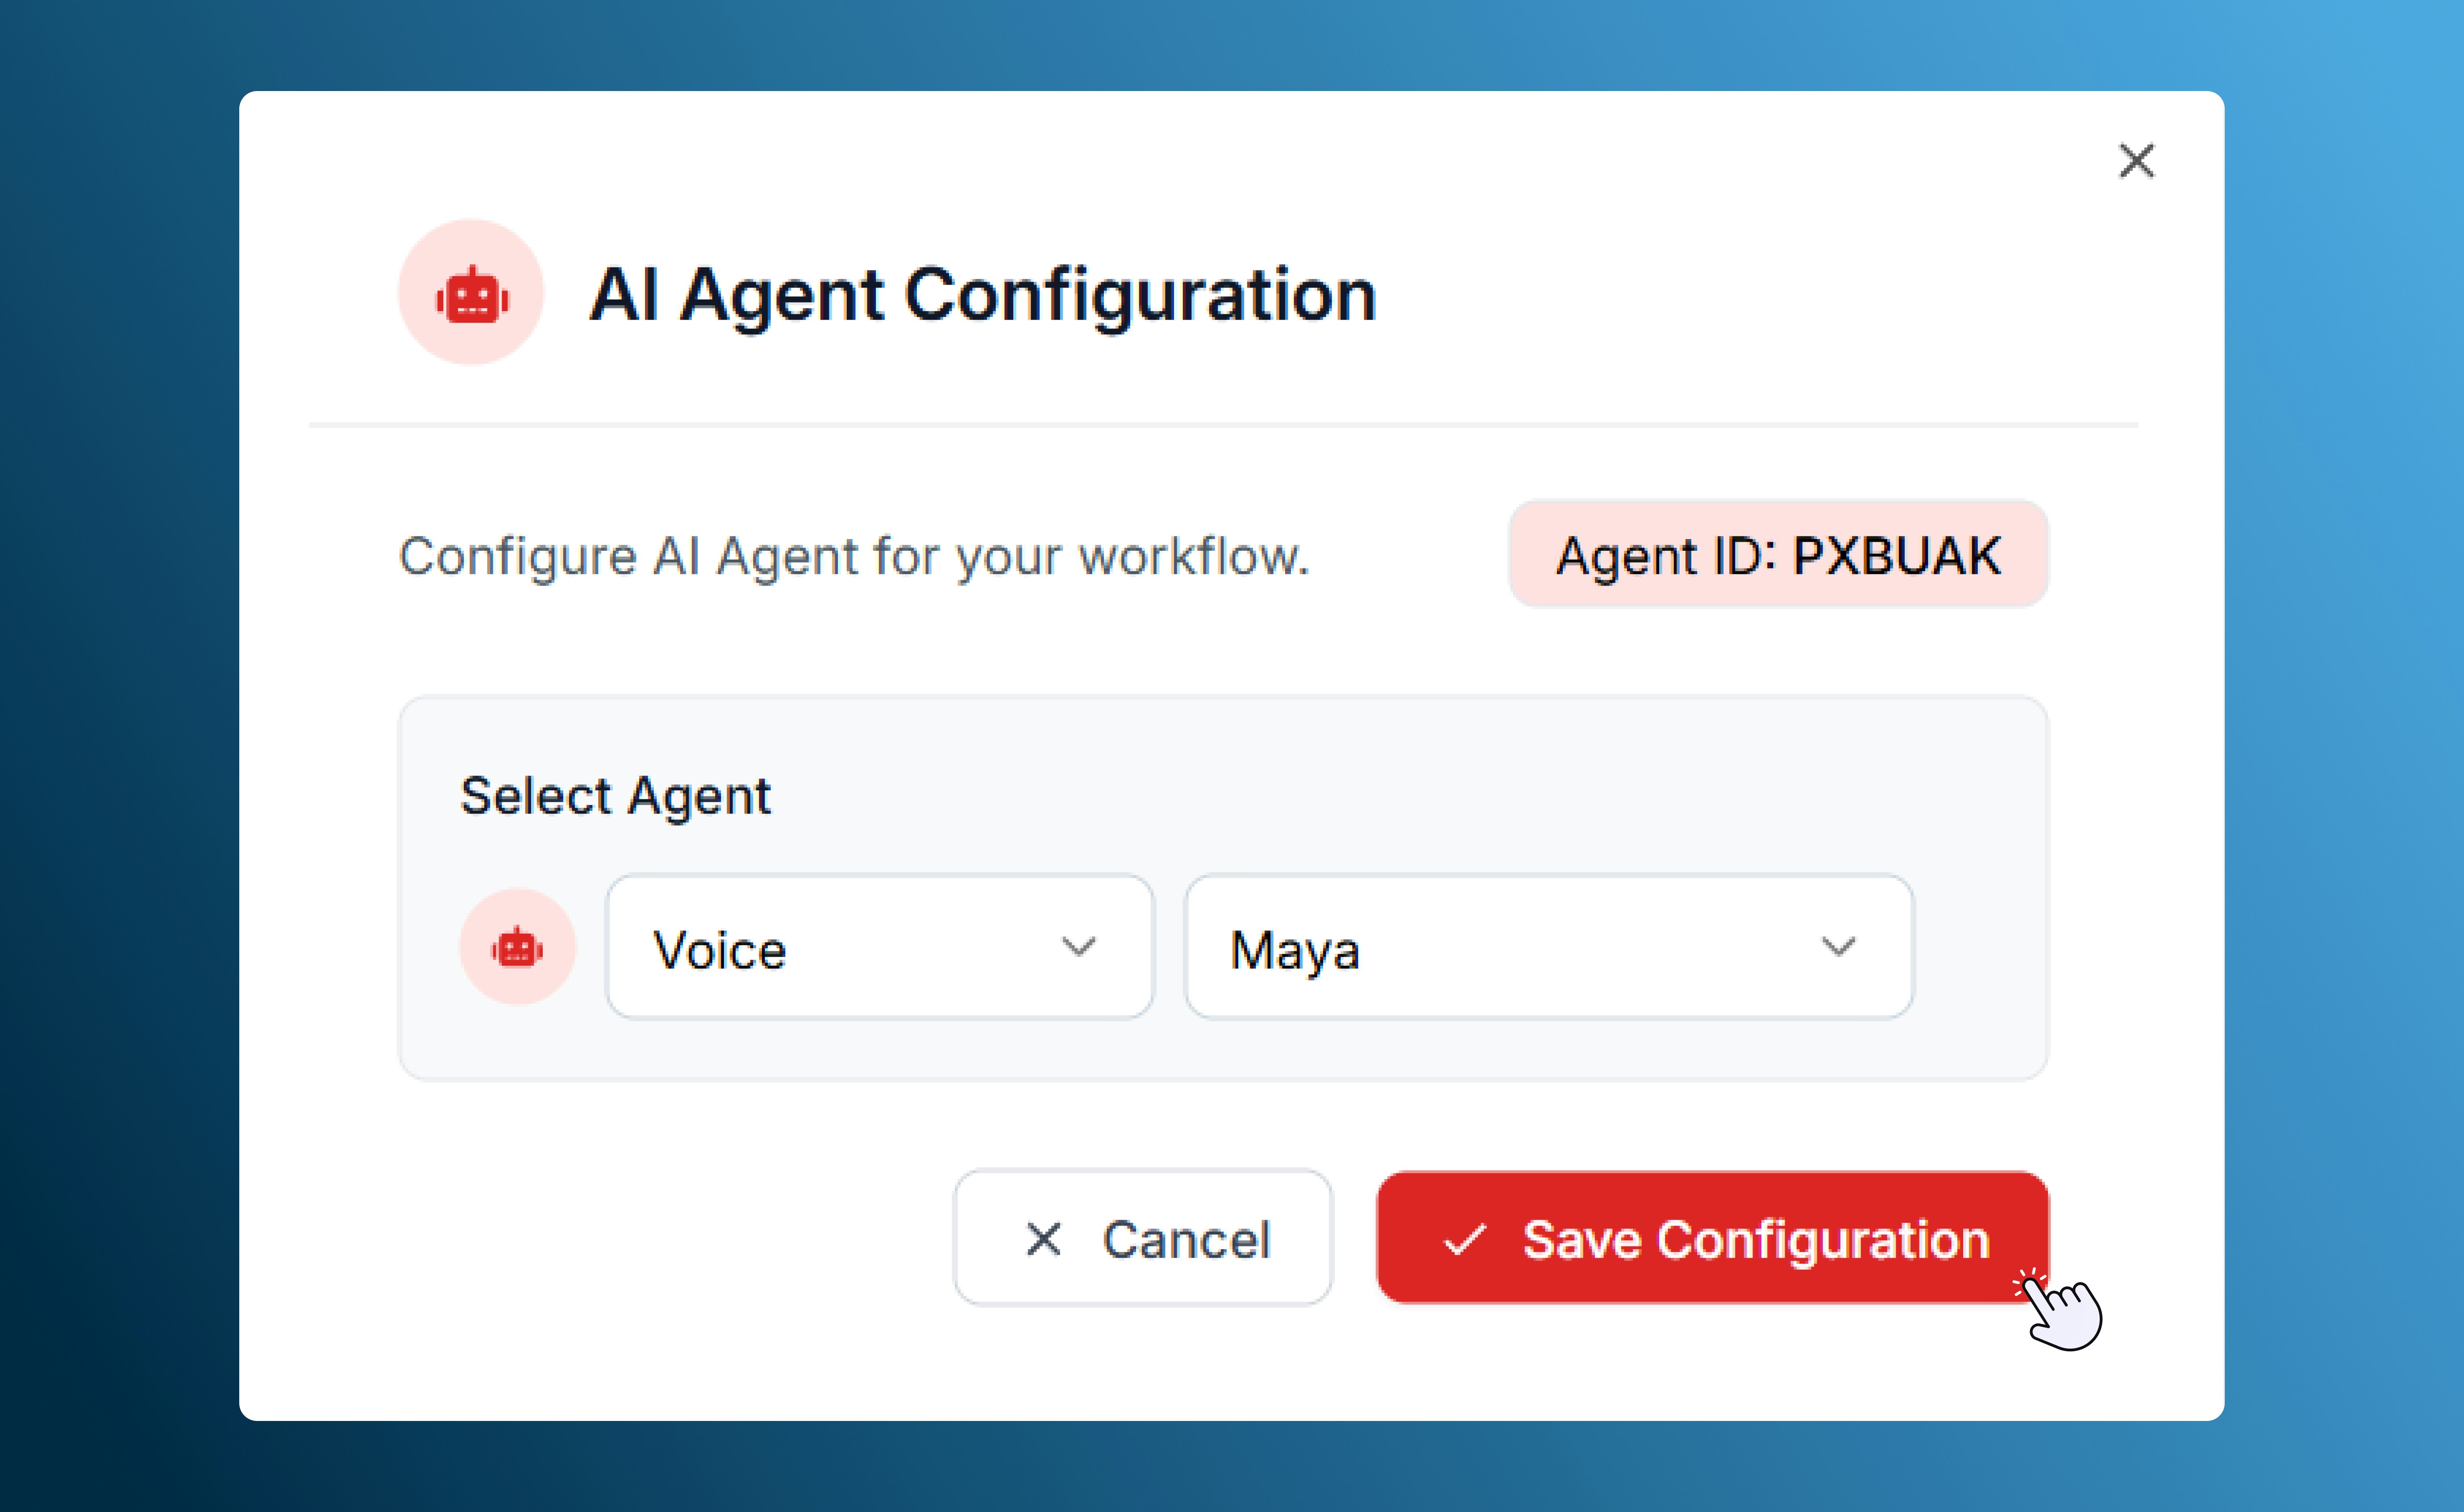
AI Agent configuration
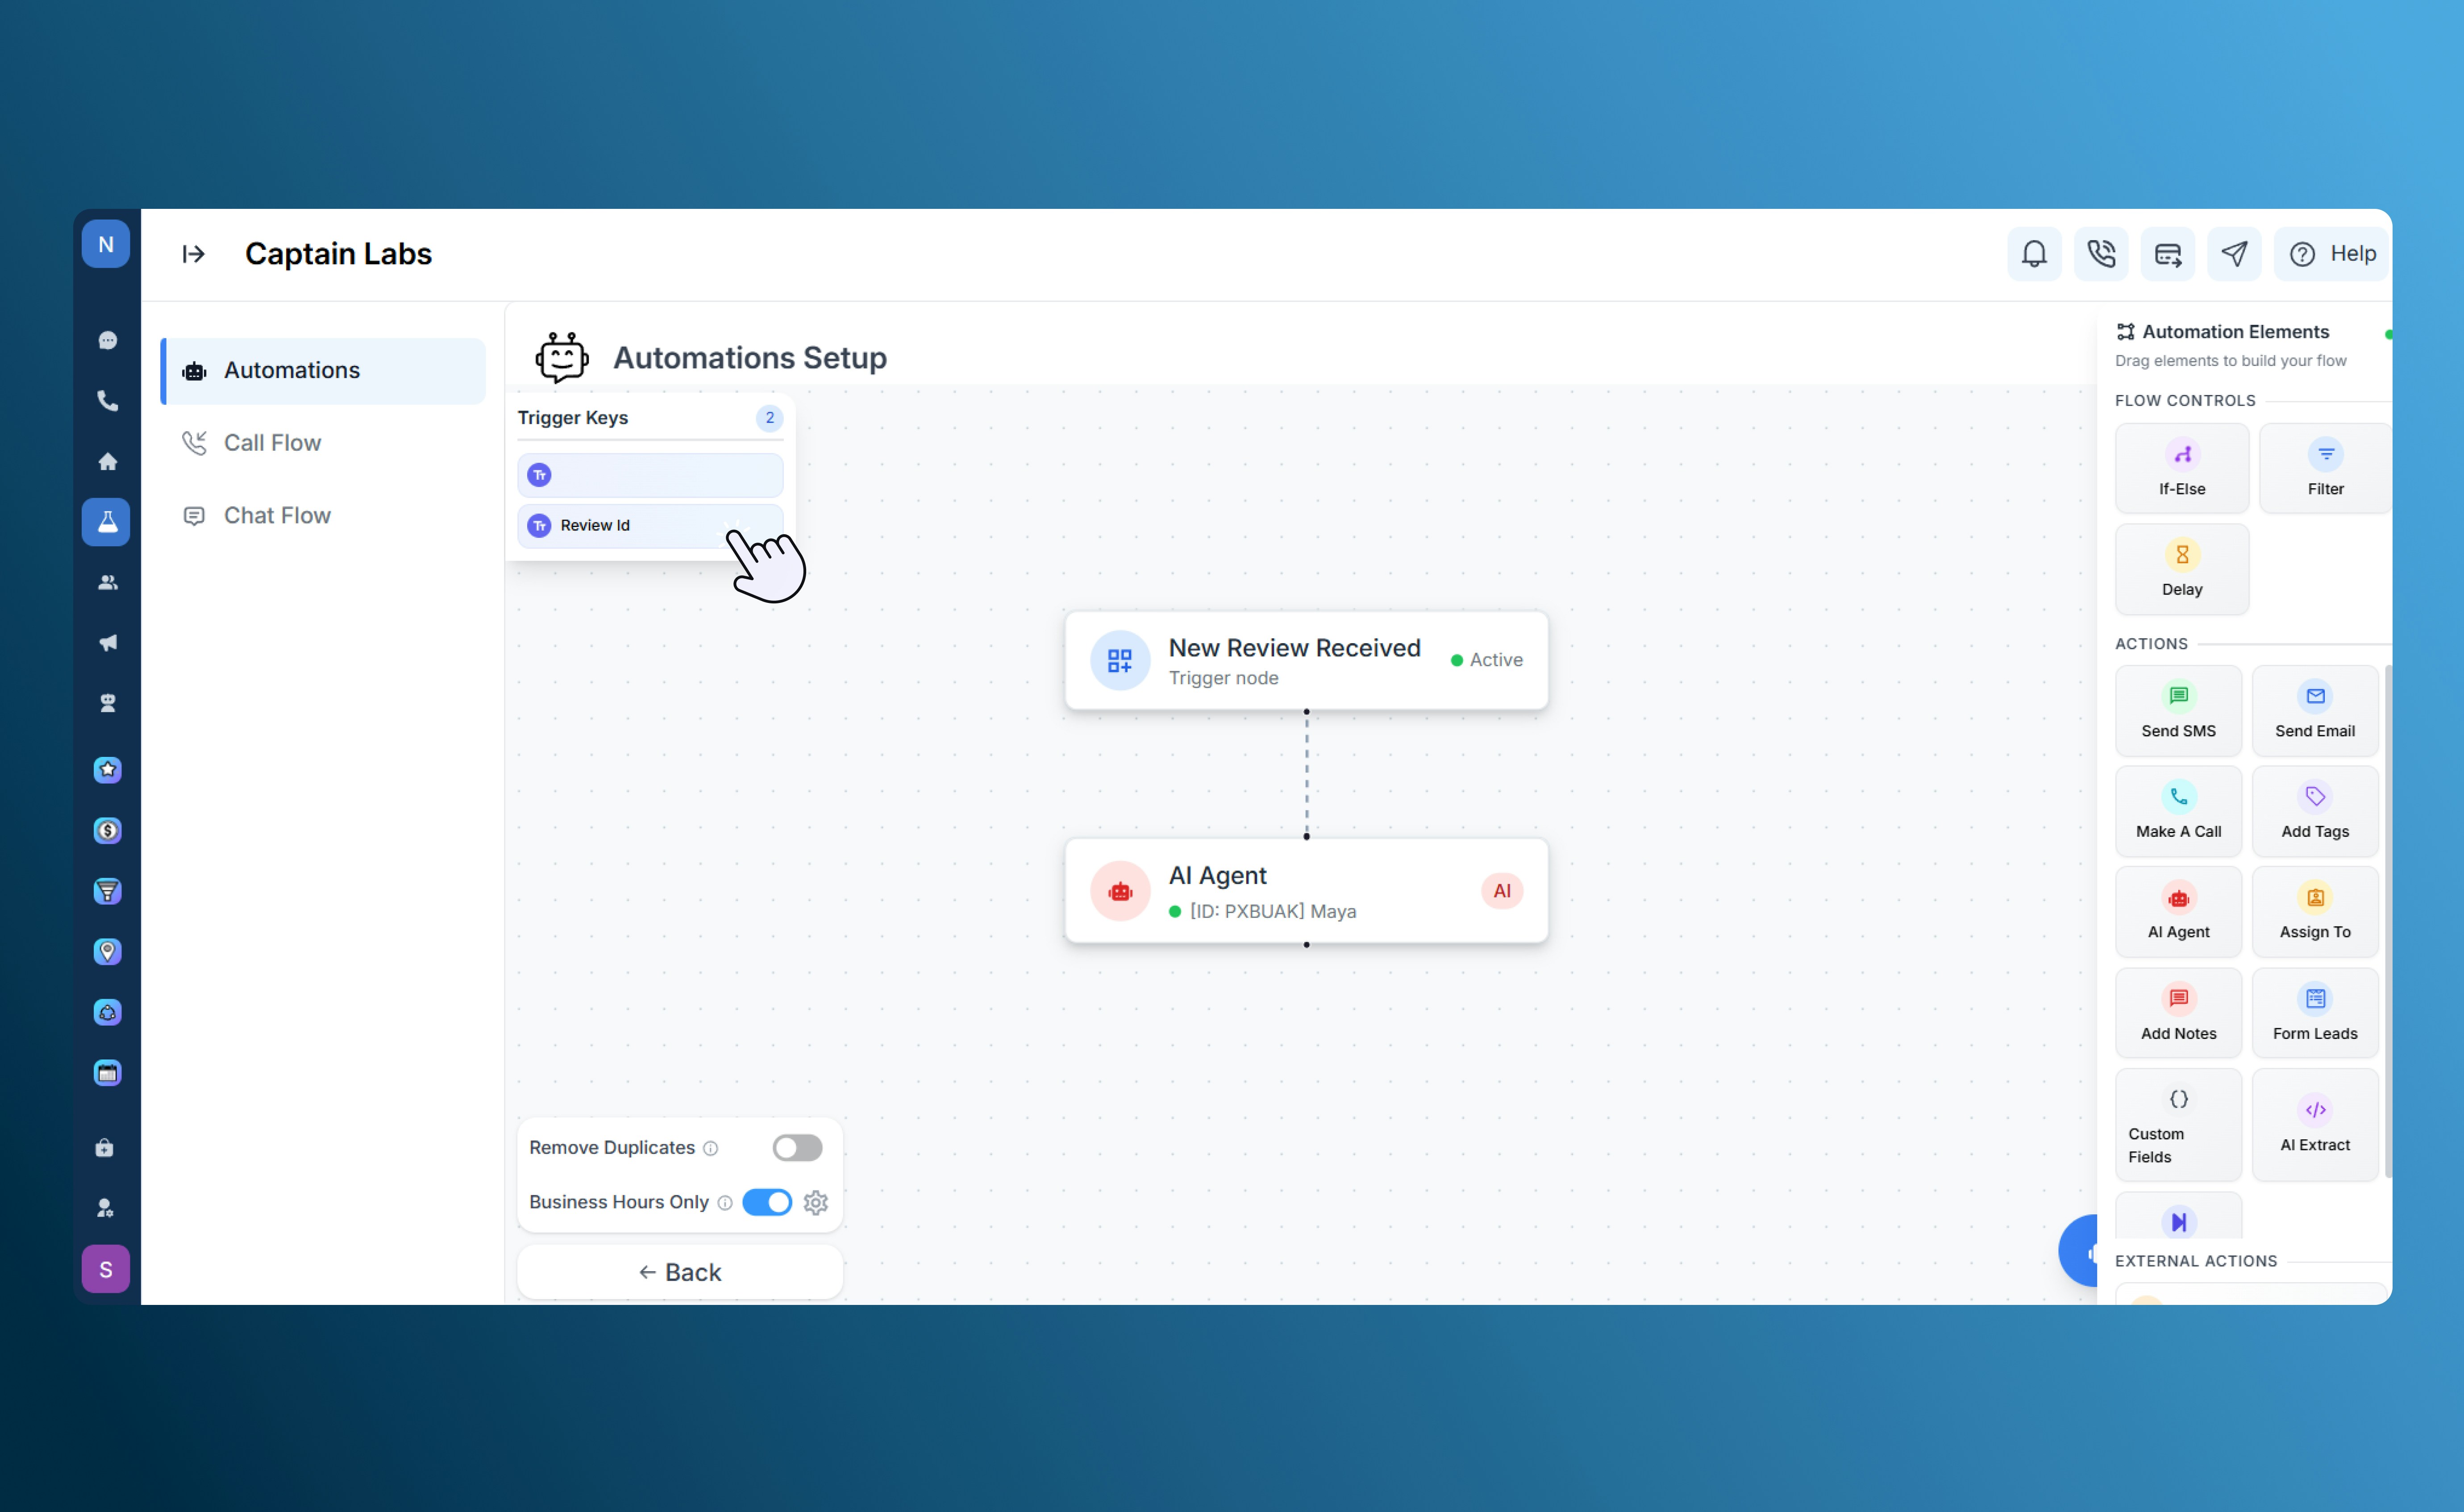
Canvas view with AI Agent element
Assign To
Automatically assign a contact or conversation to a specific user, team, or stage. Use this to route new leads, incoming messages, or support requests to the right person.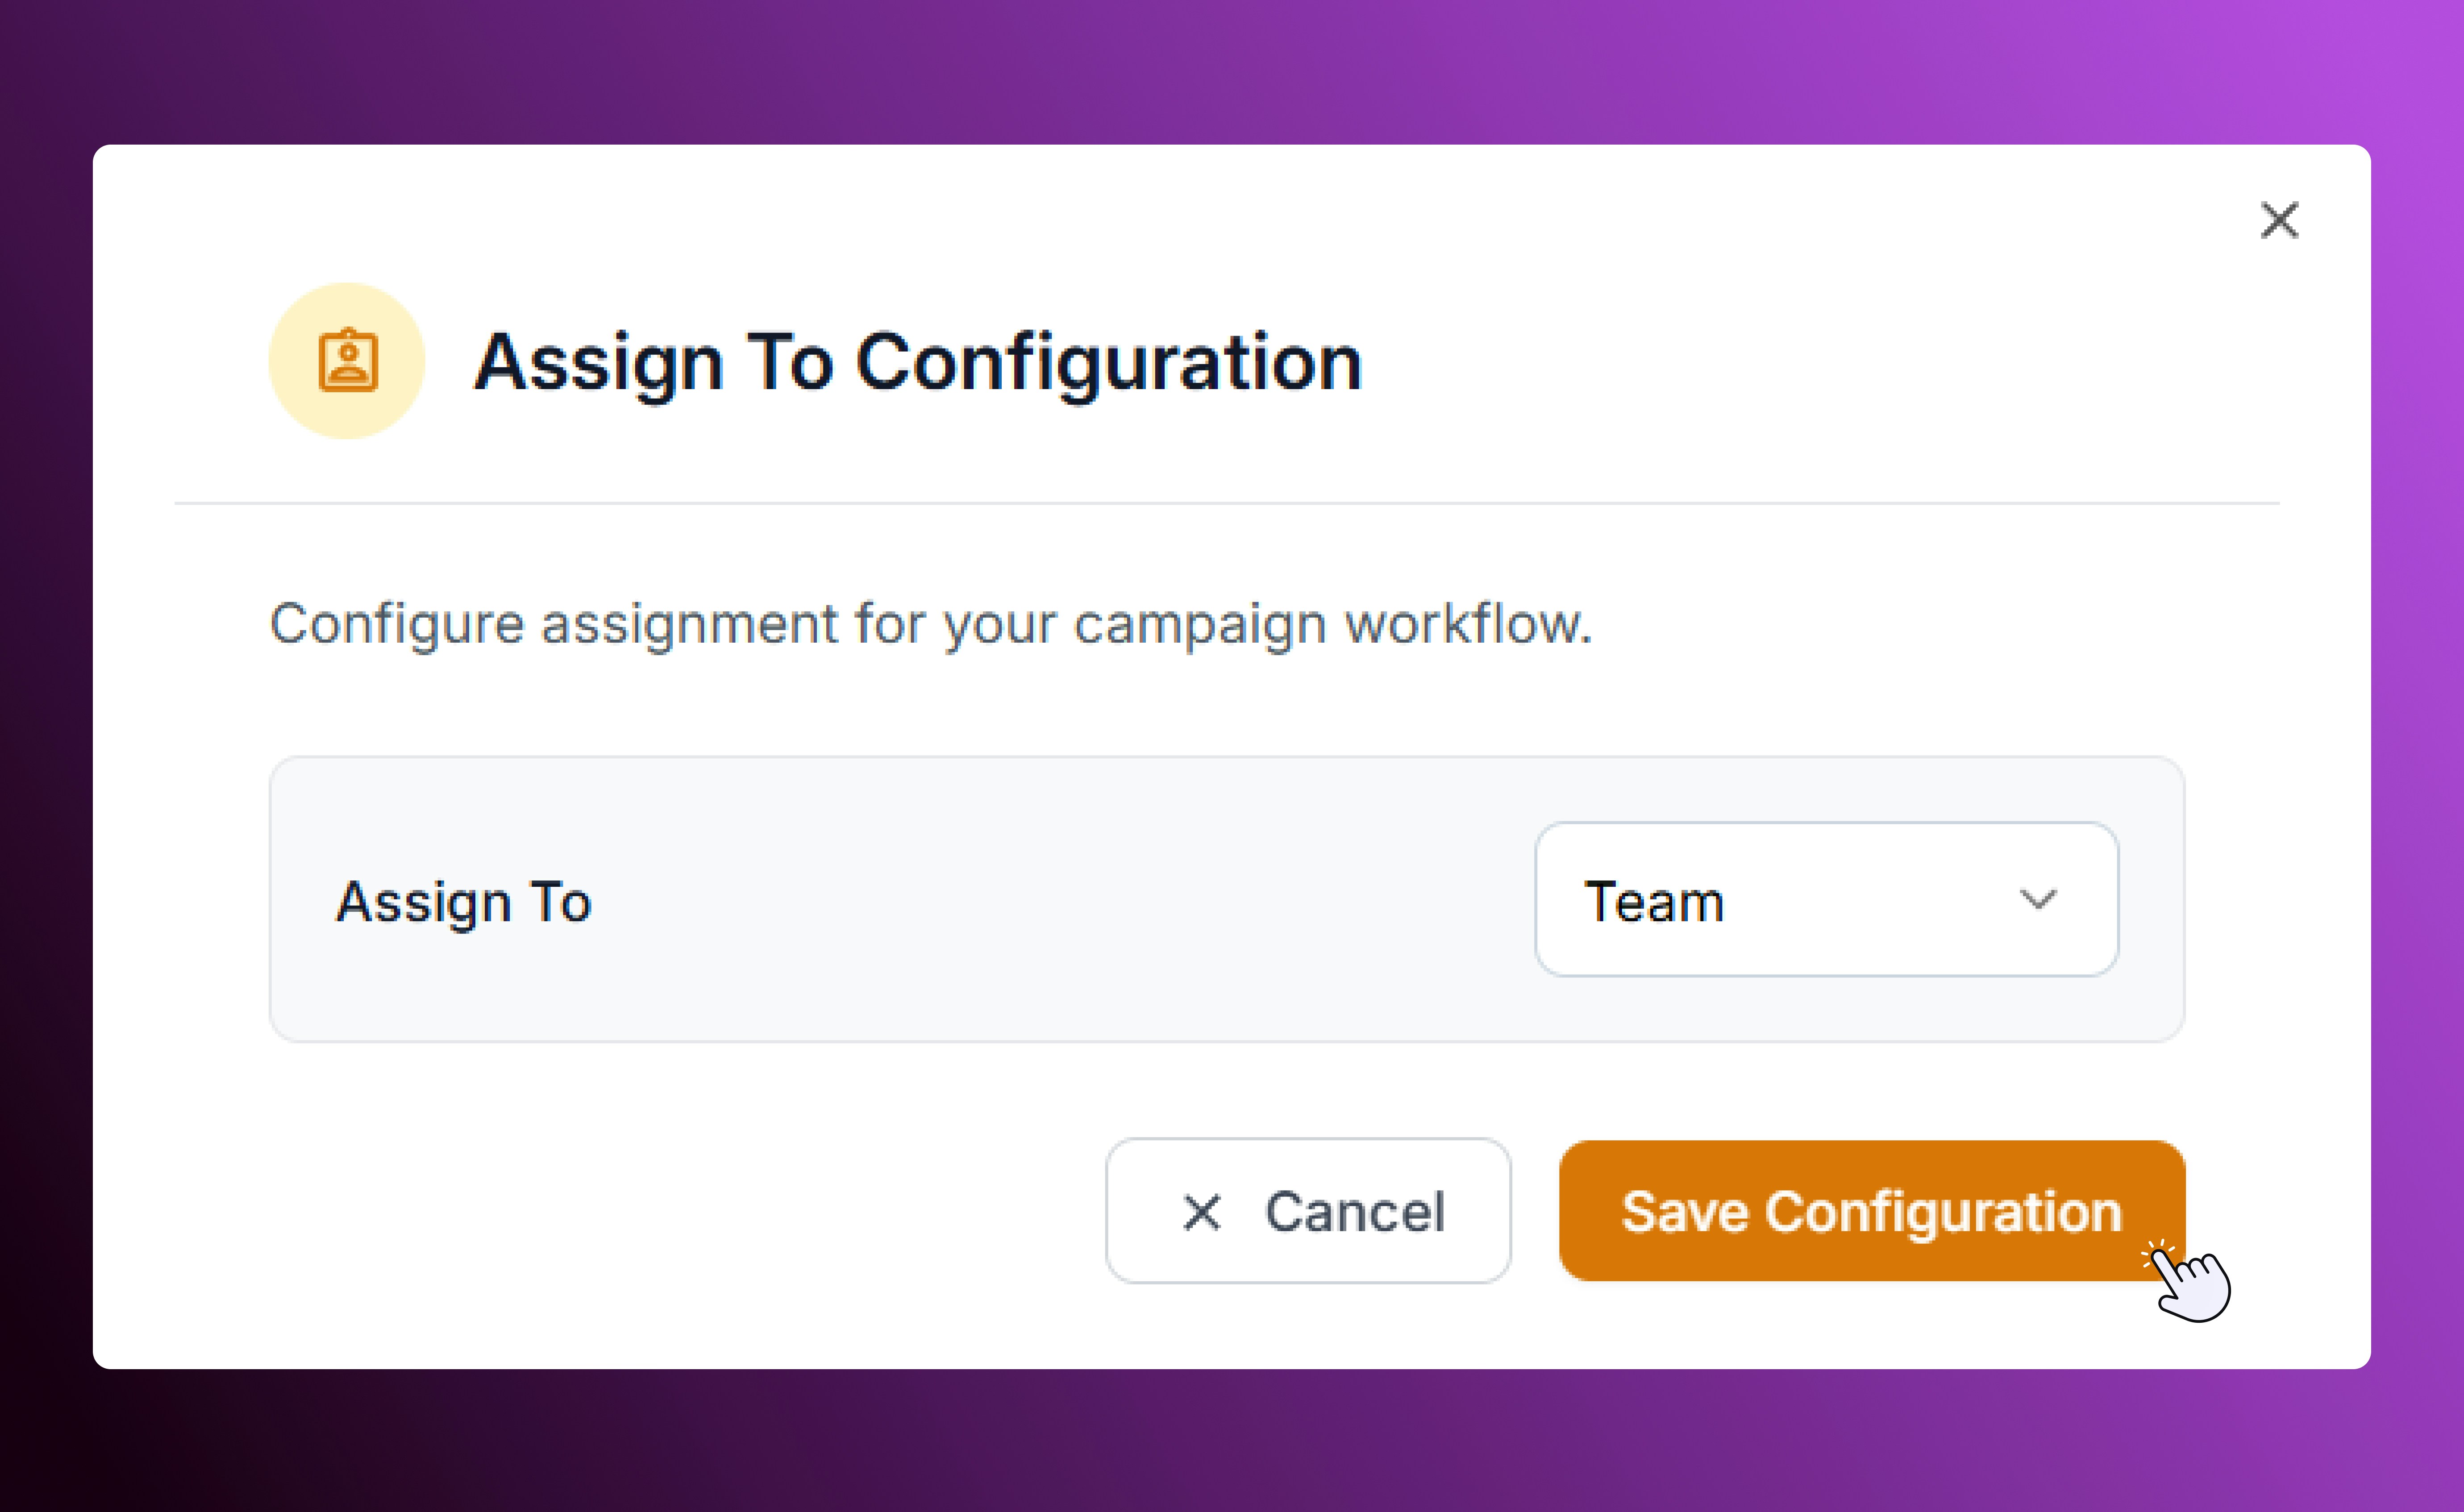
Assign To configuration
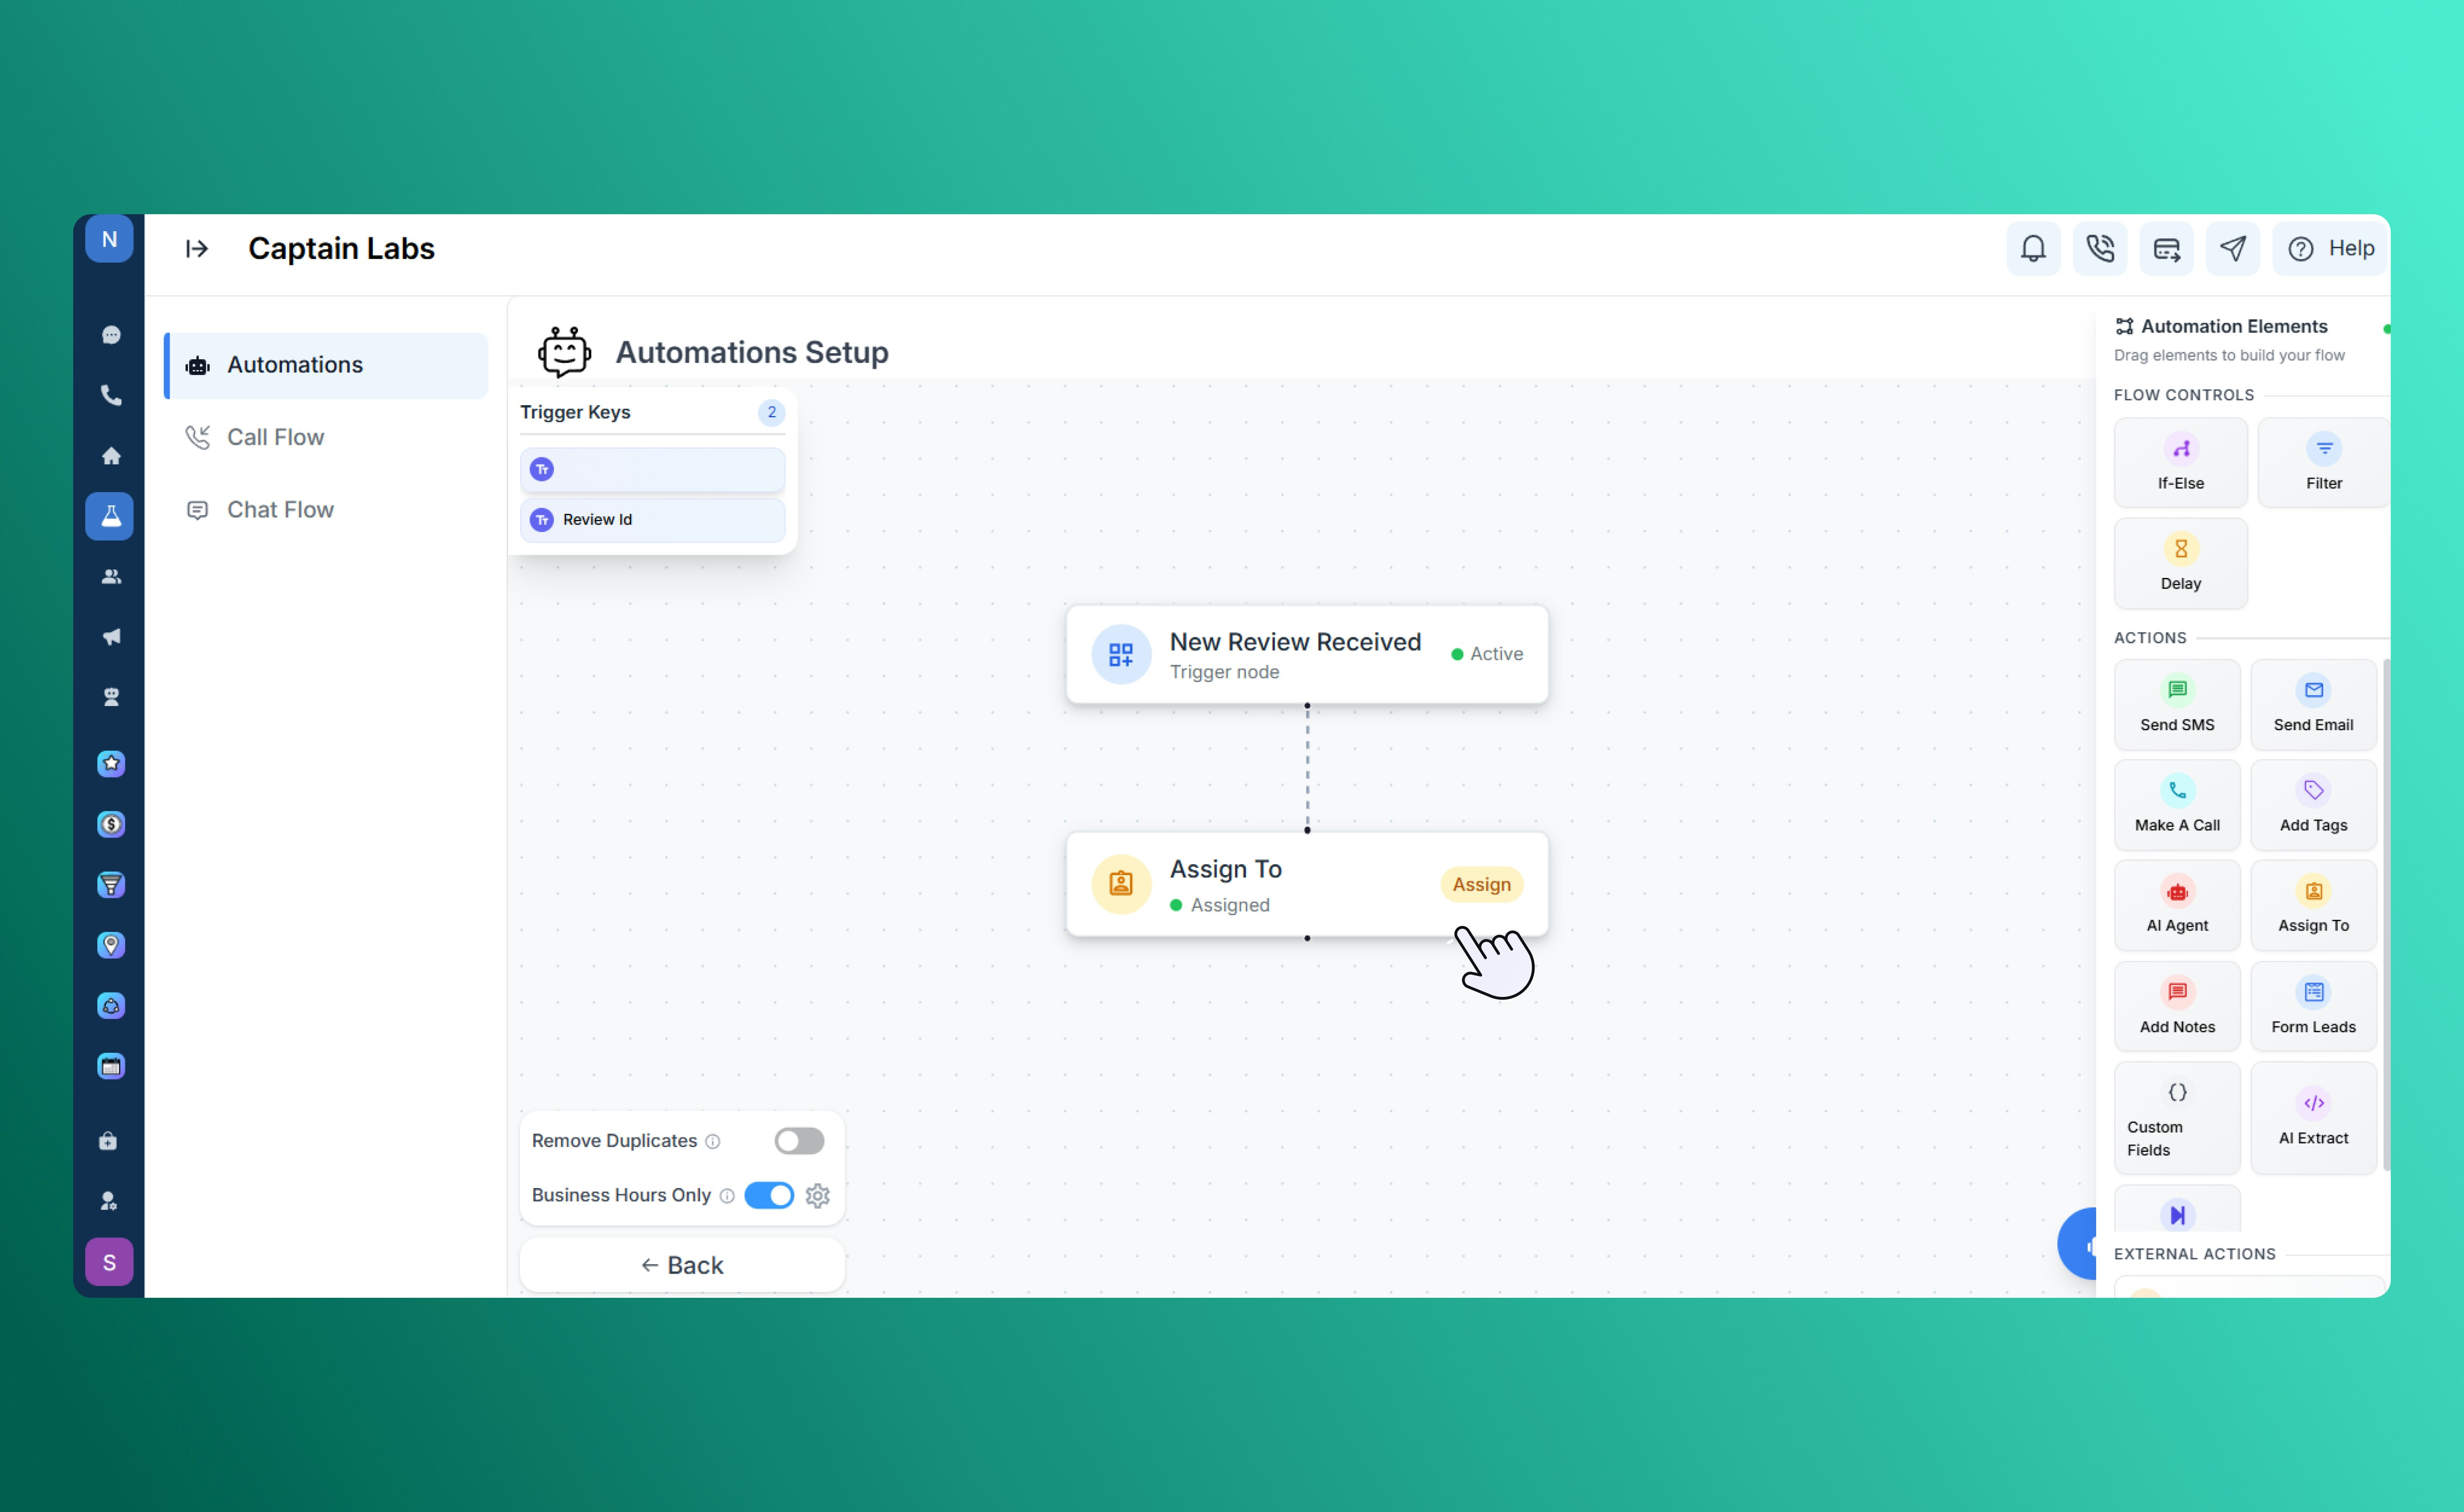
Canvas view with Assign To element
Add Notes
Add an internal note to a contact record for future reference or team visibility. Notes can include details about a conversation, next steps, or lead qualification info.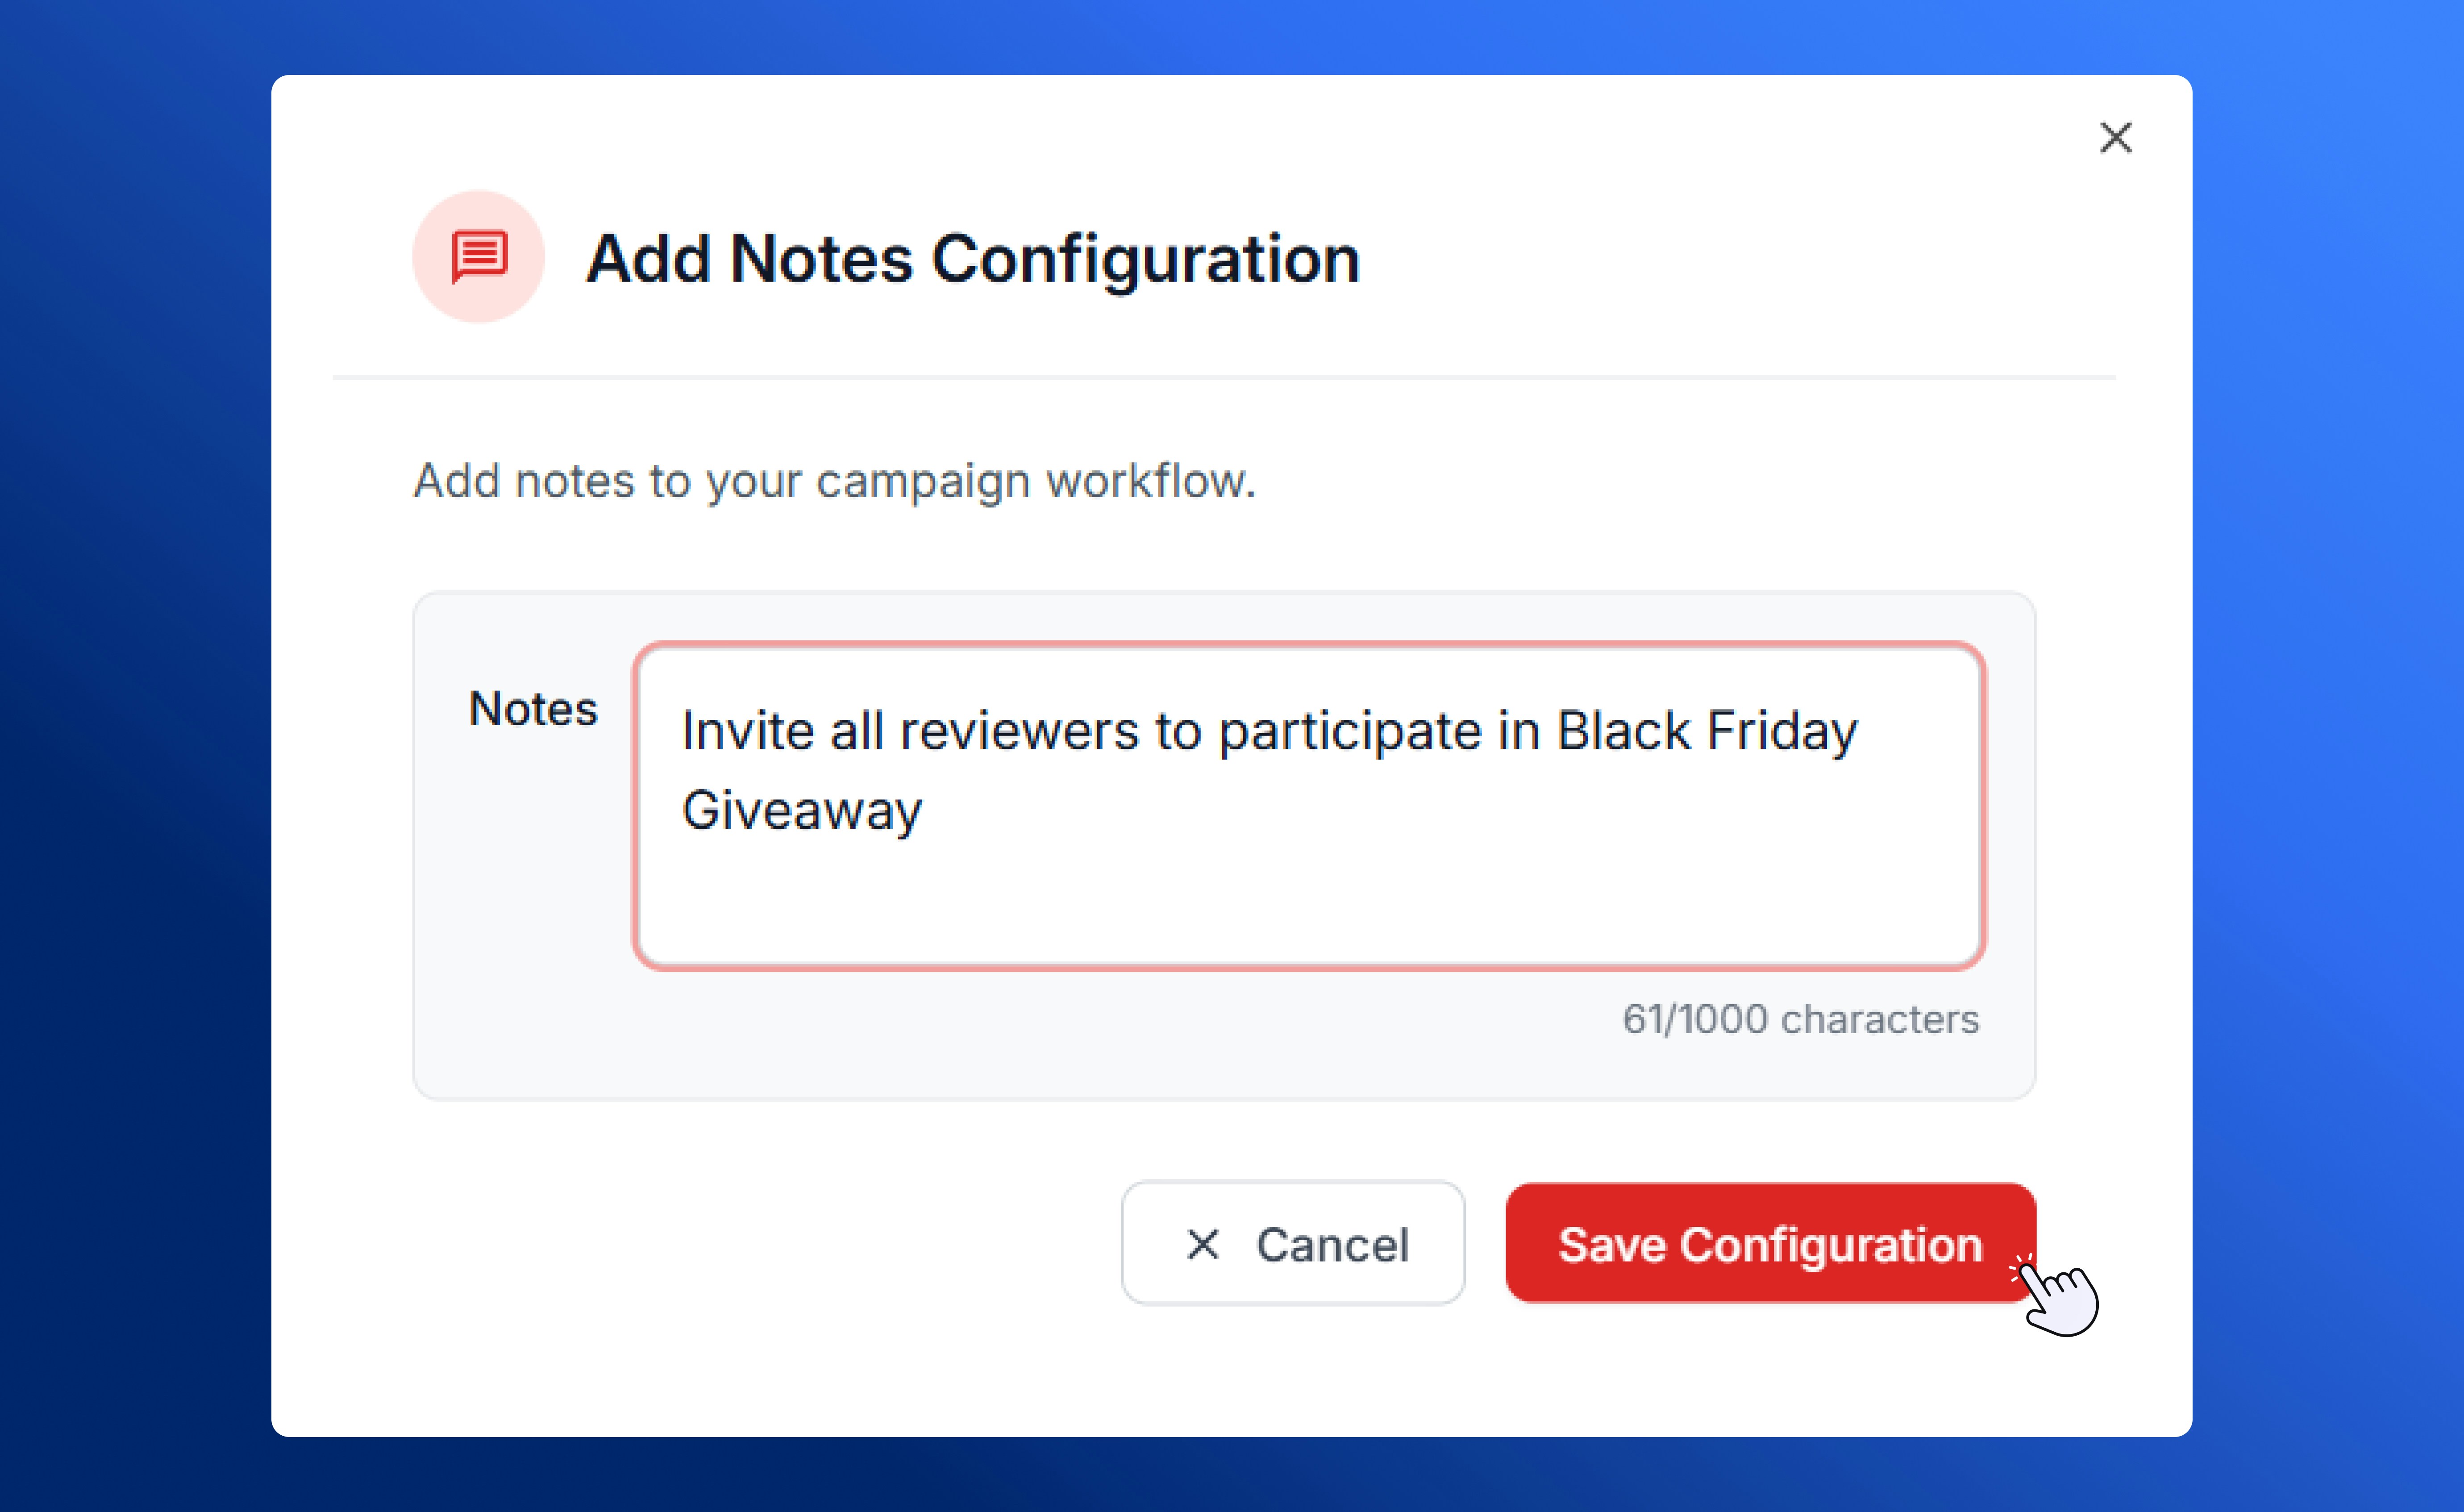
Add Notes configuration
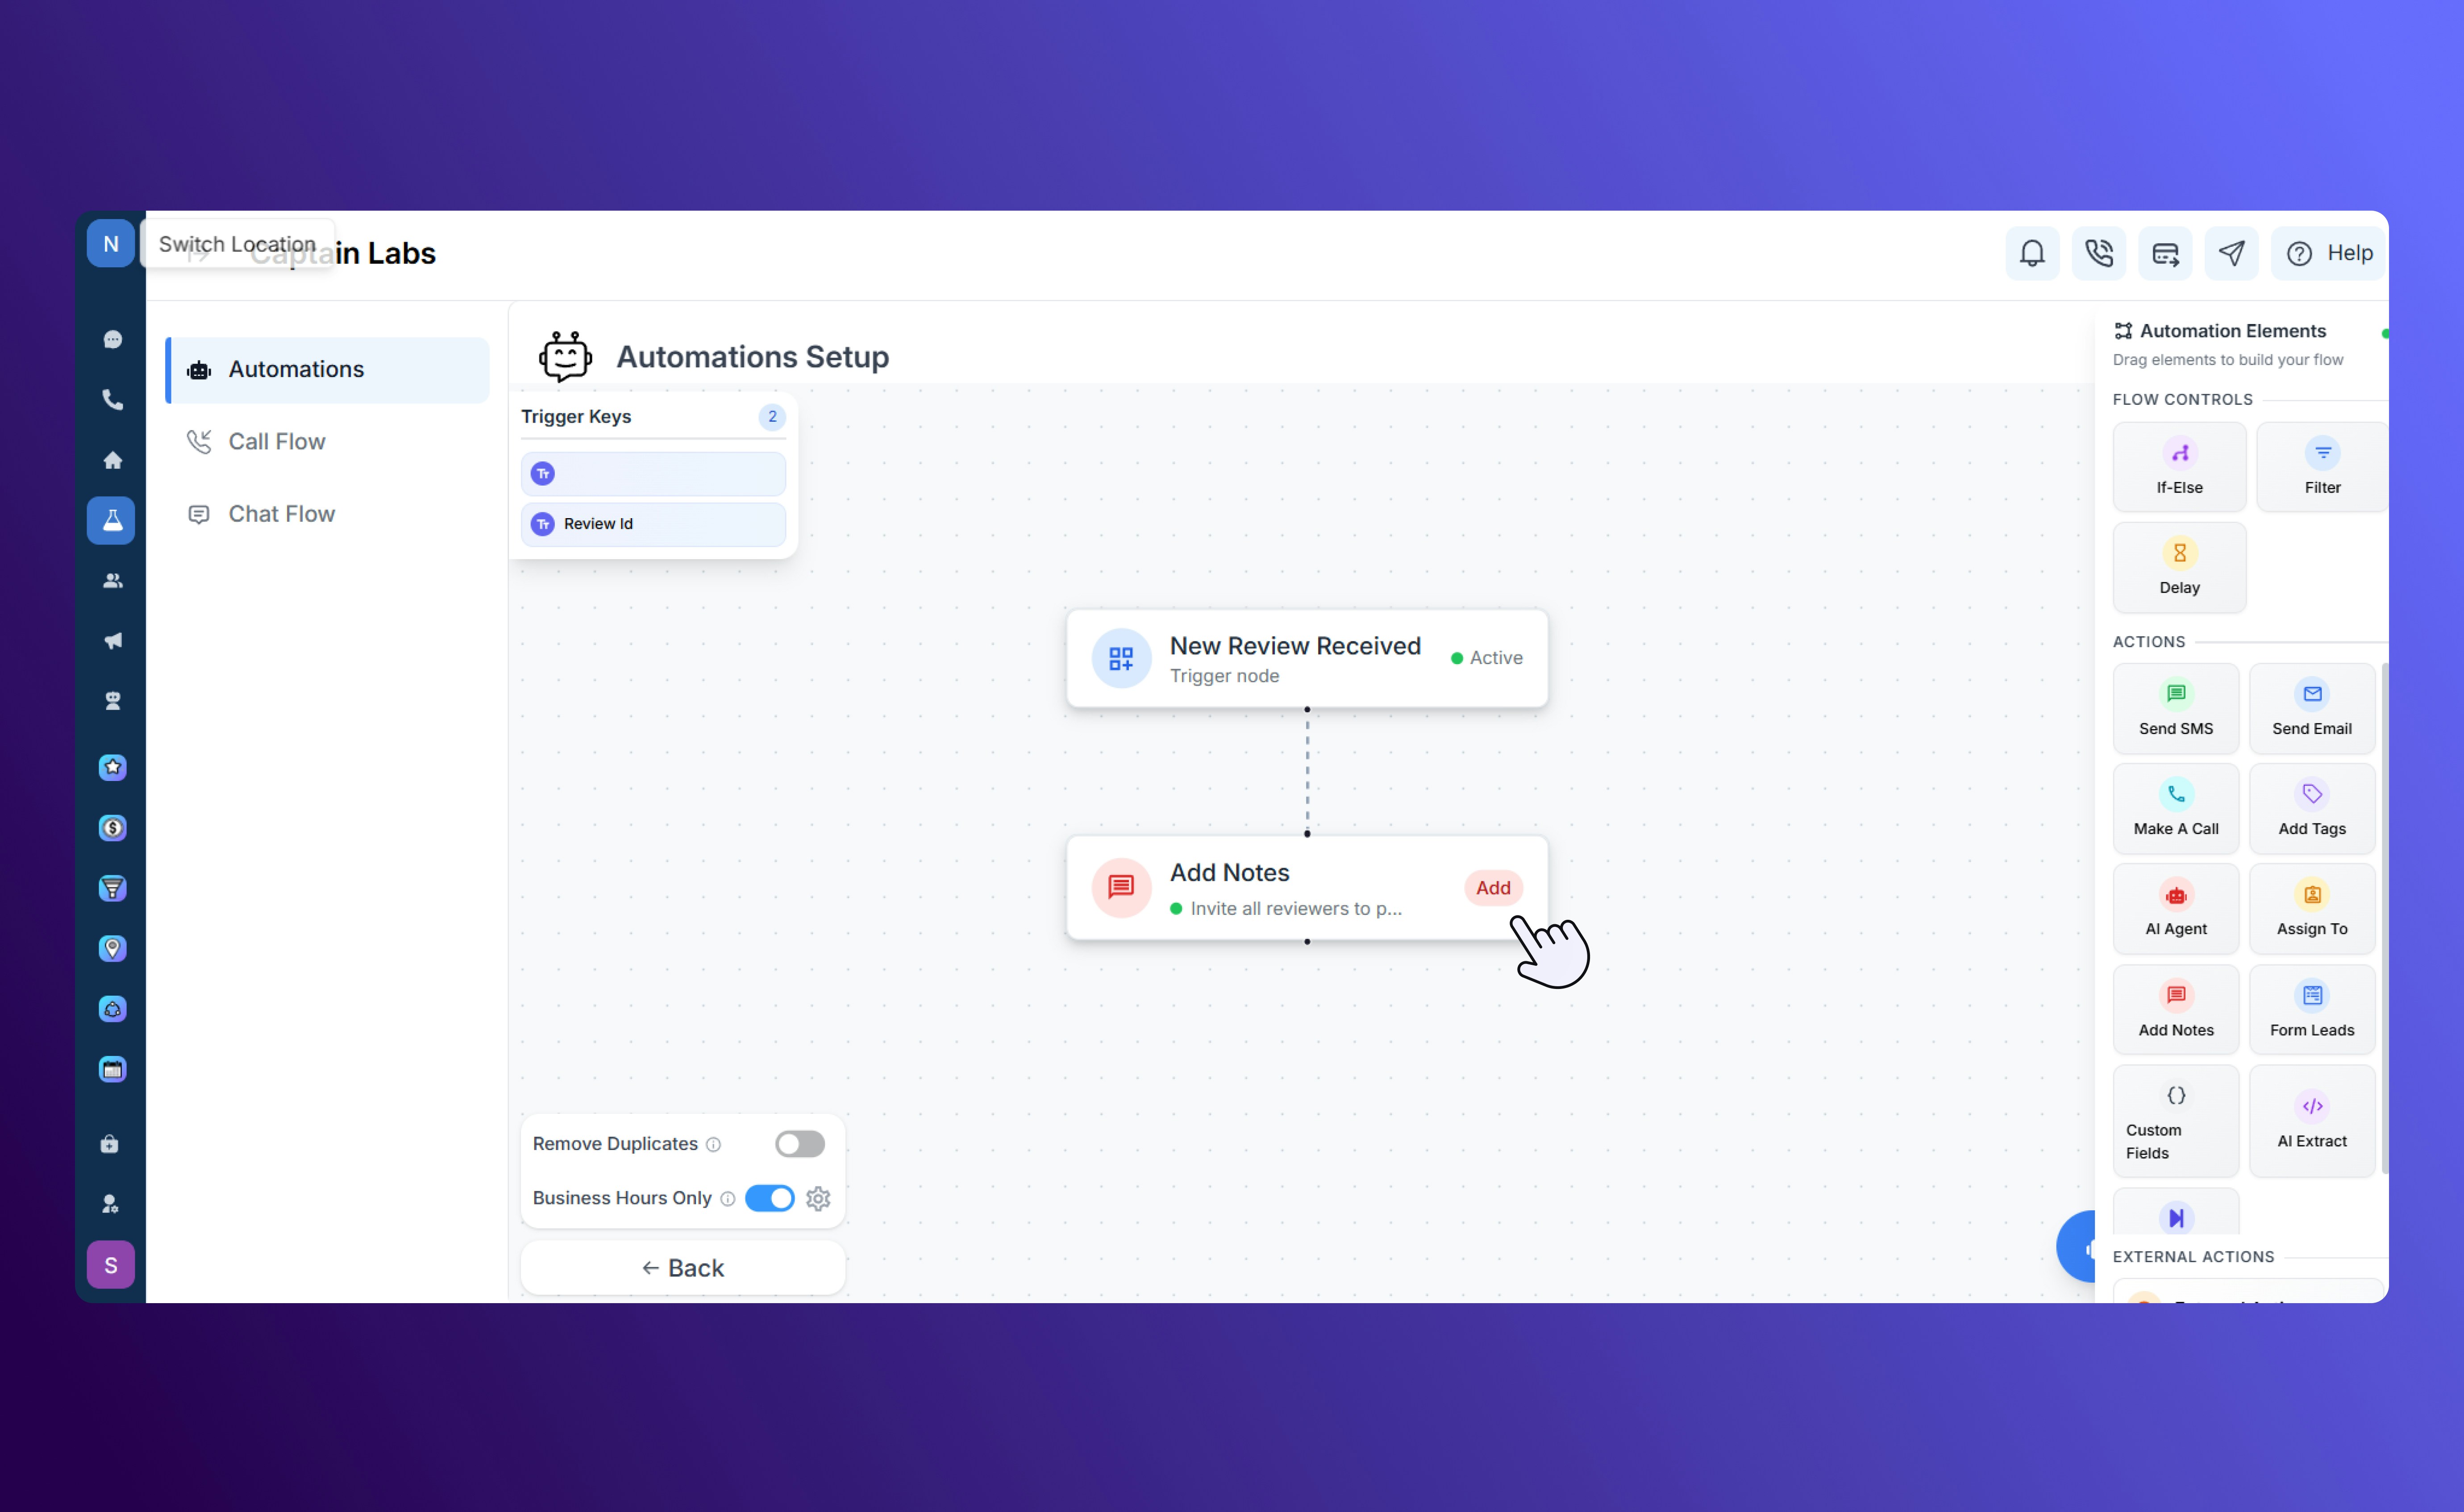
Canvas view with Add Notes element
Form Leads
The Form Leads action creates or updates a contact record using data collected from a form submission. You can configure up to 20 form fields, using either static values or dynamic data pulled from trigger keys.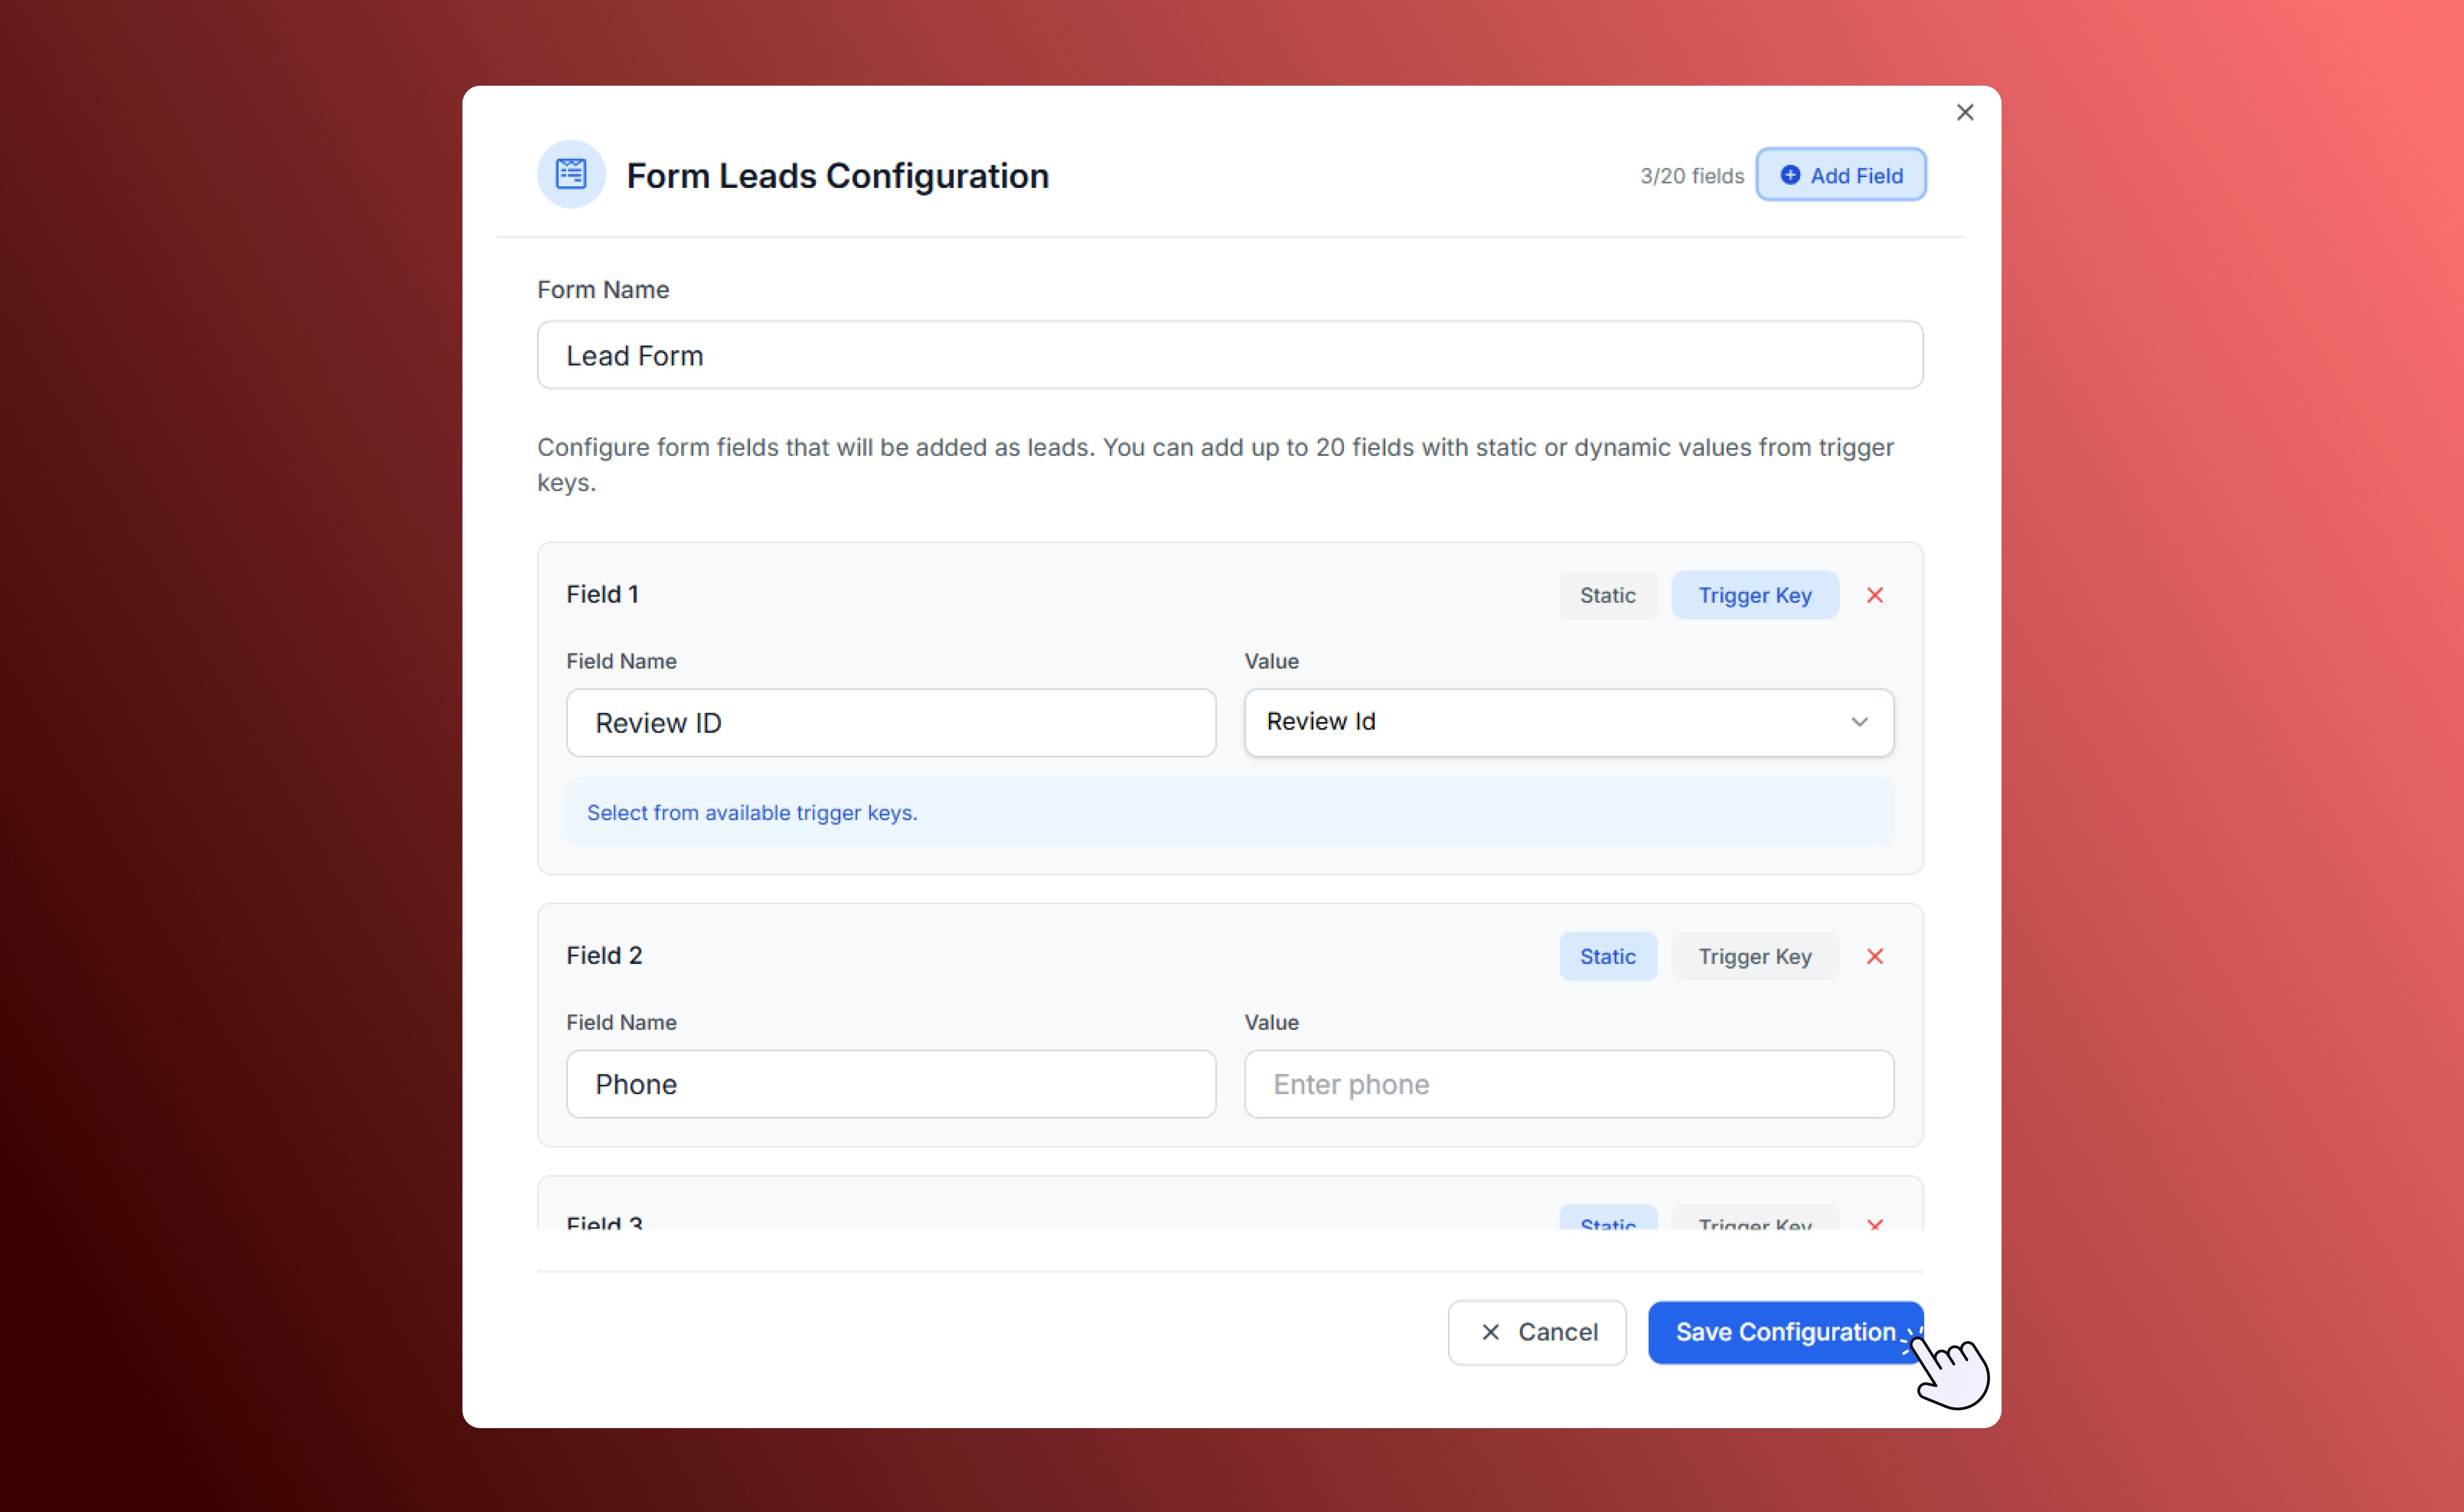
Form Leads configuration
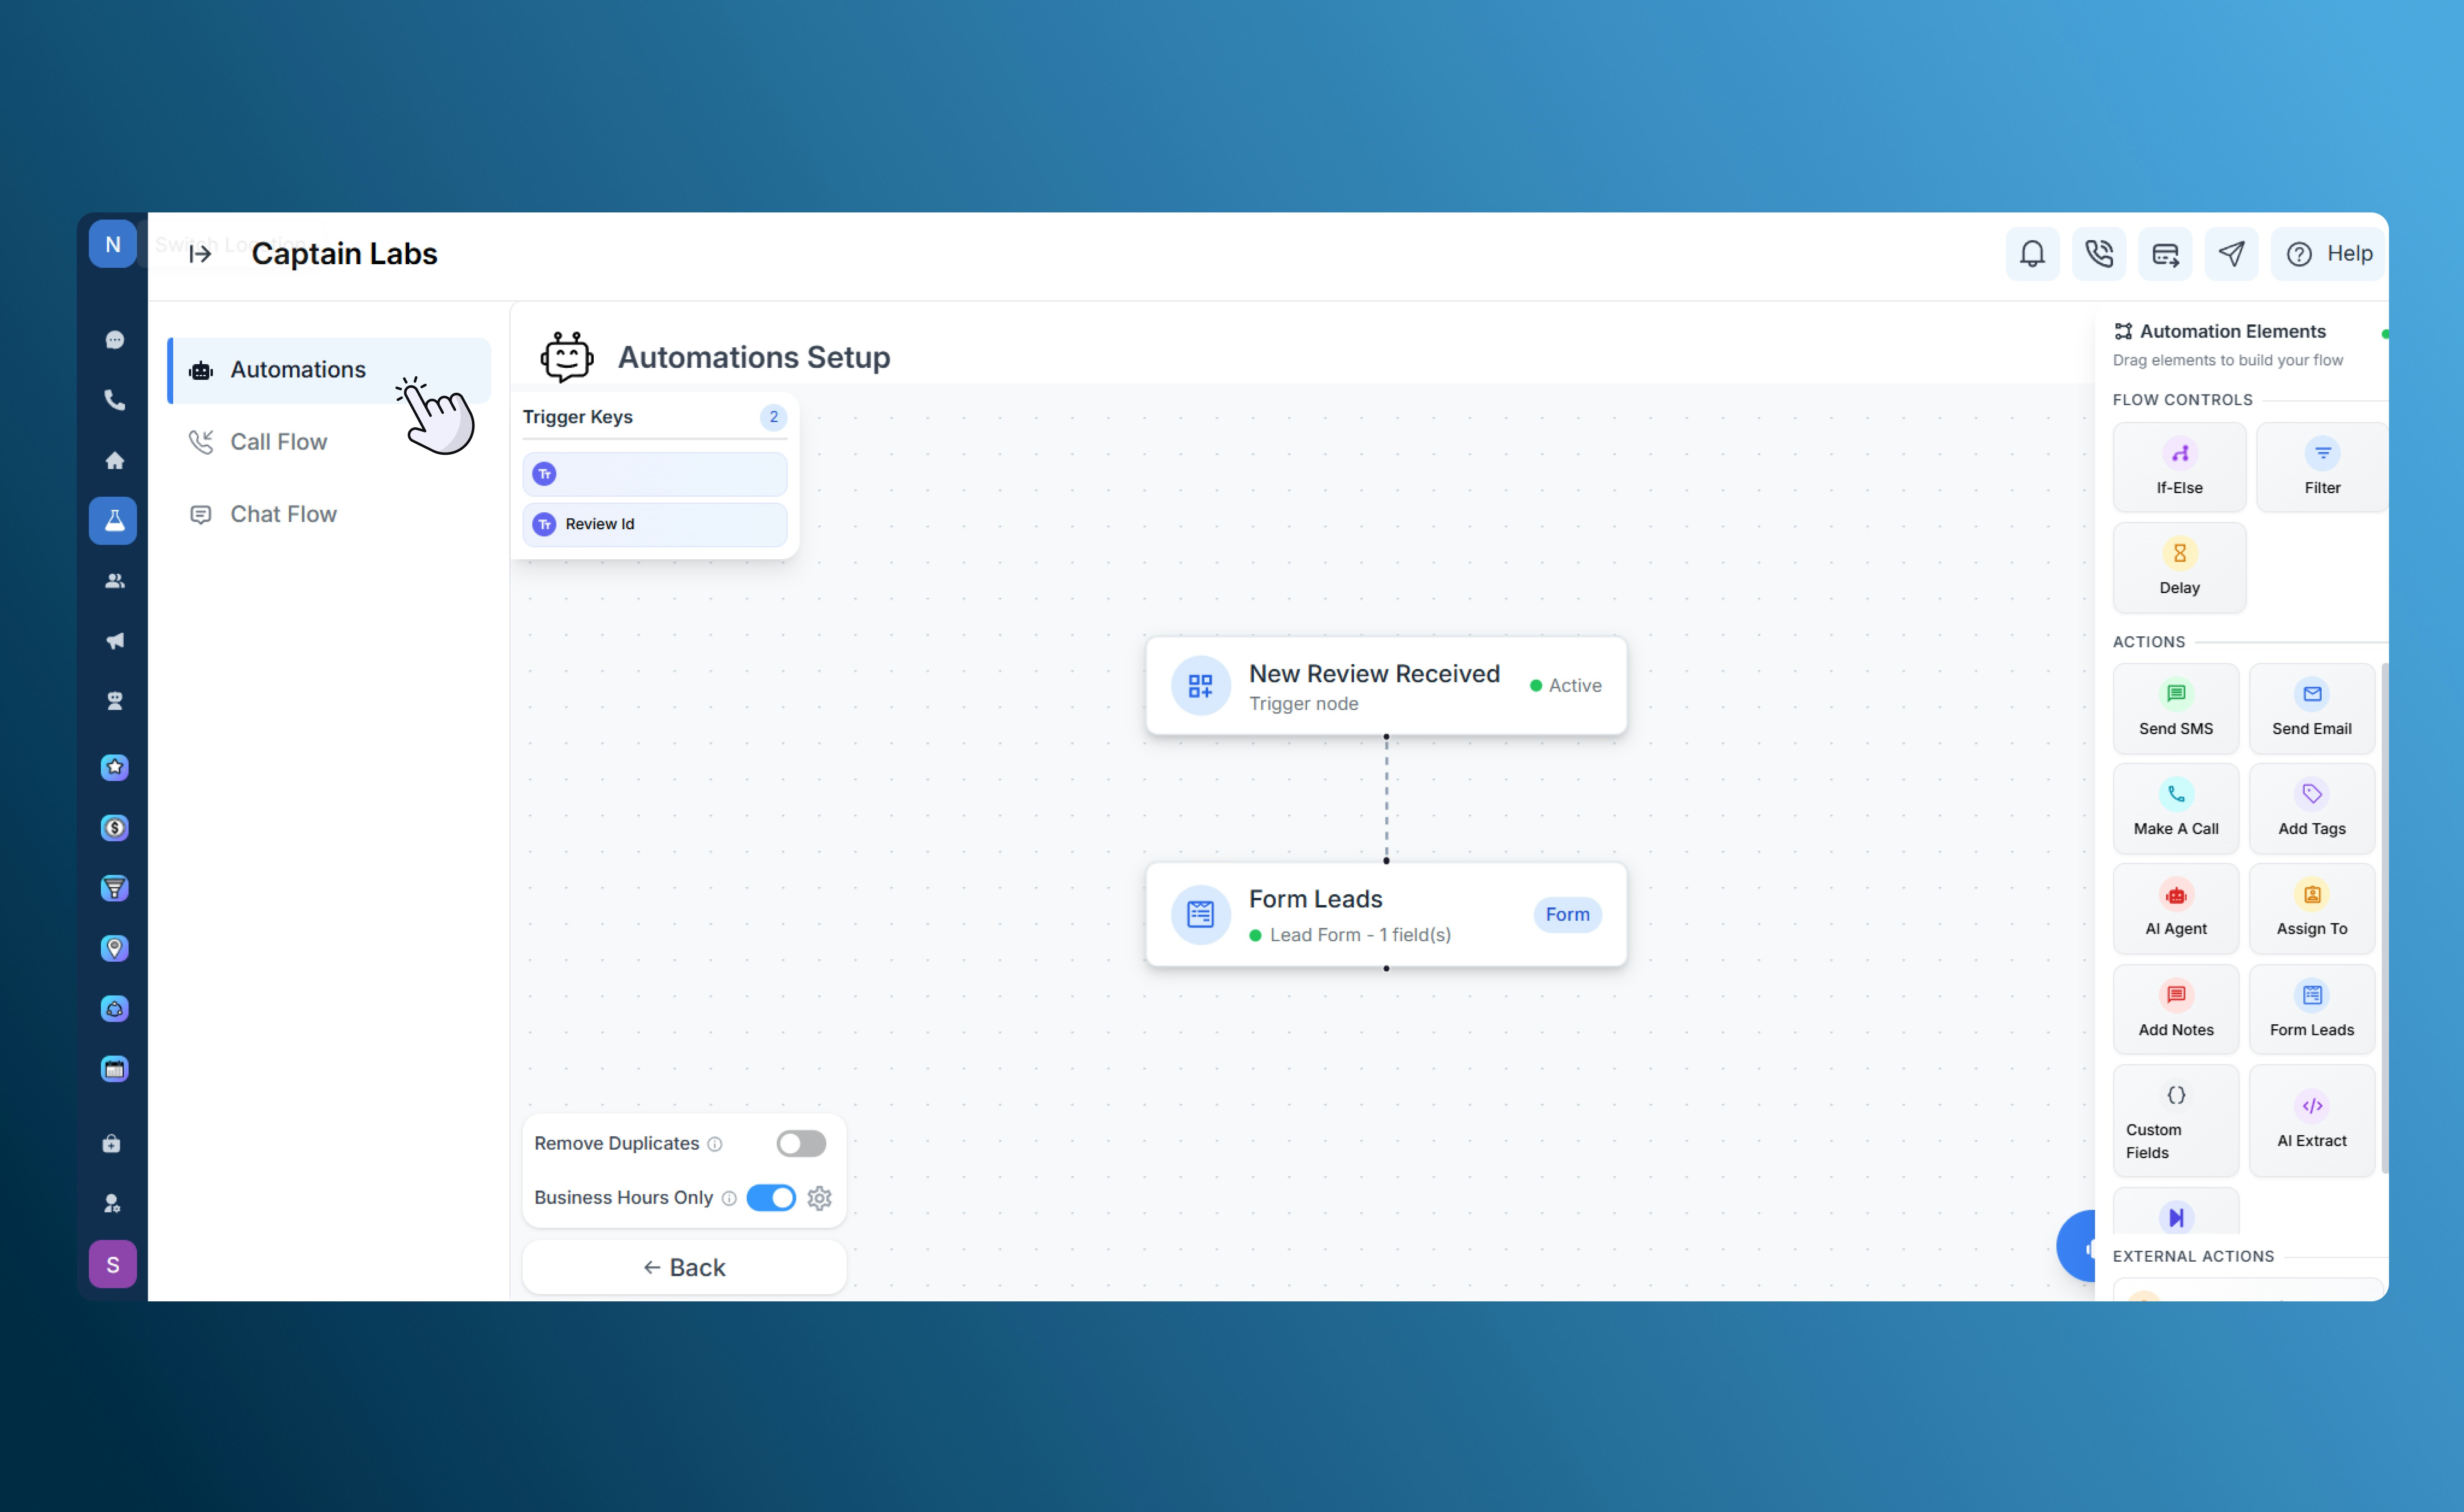
Canvas view with Form Leads element
- Create a new contact when someone fills out a “Book a Demo” form.
- Add a tag or source label automatically (like “Website Form Lead”).
Change Stage
The Change Stage action updates the contact’s current stage in your CRM pipeline. Use it to move leads from “Prospect” to “Customer” after a purchase, or from “Lead” to “Inactive” if you haven’t heard from them for a while. This ensures your stages always reflect the most recent progress in your customer journey.Custom Fields
The Custom Fields action allows you to set or update data stored in a contact’s custom fields. You can map these to dynamic values from previous automation steps, form inputs, or trigger data.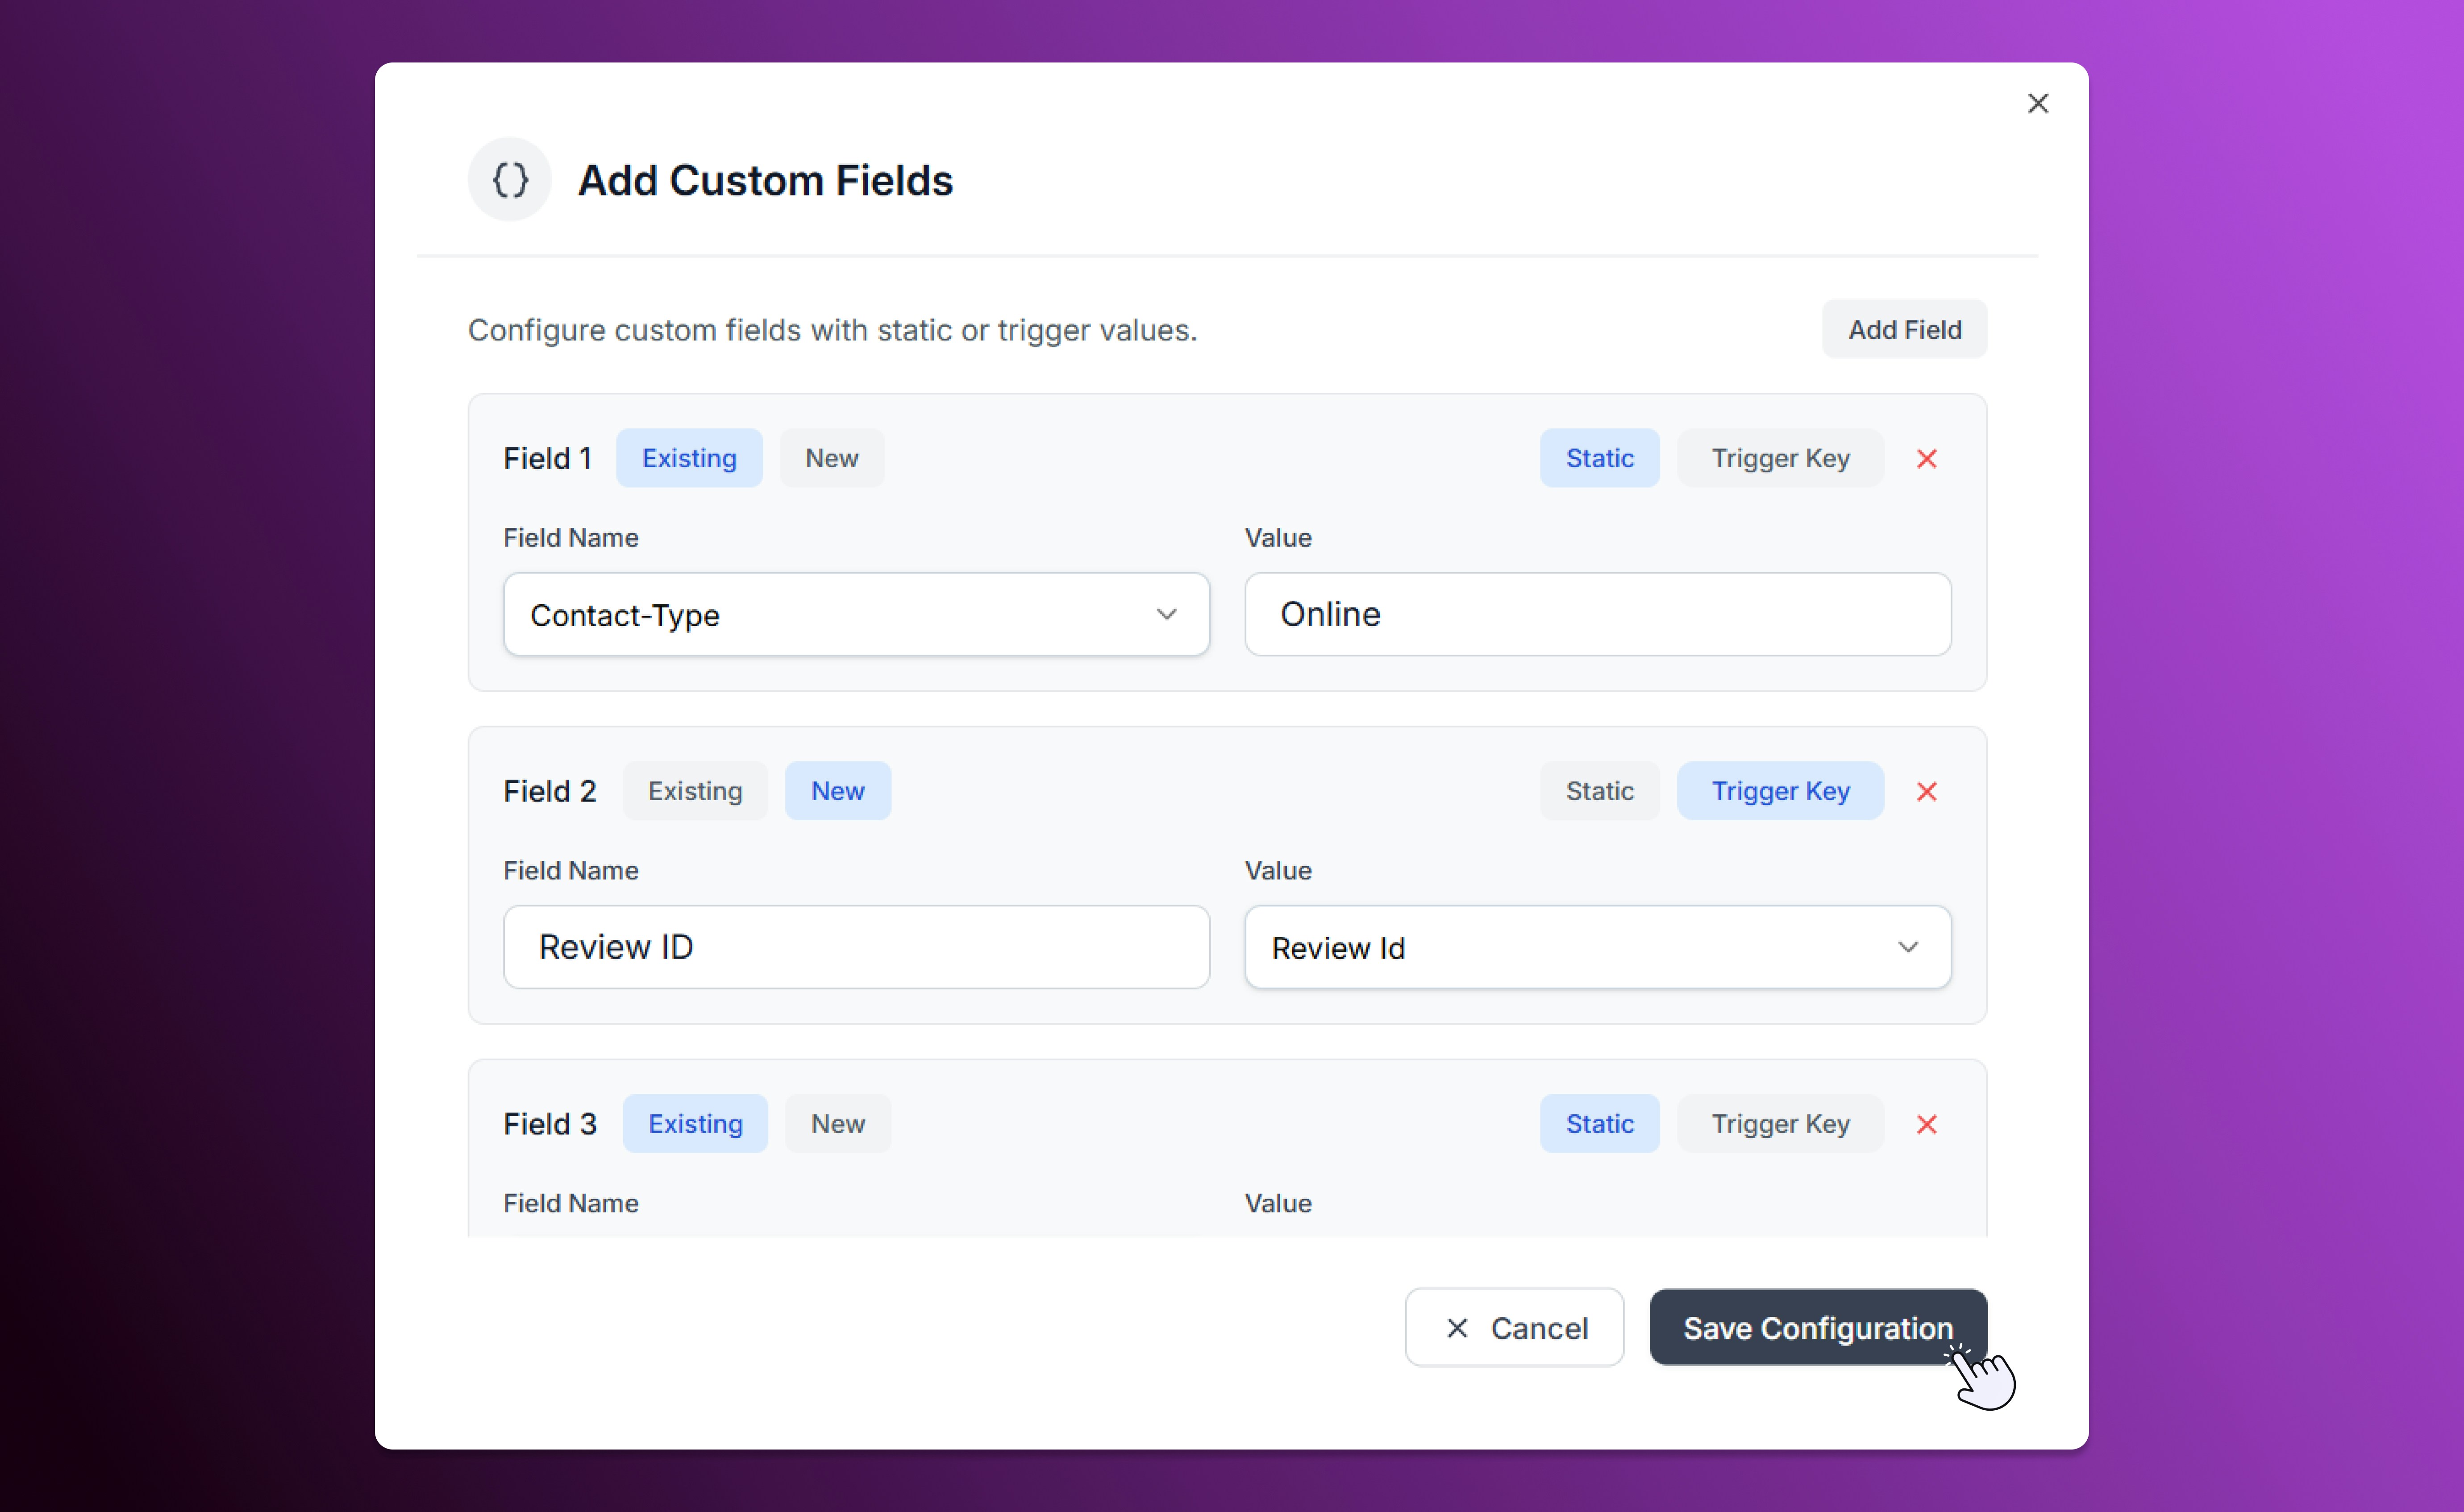
Custom Fields configuration
AI Extract
The AI Extract action uses artificial intelligence to identify, extract, and structure data from previous steps in your workflow. This helps convert unstructured text — such as a message, transcript, or note — into organized fields or tags.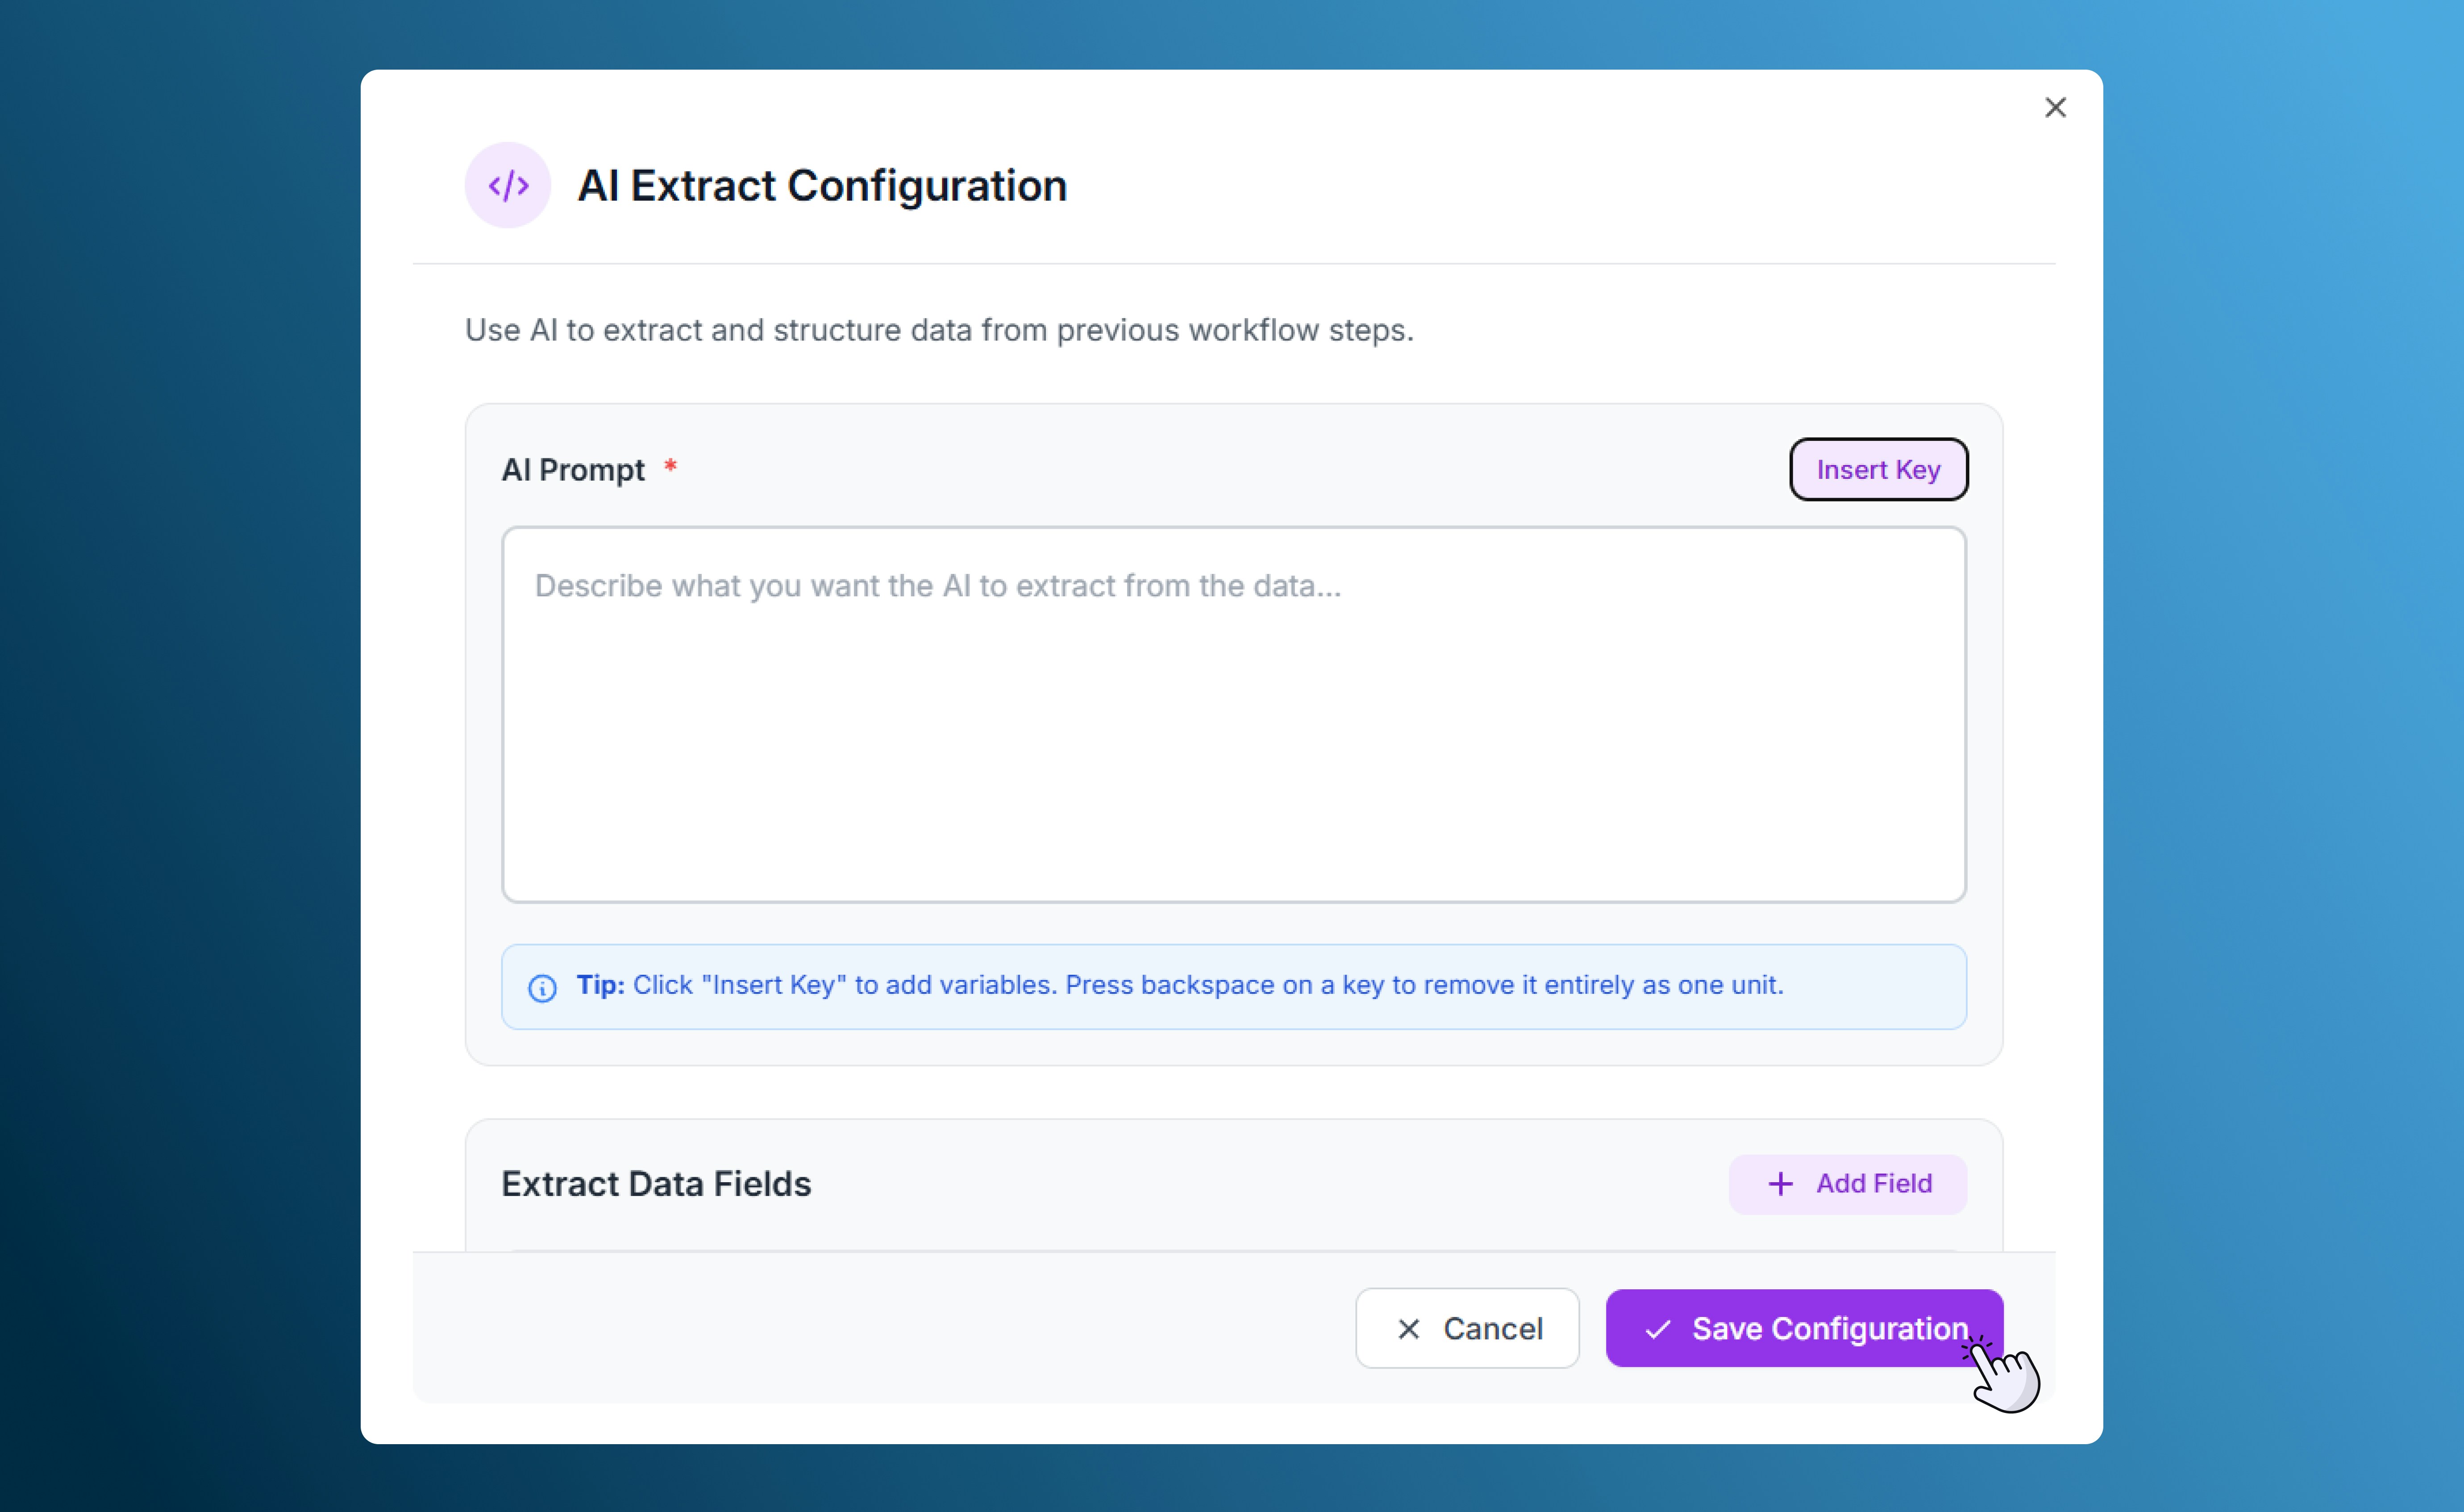
AI Extract configuration
Best Practices
- Start with a clear goal. Plan what your automation should achieve before adding steps.
- Keep flows simple. Limit unnecessary branches or delays to keep workflows efficient.
- Use consistent naming. Label all actions and controls clearly to make maintenance easier.
- Test before activating. Run test data through the flow to ensure every action works correctly.
- Review regularly. Update messages, conditions, and timing as your business processes evolve.